Webflow offers multiple features to customize its CMS. By creating different collections and personalizing each field, you can develop a website that is easily scalable. Webflow’s CMS allows you to easily add content to your website by creating pages or adding content to specific sections in just a few minutes.
One of the most popular and definitely the most flexible fields is Rich Text. Rich text is a text format that allows you to add additional features such as formatting, hyperlinks, and images, making the content visually appealing and interactive.
However, currently, Webflow's Rich Text has some editing limitations. In this article, we will explore how to overcome these limitations with a no-code Webflow extension (or nearly).
Customizing Your Webflow Rich Text with Sneaps
Sneaps is the extension for Webflow that revolutionizes Rich Text customization.
With Sneaps, you can unleash your creativity by easily adding rich content to your web pages:
- Customize your text styles
- Insert tables
- Create multi-level lists
- etc.
Sneaps provides you with an enriched design experience, allowing you to create engaging designs and enhance the visual appeal of your content in Webflow.
How to Use Sneaps in Webflow?
1. Download the Webflow Extension
First, you will need to download/install the Sneaps extension on your web browser.
2. Open Your Project in the Webflow Designer
Once the extension is installed, you can go to your Webflow project.
It is important to note that the extension only works in the Webflow Designer and not in the editor mode.
3. Create Additional Styles via the Extension in the CMS
Once you are in your project, you can navigate to your CMS, to one of your collections, and more specifically to the item where you want more formatting options for the Rich Text.
When you reach your Rich Text field, you will see that a new button has appeared above. When you click this "Add rich content" button, a new rich content editor will appear.
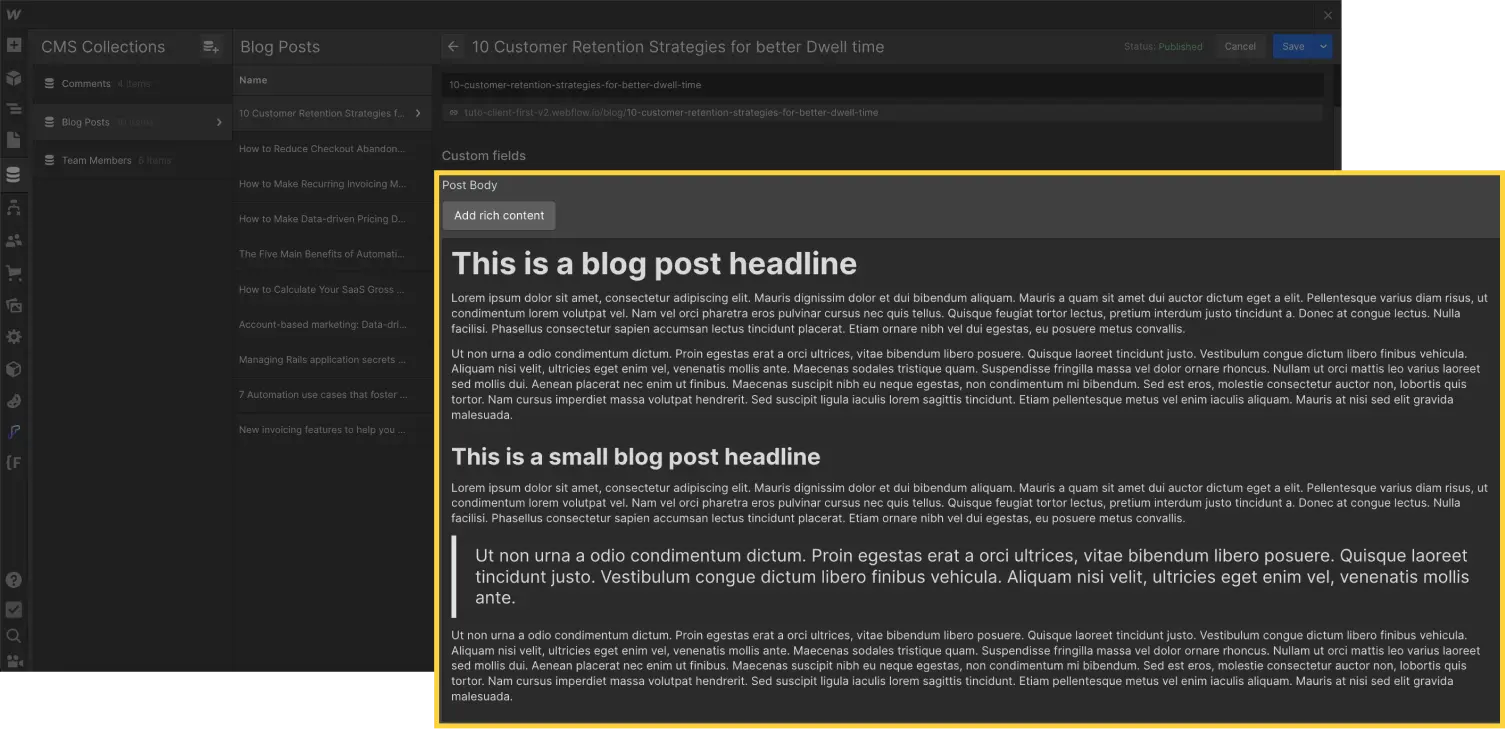
In this new editor, you have significantly more features (as mentioned earlier) than in Webflow. You can simply customize your content as you wish (for example, by adding a table, changing text colors, sizes, etc.).
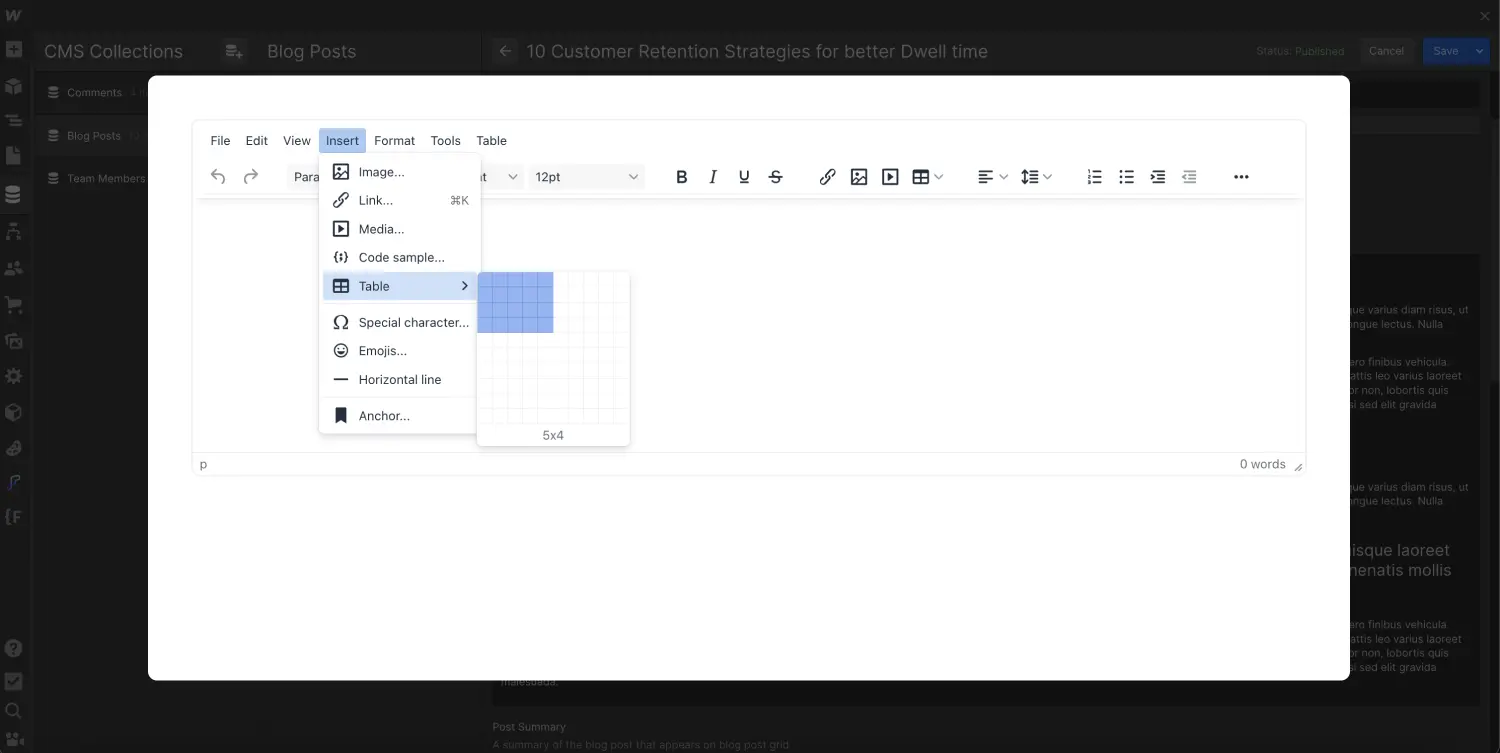
4. Copy the Source Code and Paste it into an Embed Rich Text
Once you finish customizing your content, it will not directly appear in your Webflow field. You will need to perform a small operation to insert it into your field.
You will need to open the "Tools" tab, then inside, click on "Source code". Afterwards, you need to copy all the content (ctrl or cmd + a to select all, and then ctrl or cmd + c to copy).
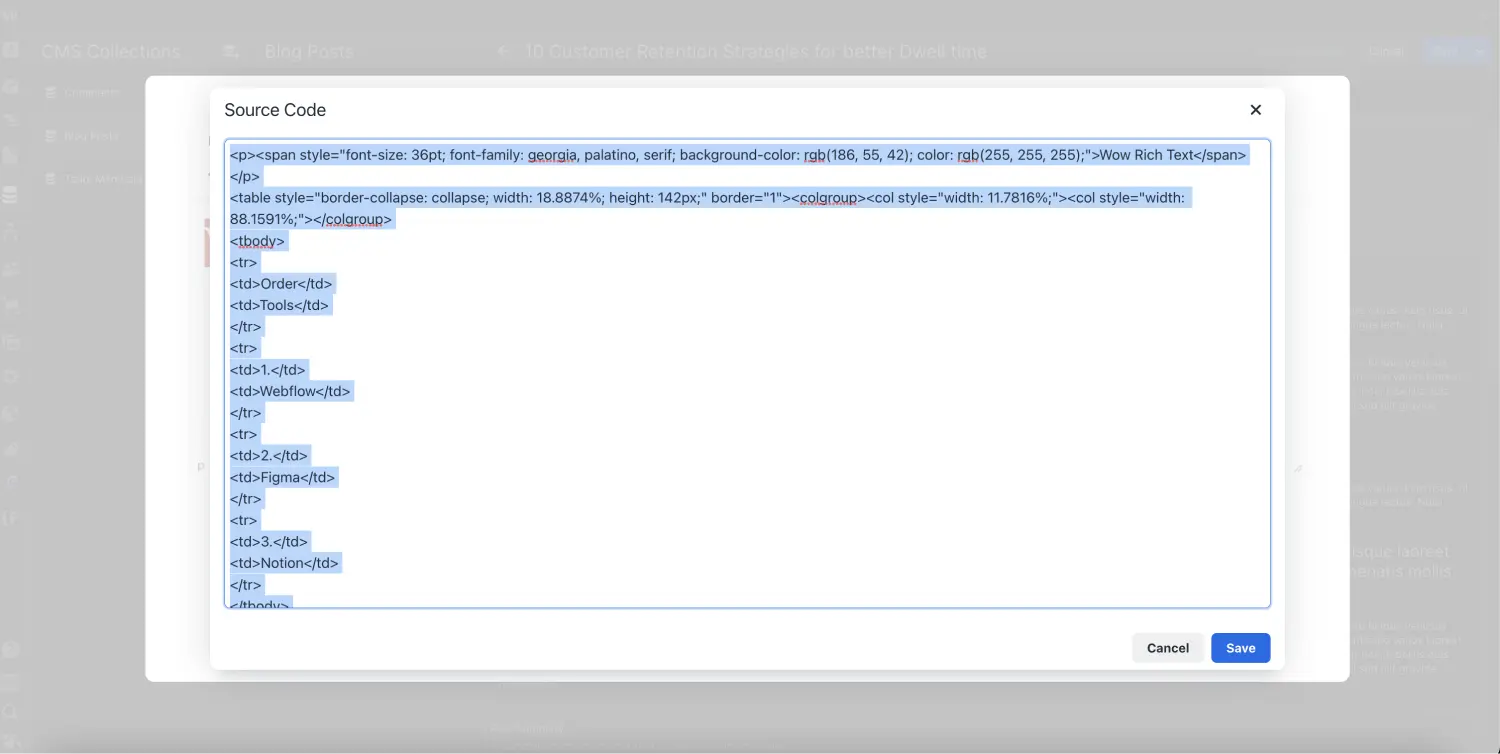
Next, you should:
- Return to your native rich text field.
- Add an embed element.
- Paste the code (ctrl or cmd + v).
- Click on "Save and close".
- Publish your item to see the content appear on your page.
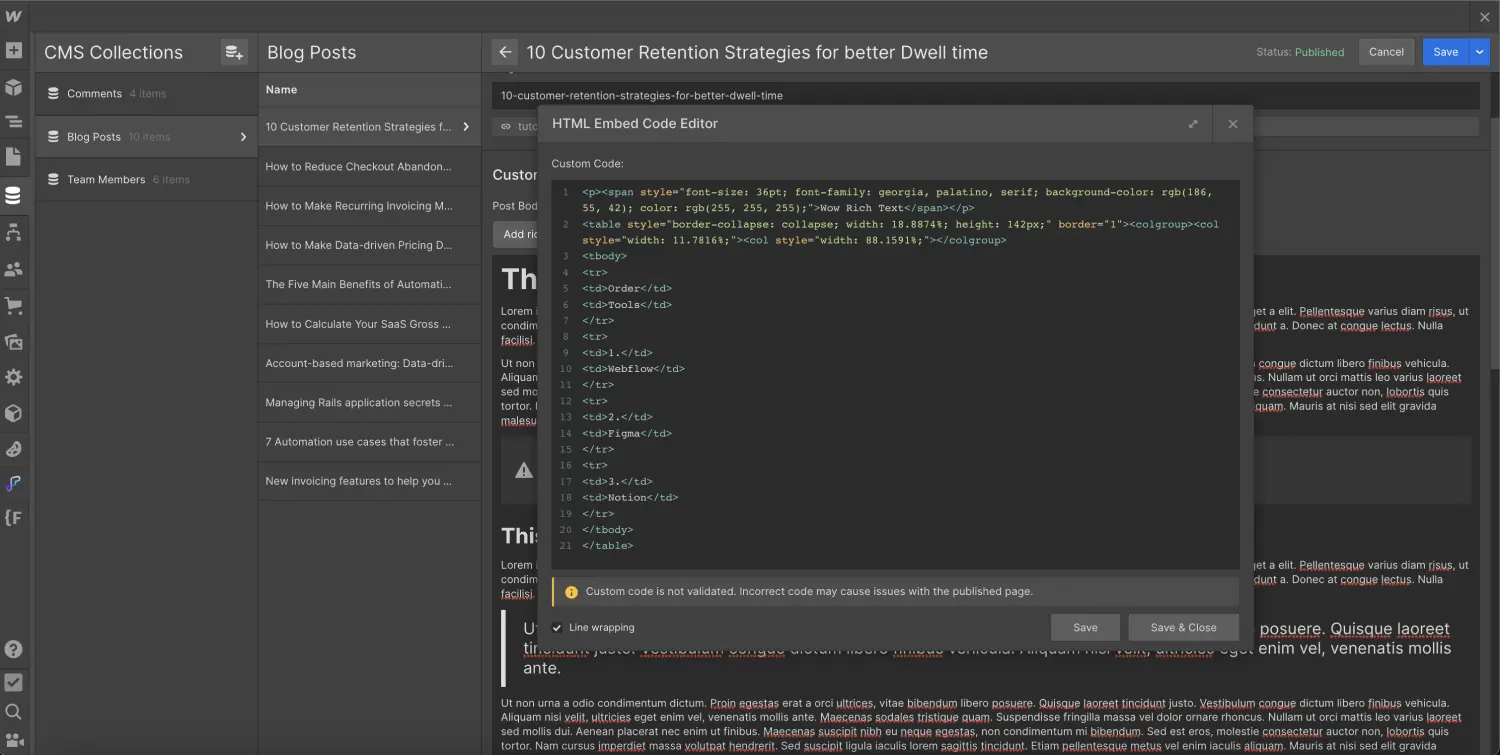
Certainly, modifying it later will be more complicated, but with this method, you can "easily" further customize your content.
5. Exceeding the 10,000 Character Limit for Webflow Embeds
Unfortunately, with Webflow, a new limitation may pose a problem. Yes, you cannot exceed 10,000 characters in an embed element.
Option 1: Split into Multiple Embeds
We recommend that to ensure you never exceed the 10,000 characters limit, you do not write all your content in Sneaps but instead use a mix of Webflow and Sneaps. We also advise dividing the content you add in Sneaps into multiple parts with this same aim.
By following this approach, you can optimize content management and avoid any character limitations imposed by Sneaps. By using Webflow and Sneaps complementarily, you can maximize the customization features while ensuring a smooth experience for your users.
Option 2: A More "Technical" Solution
The second option is a bit more technical, and its ease of editing is very low. If the code exceeds 10,000 characters, you can:
- Paste the text into a text editor
- Save the file in .txt format
- Upload the .txt file to your project’s assets
- Copy the source of the .txt file
- Add an embed element with the following code in your rich text
- Replace the source of the .txt file with the one you copied
- Publish the item
The drawback of this method is that making modifications requires repeating the steps from the beginning.
This is how you can customize your rich text in Webflow, including easily adding tables. To go further, you can learn how to add components to a Webflow rich text!

.jpeg)
.webp)


