Combining interactivity, maps, and the Webflow CMS can sometimes leave developers feeling dizzy.
In today's tutorial, we will show you how, in just a few steps, you can create a 3D map on your website while integrating data points sourced from the Webflow CMS.
Steps to Create a 3D Map in Webflow
Step 1: Add the Necessary JavaScript Libraries
First and foremost, you will need to add some custom code in your page settings (this requires having a Webflow paid plan).
You will need to add the following CSS file in the head code of your page (page settings > custom code > Inside head tag):
Next, you will need to copy and paste the code below before the closing body tag (page settings > custom code > Before body tag):
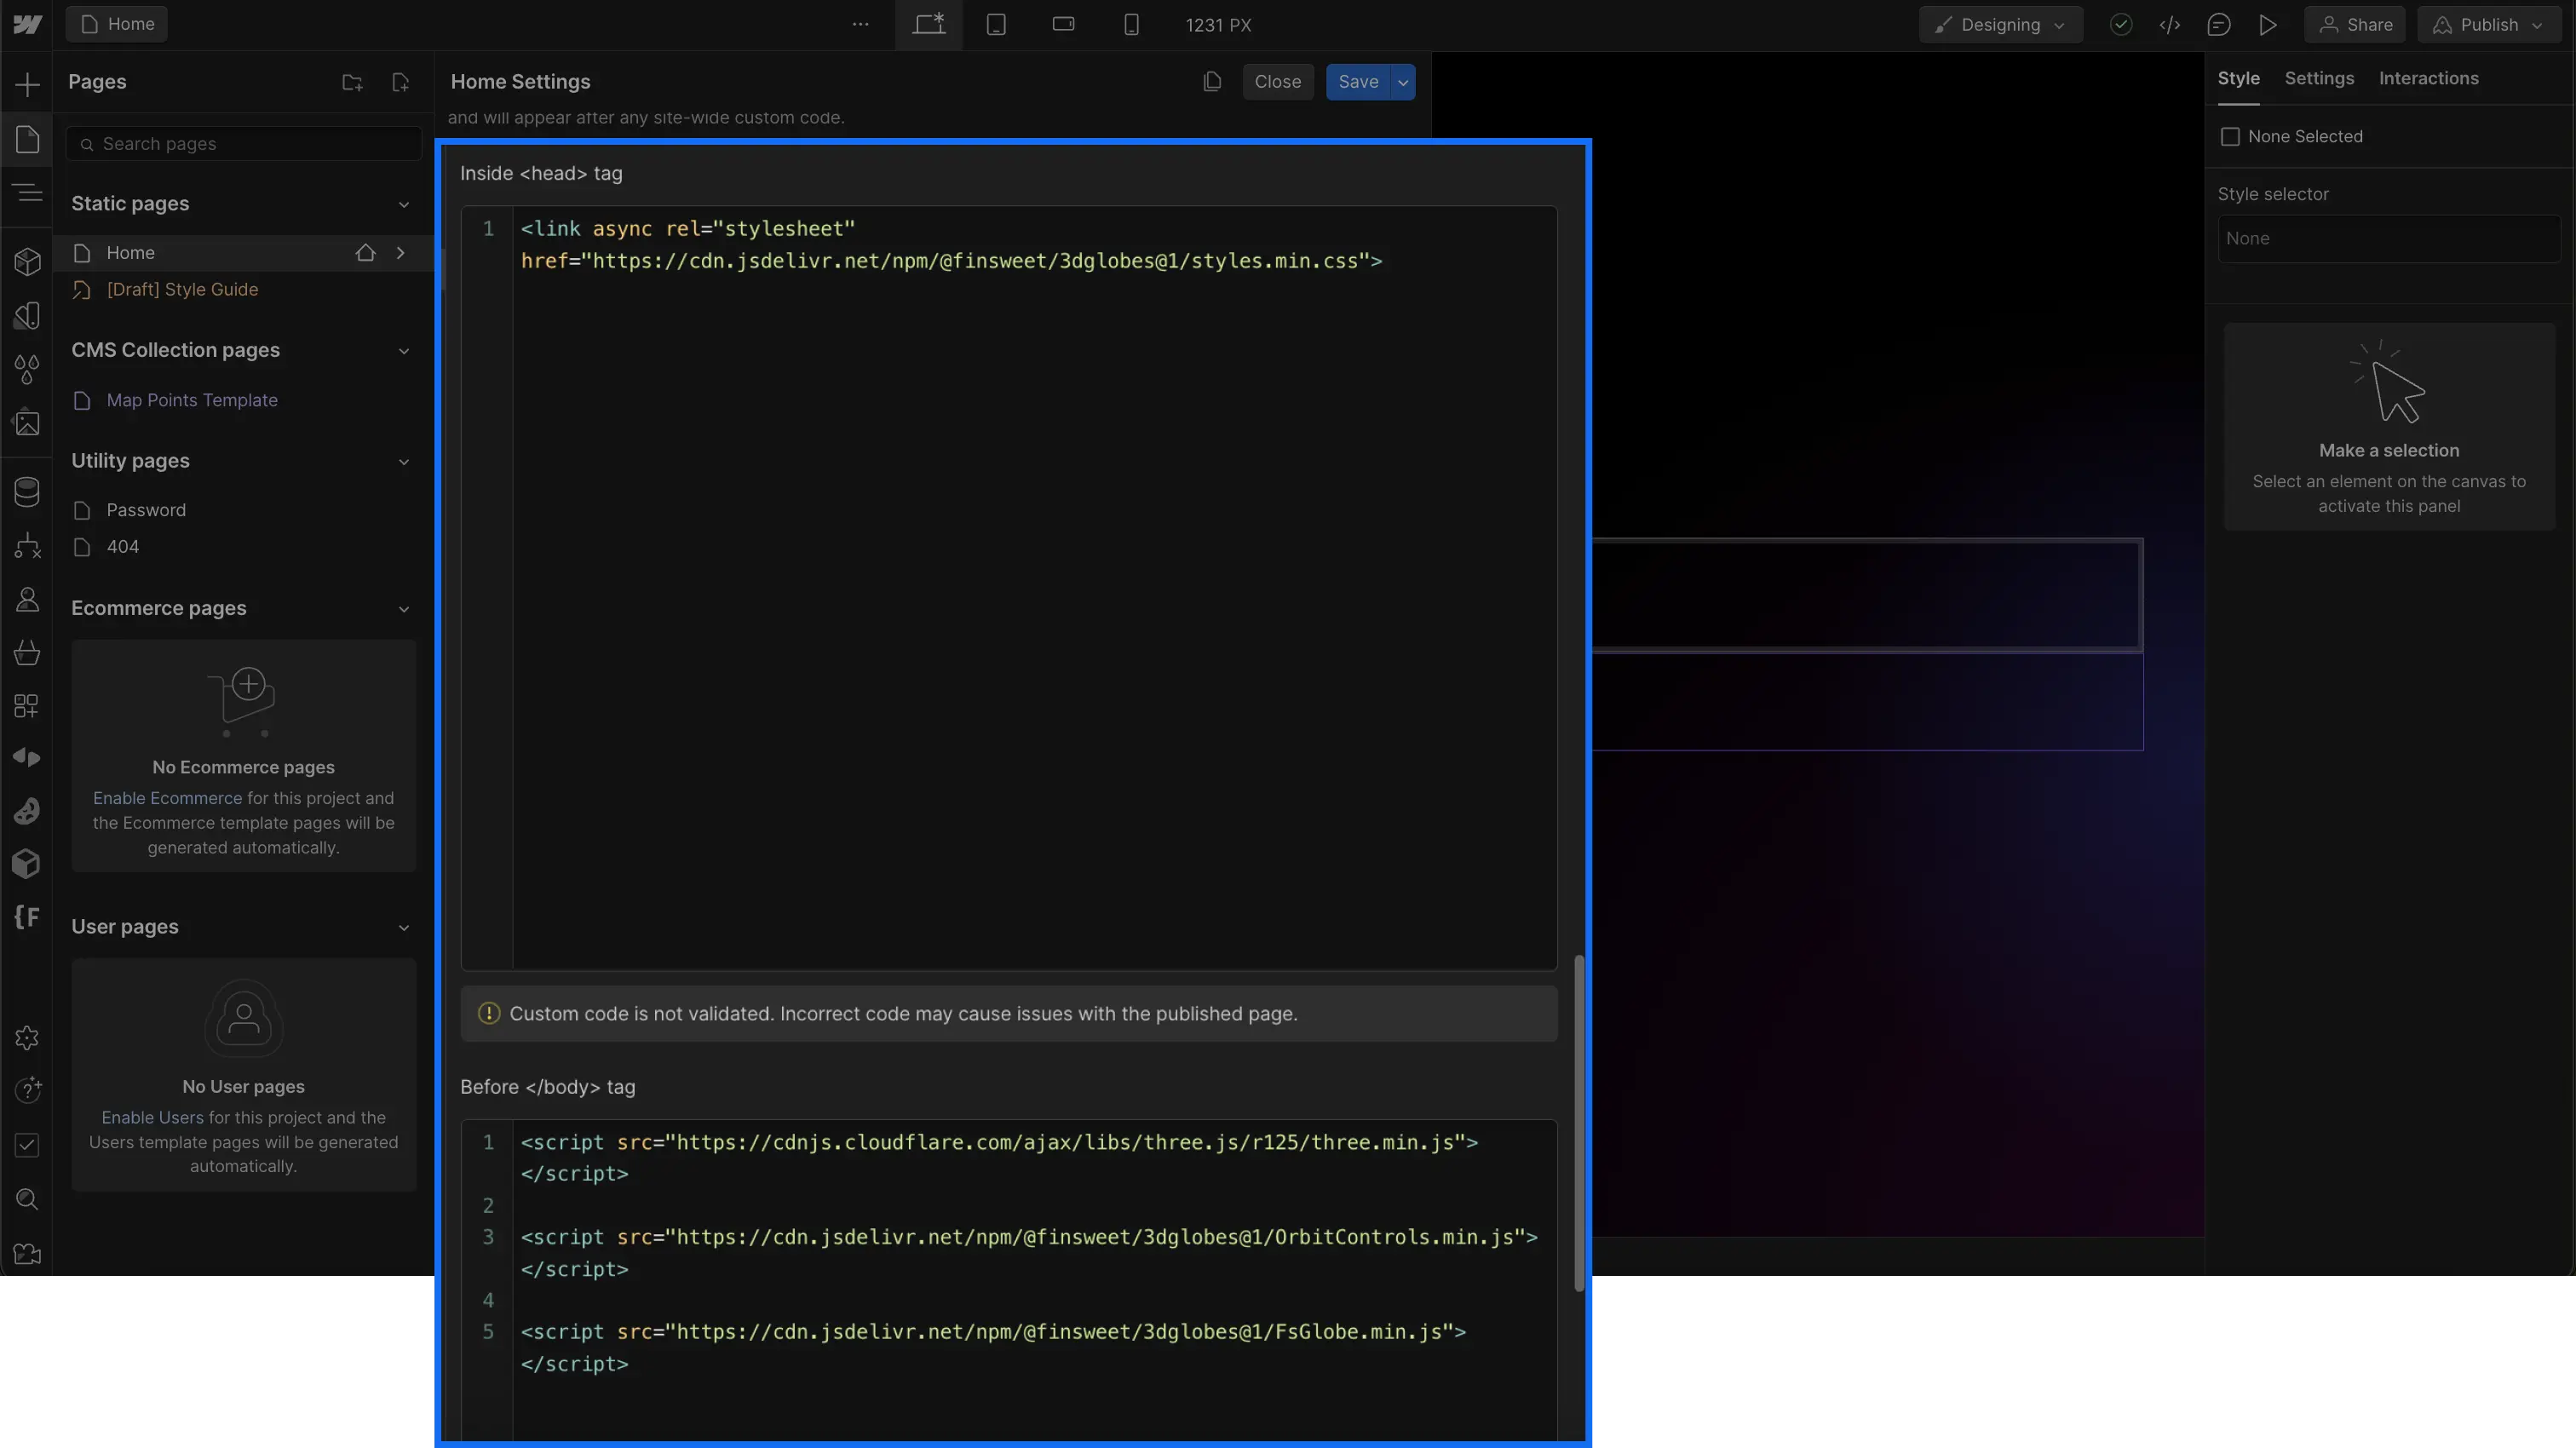
Step 2: Create the 3D Globe
Now, let's move on to an exciting part: how to create an interactive 3D globe.
To achieve this, you will need to add the class "fs-3dglobe-container" to the div that will contain your globe, along with the following attribute: fs-3dglobe-element = container
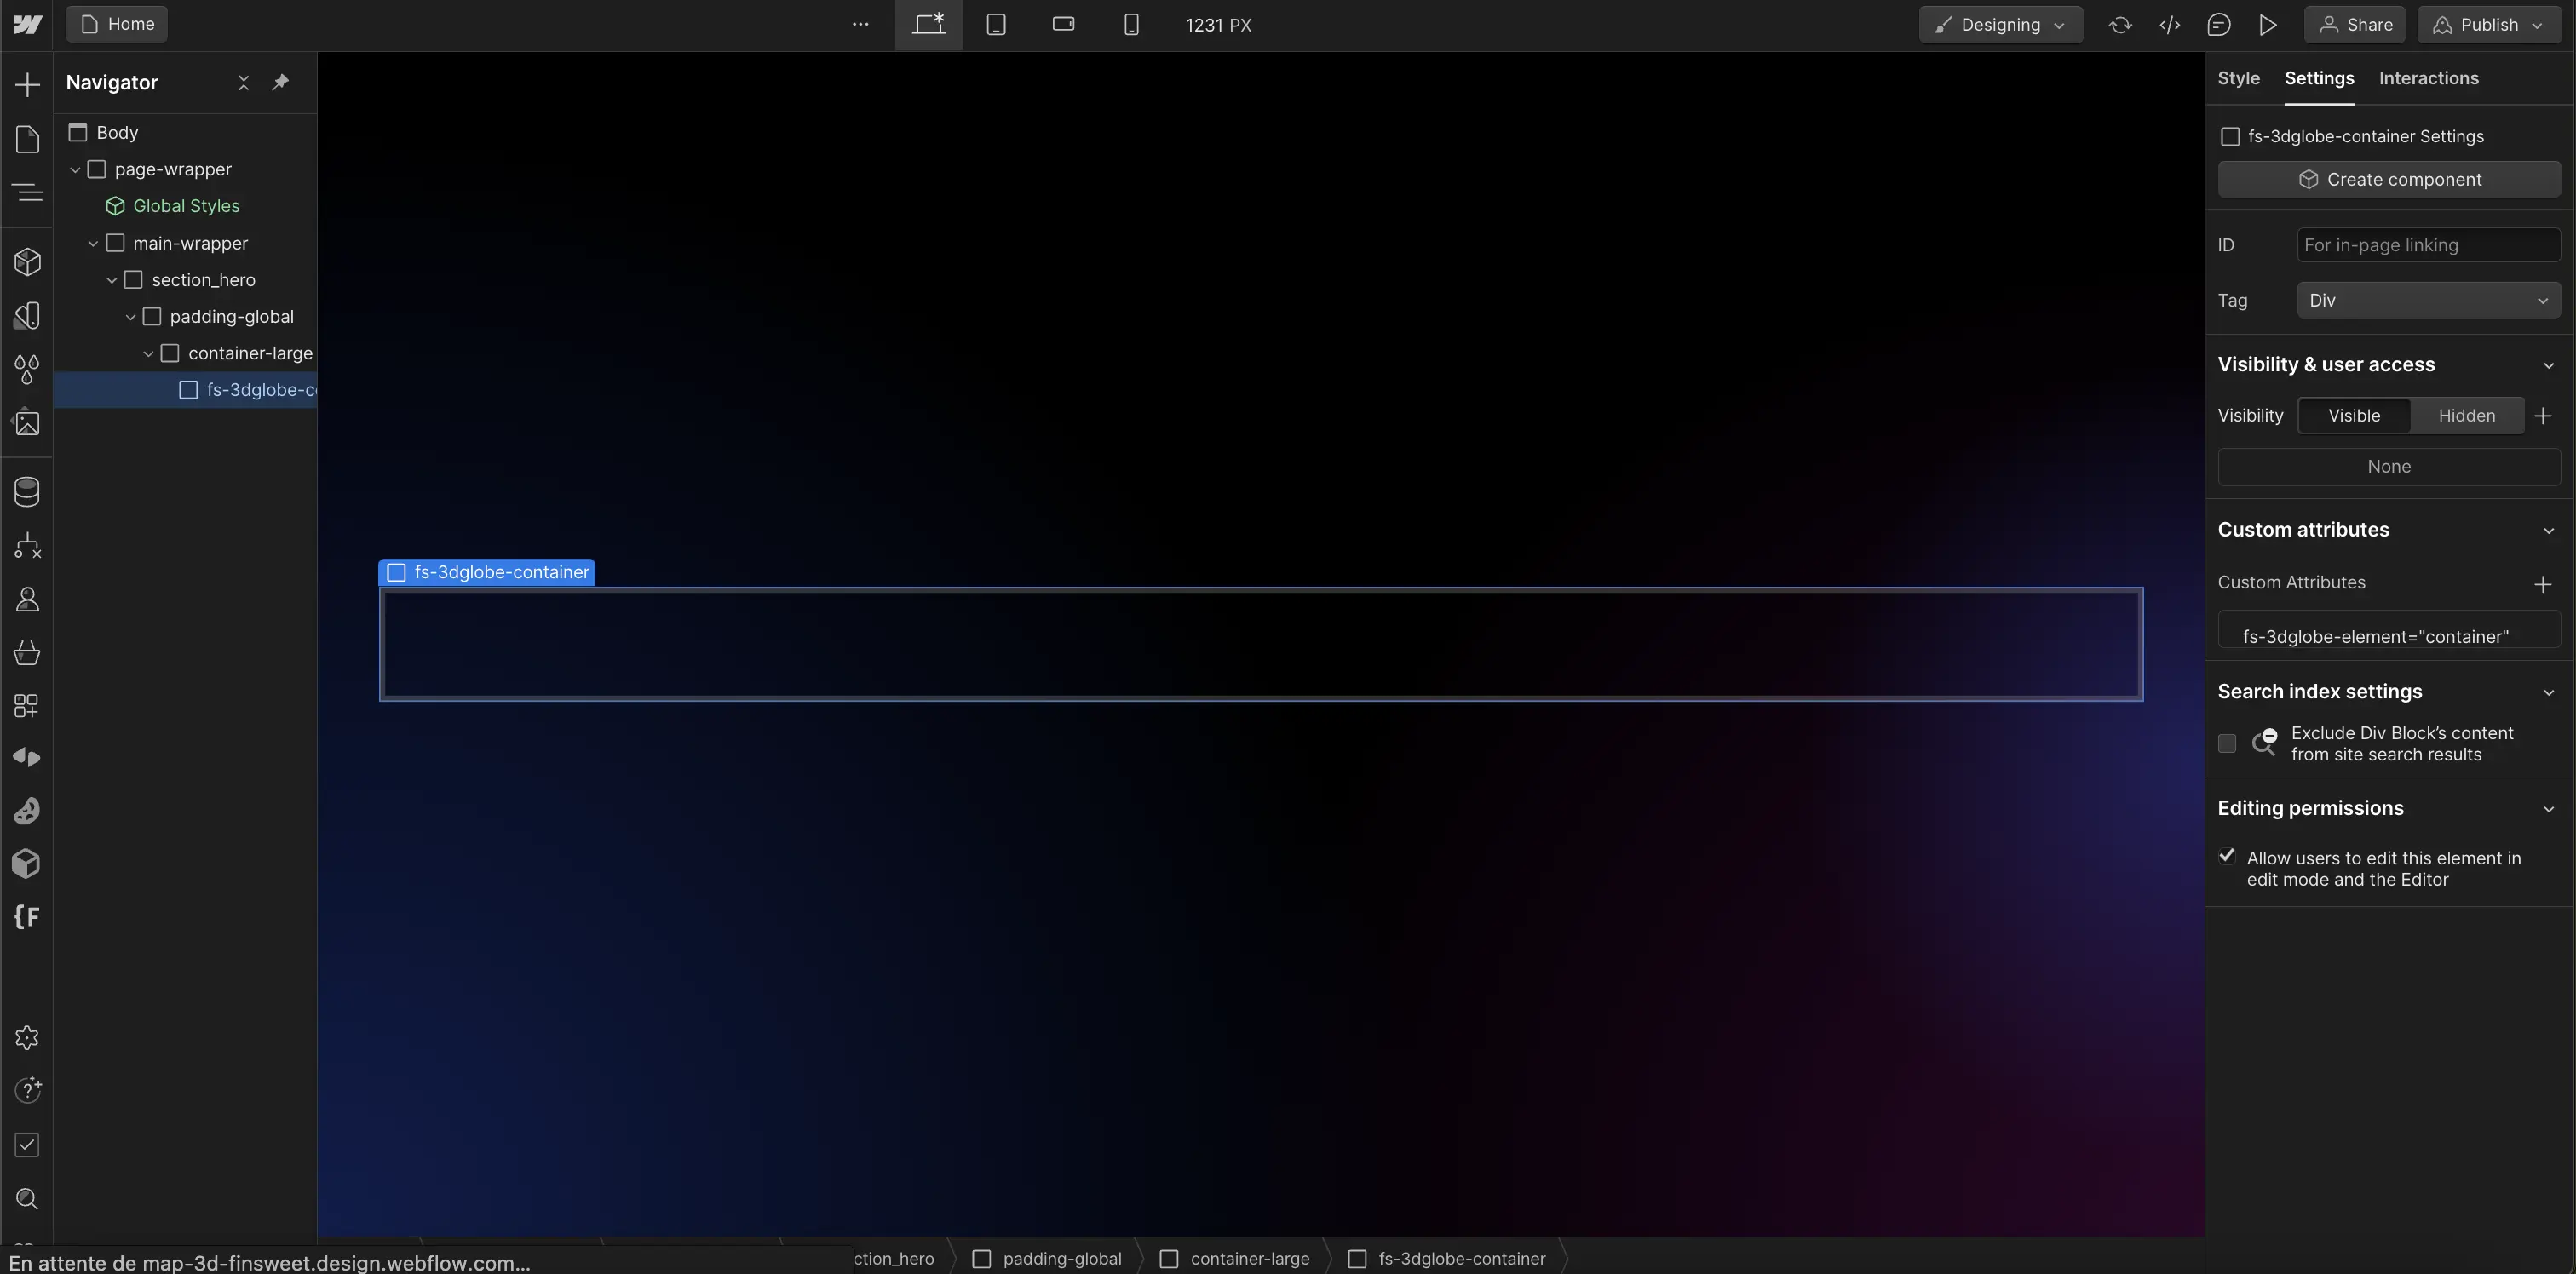
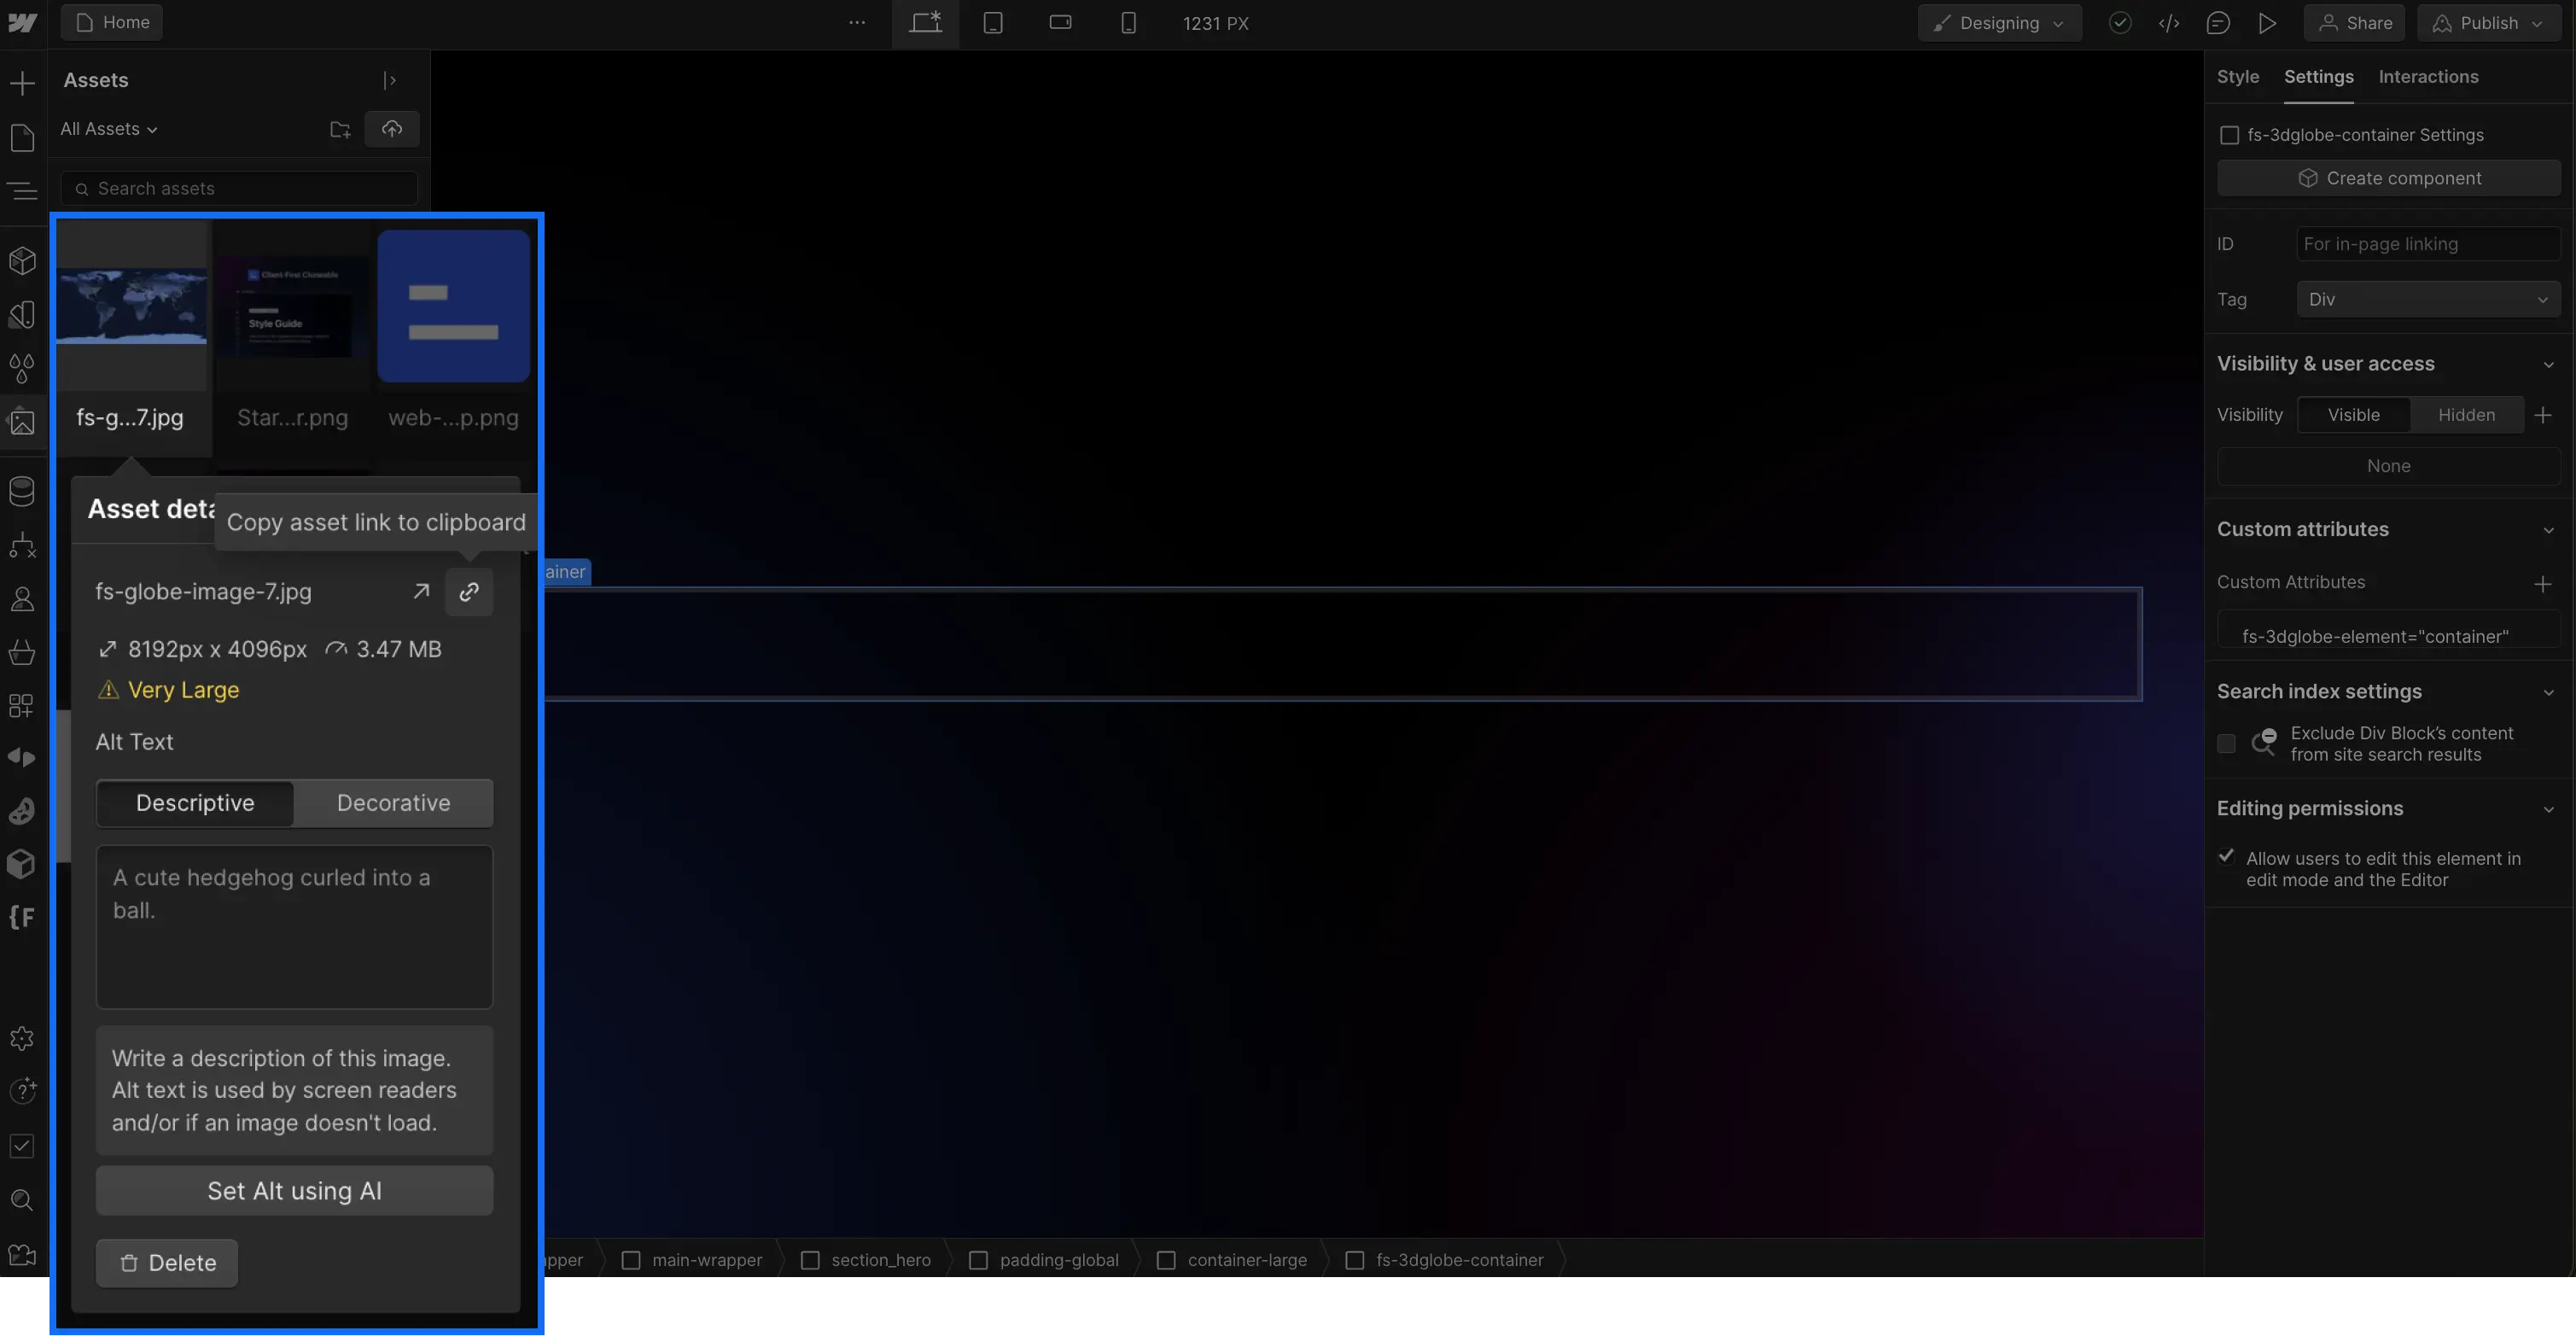
Next, we will select which map we want to display as a globe. We will choose an image that we will upload to the assets of our Webflow project.
Image recommendations for the globe:
- Image in .jpg format
- Resolution of 8192x4096 pixels
- File size under 4MB
- Image follows the equirectangular projection model
If you want to simplify the process, you can find a list of freely downloadable maps that meet these conditions from the Finsweet resources.
After uploading your image to the assets, you can copy the URL to access it.
Finally, add the following attribute to your globe container (in addition to the previous one): fs-3dglobe-img = URL of your image (In the value of fs-3dglobe-img, paste the URL of your image).
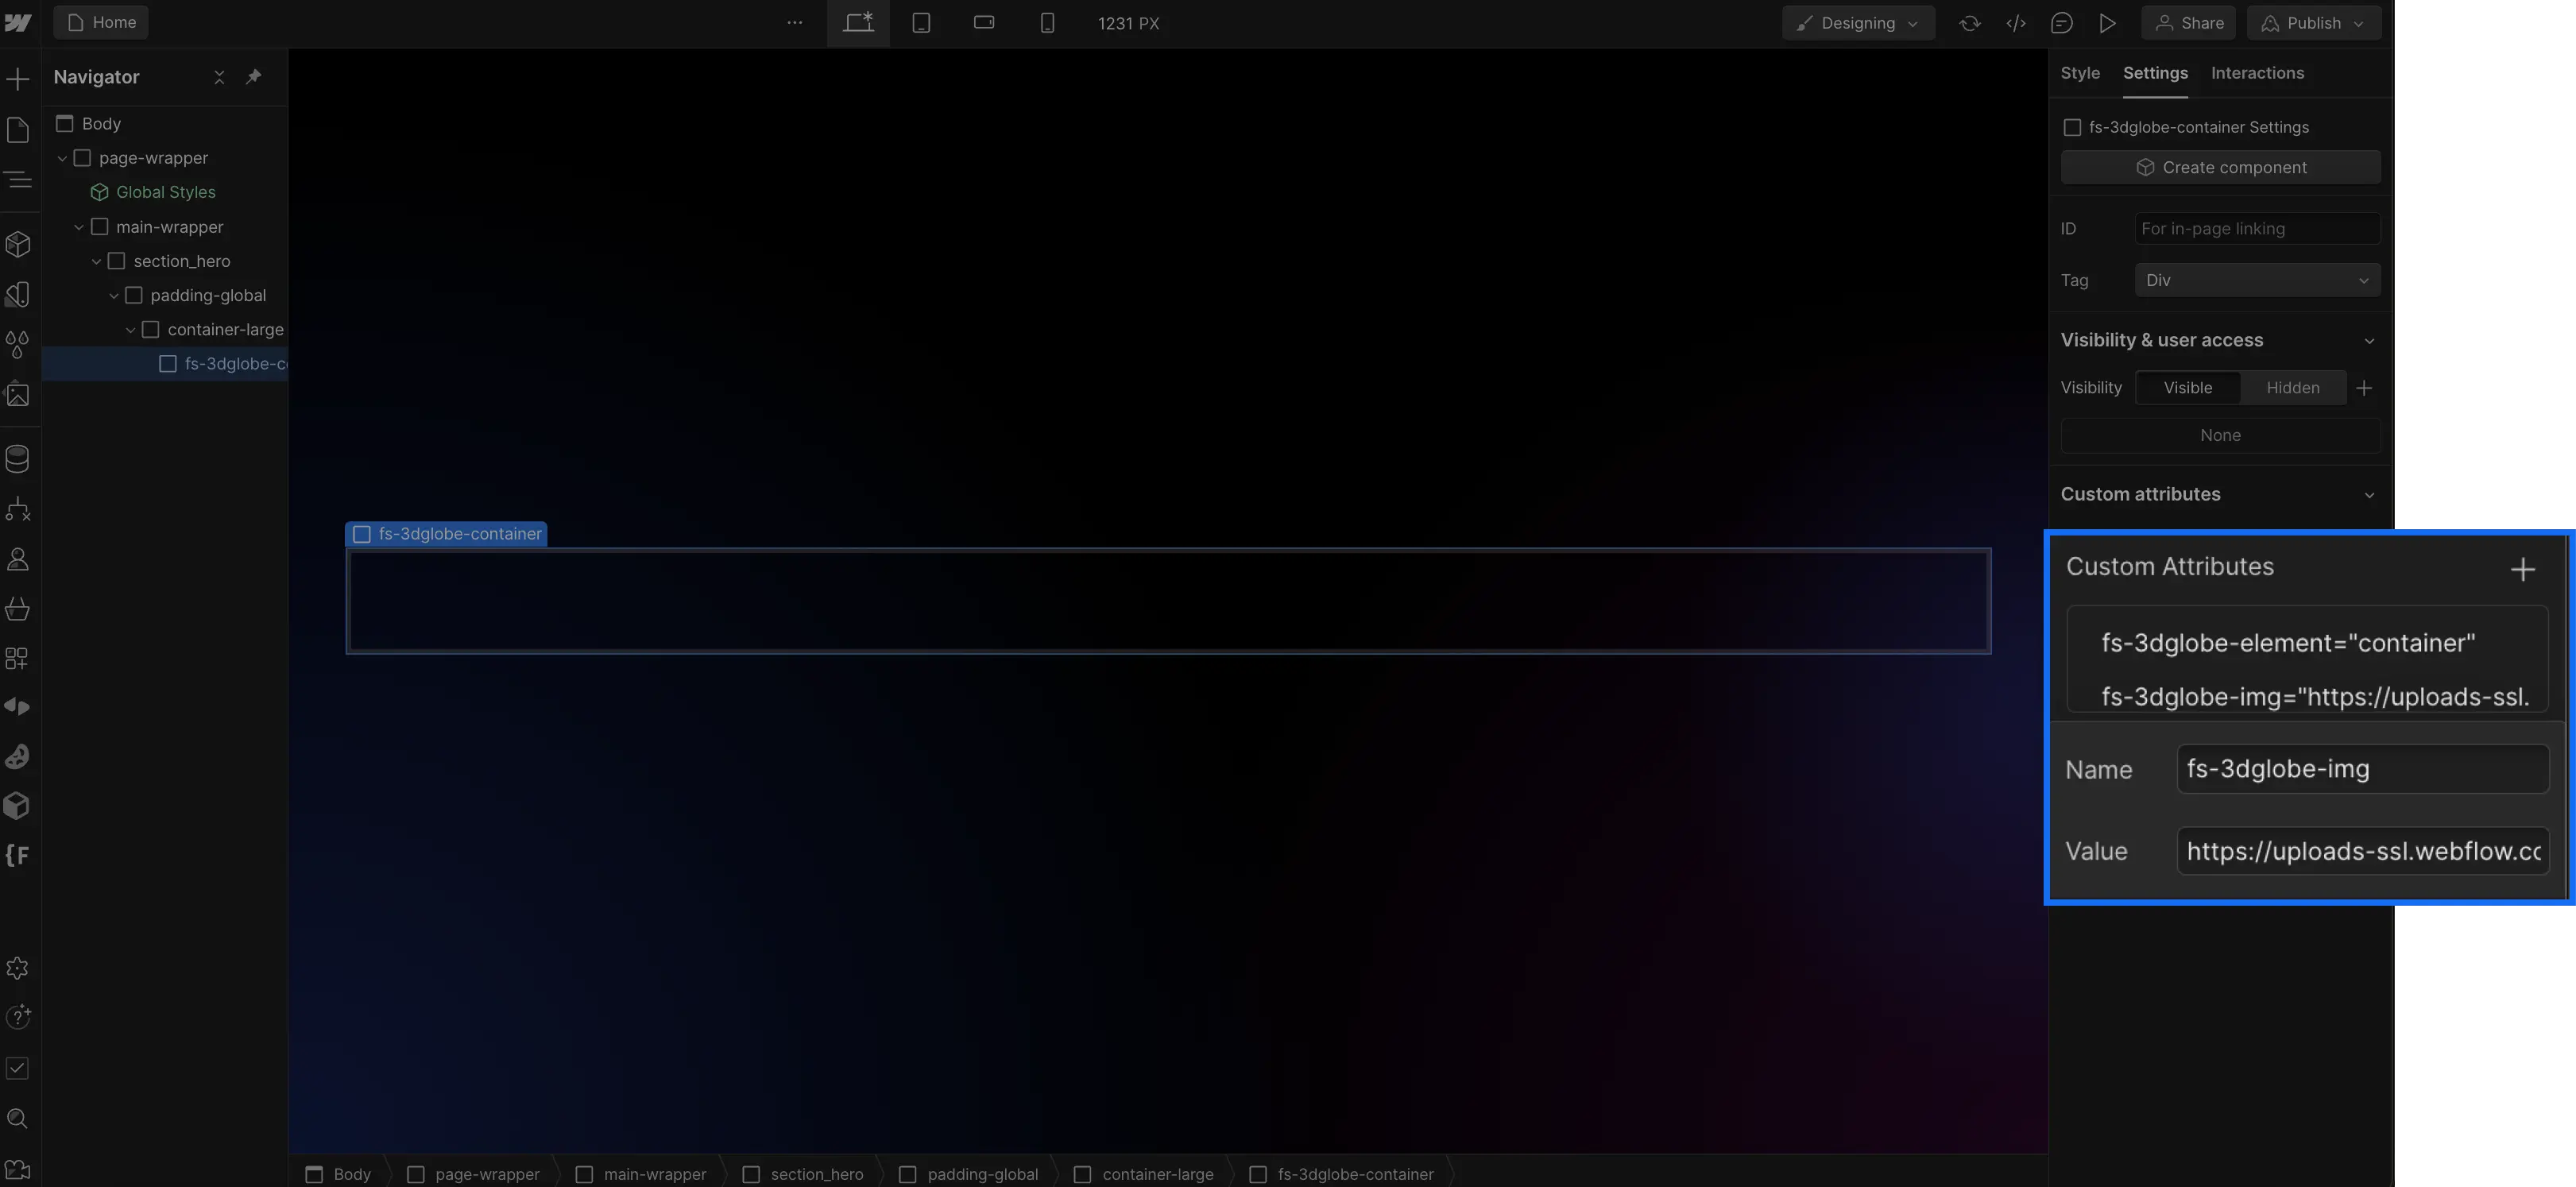
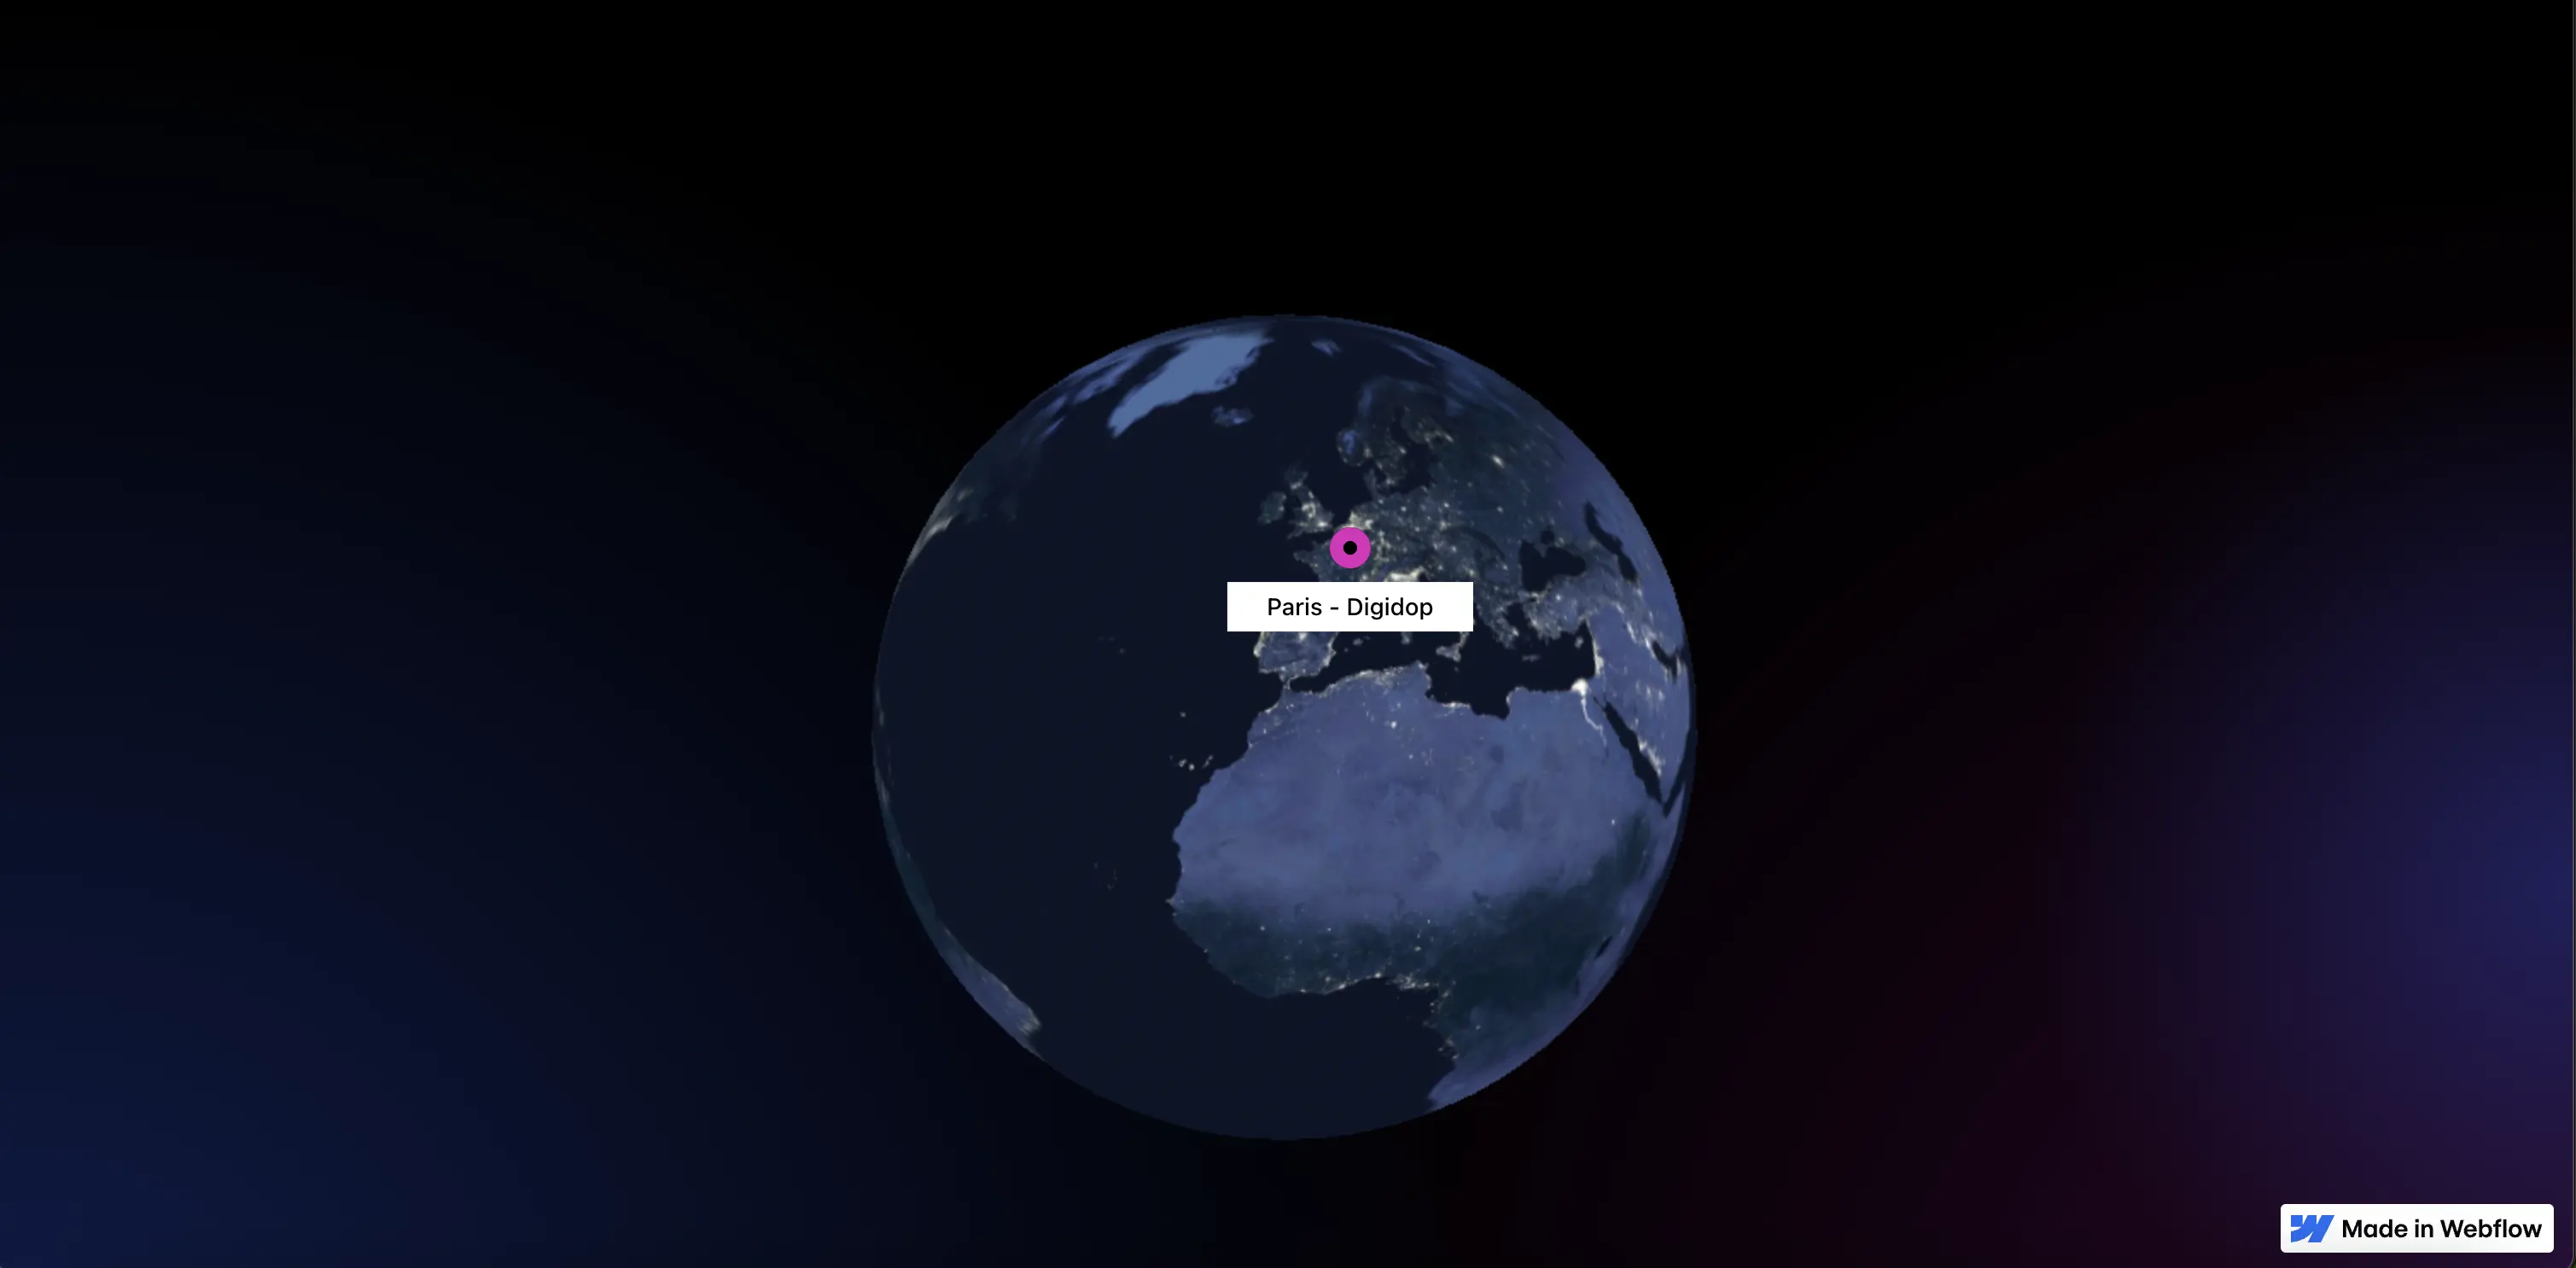
If you publish your project at this stage, you can already see your interactive 3D map.

Step 3: Create a Collection to Place Your Points on the 3D Globe
If you want to add more than just a simple 3D map to your project, you can also place points on the map for increased interactivity.
For simplified point management, we will use the Webflow CMS.
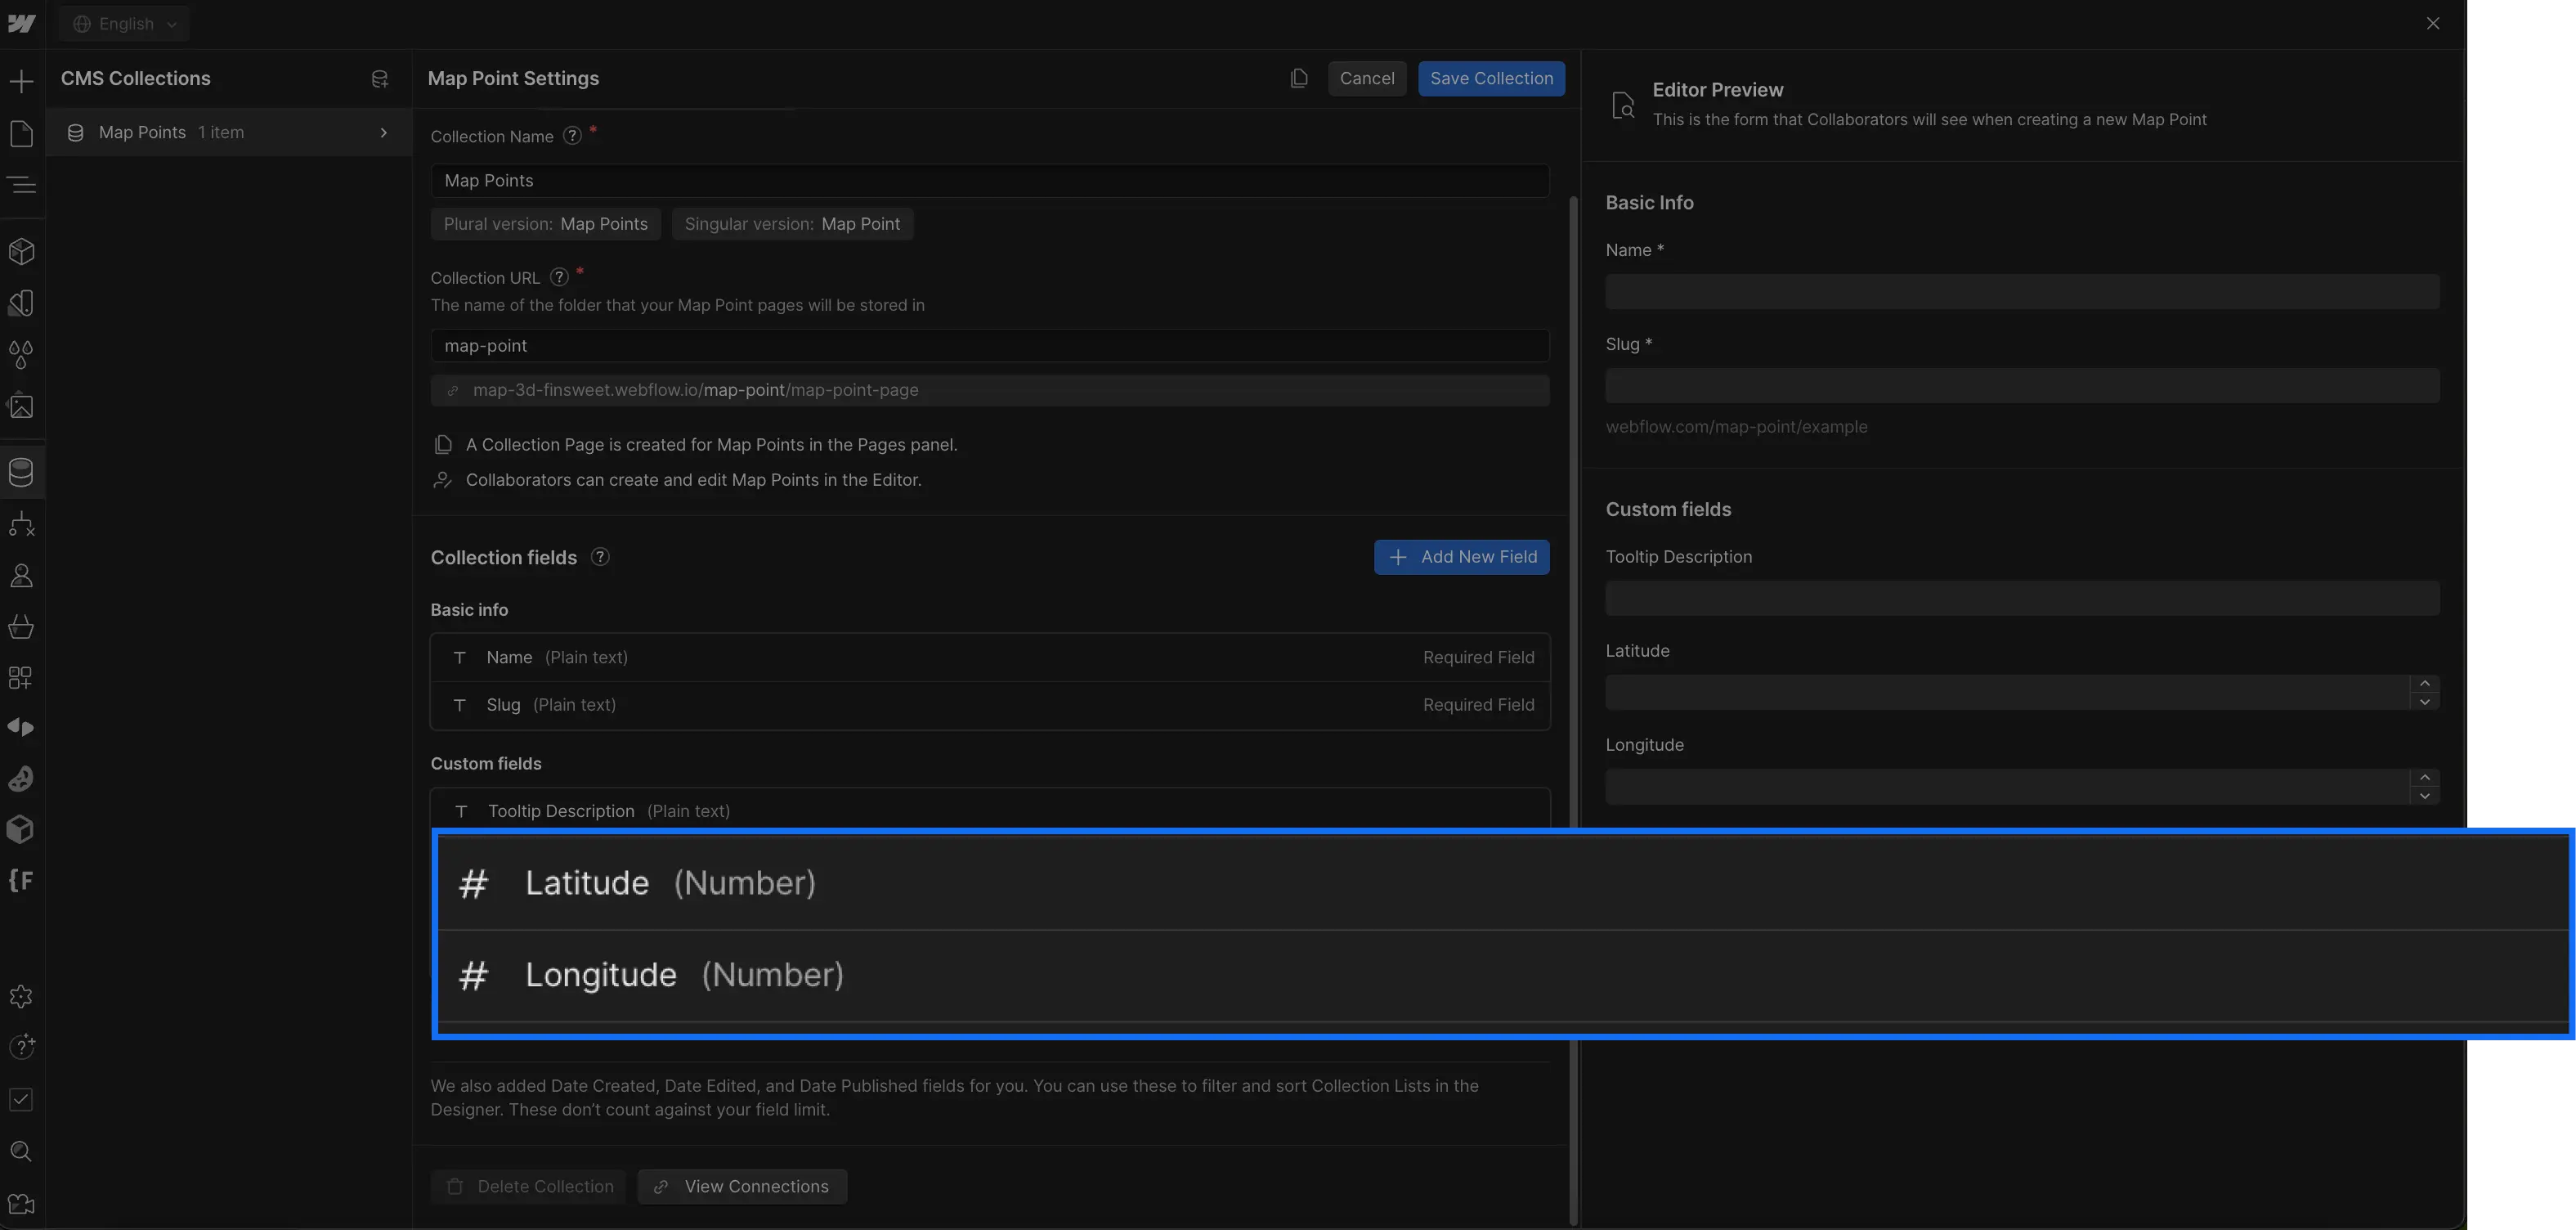
In your collection, you will need to add Latitude and Longitude (Number) fields. These fields will allow you to place your points on the map.
You can also add as many fields as you wish to customize the pin or the content of the tooltip.
Step 4: Configure the Collection for Points
To place the points on your globe, on your page, you will need to add a collection and link it to the collection you just created.
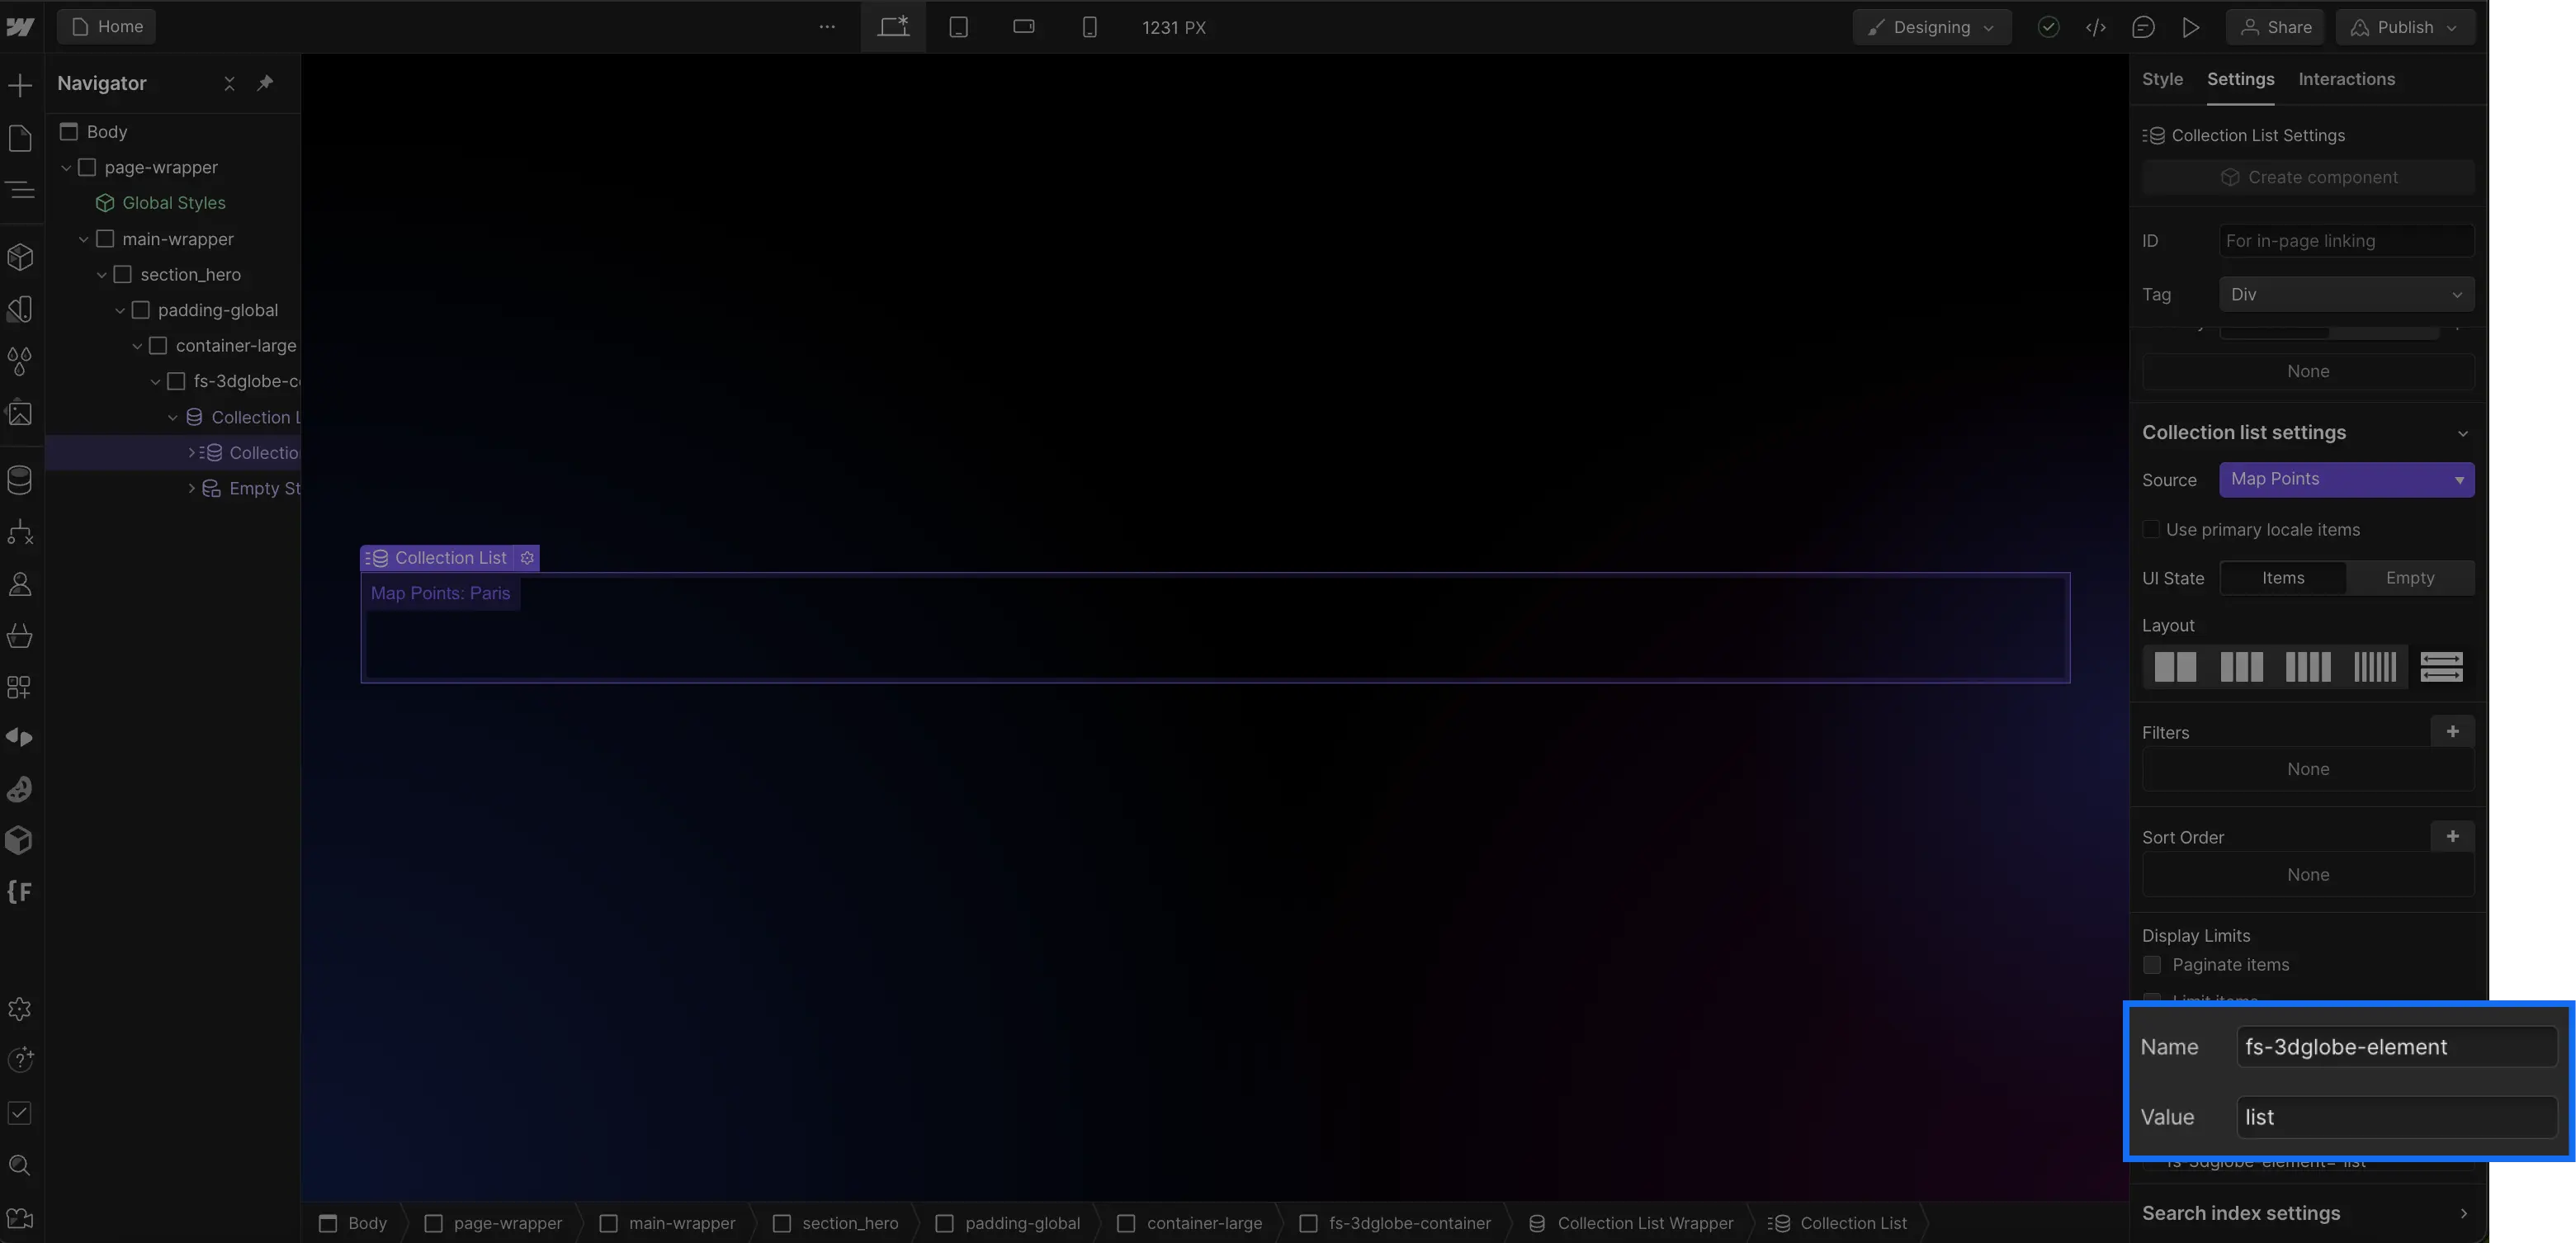
Next, you will need to give the attribute: fs-3dglobe-element = list to your Collection List element.
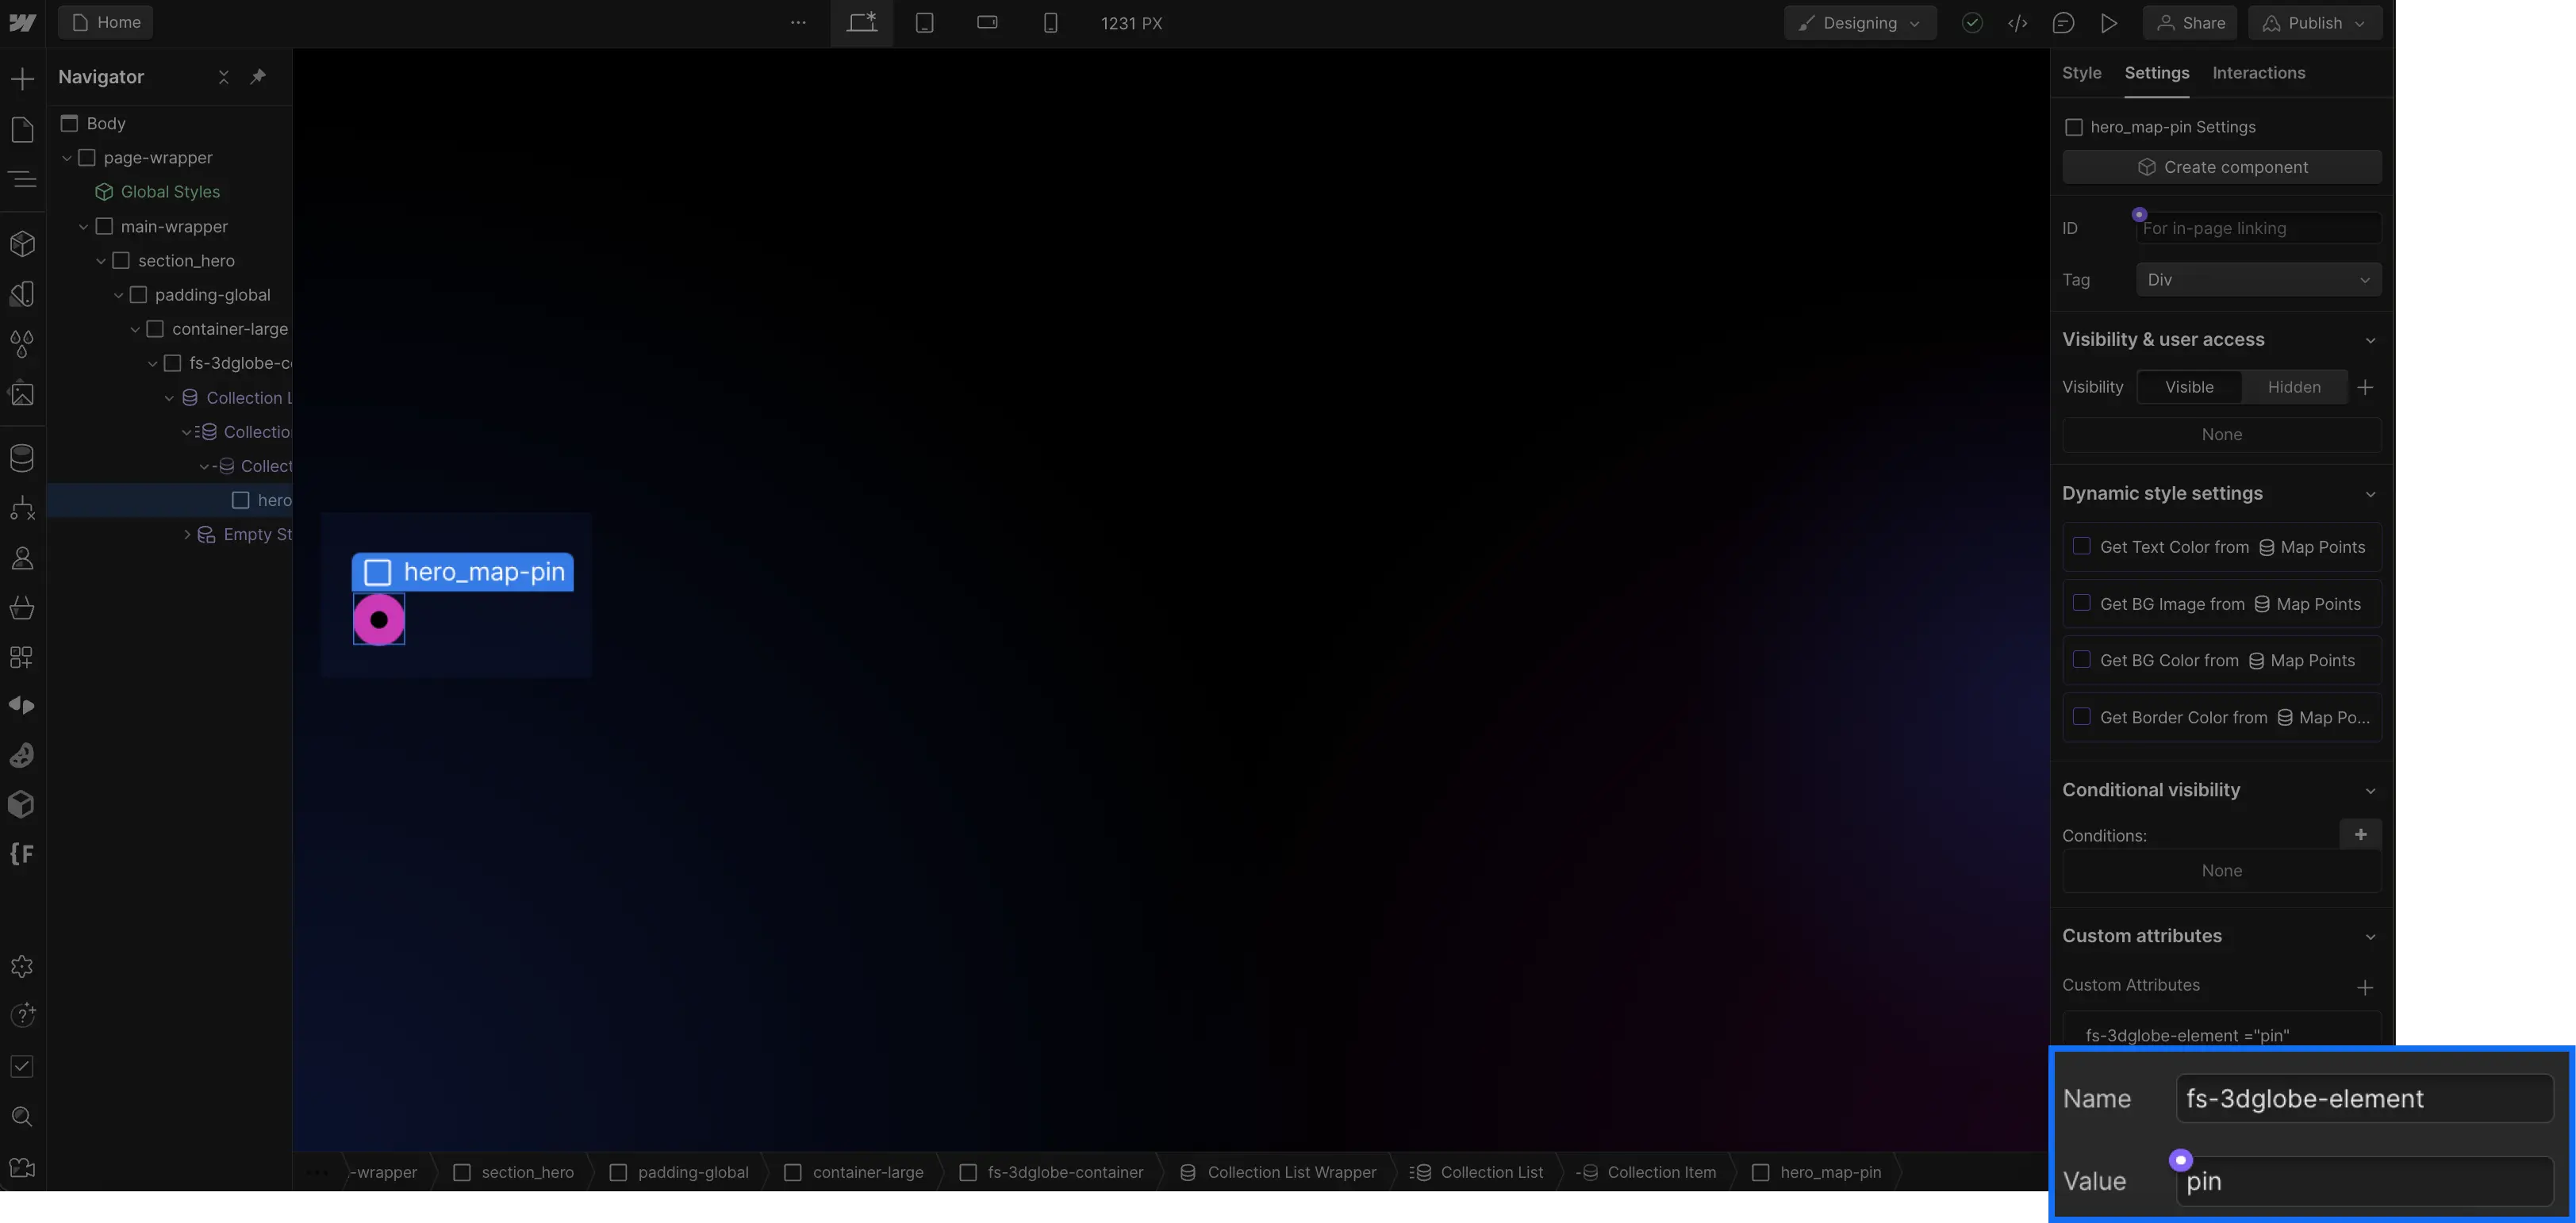
You will need to add a div that will contain your pin and give it the attribute fs-3dglobe-element = pin (you can add any static or dynamic element you wish inside it)
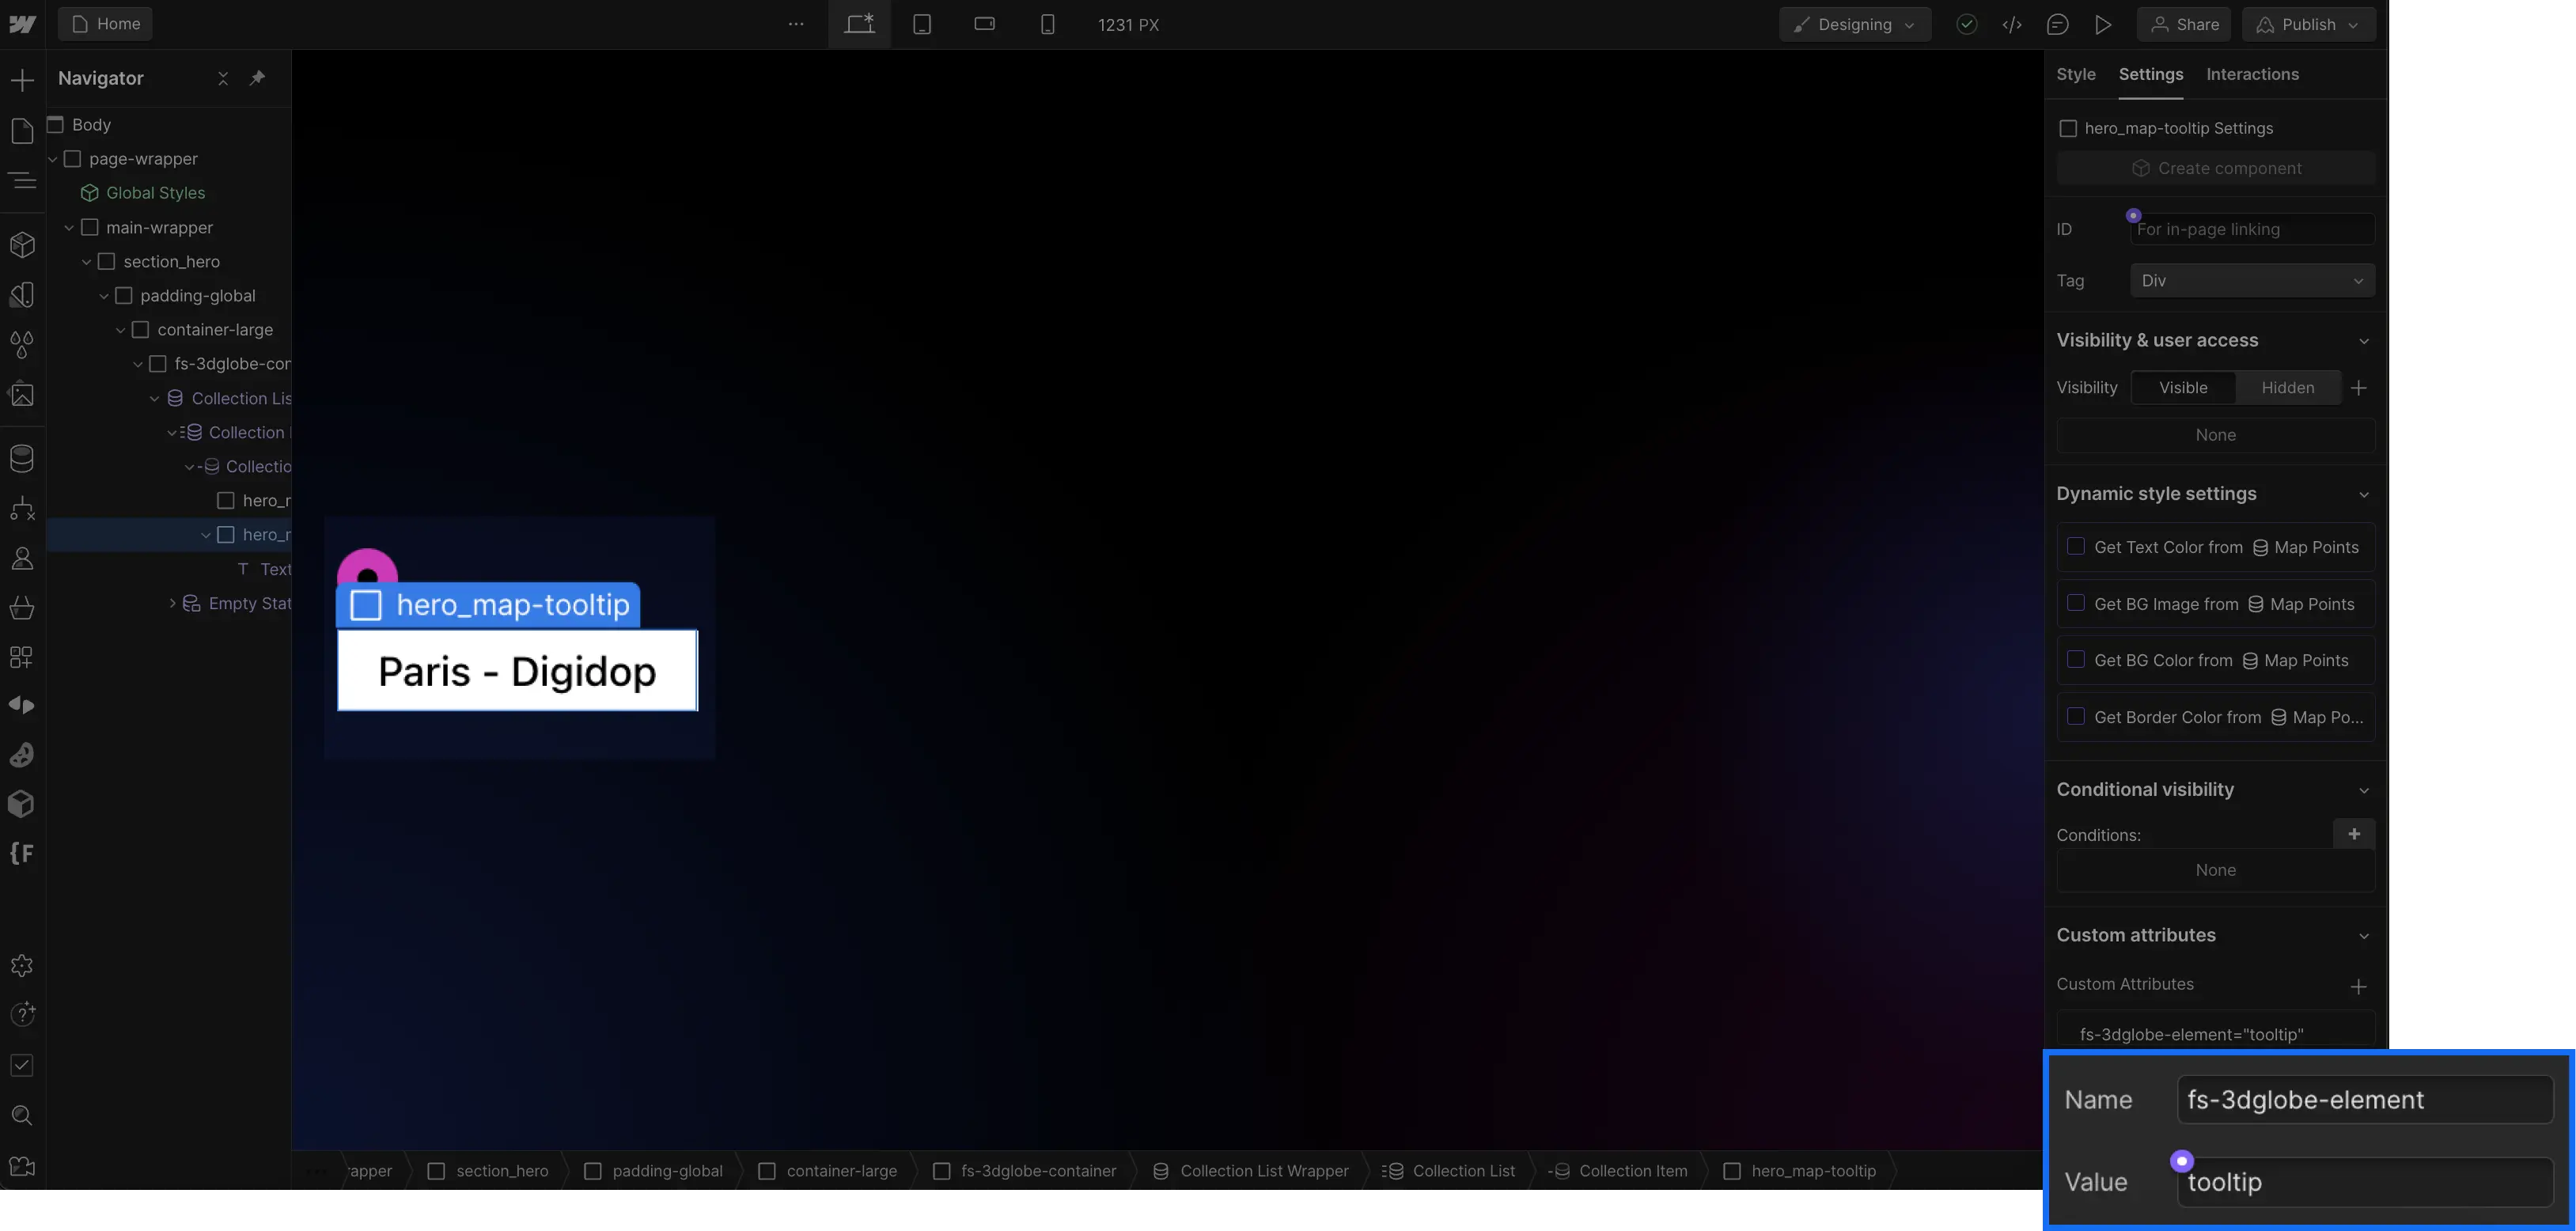
You will need to add a div that will contain your tooltip and give it the attribute fs-3dglobe-element = tooltip (you can add any static or dynamic element you wish inside it)
You will need to add a text block and connect it to your latitude field, then give it the attribute fs-3dglobe-element = lat (you can hide this element)
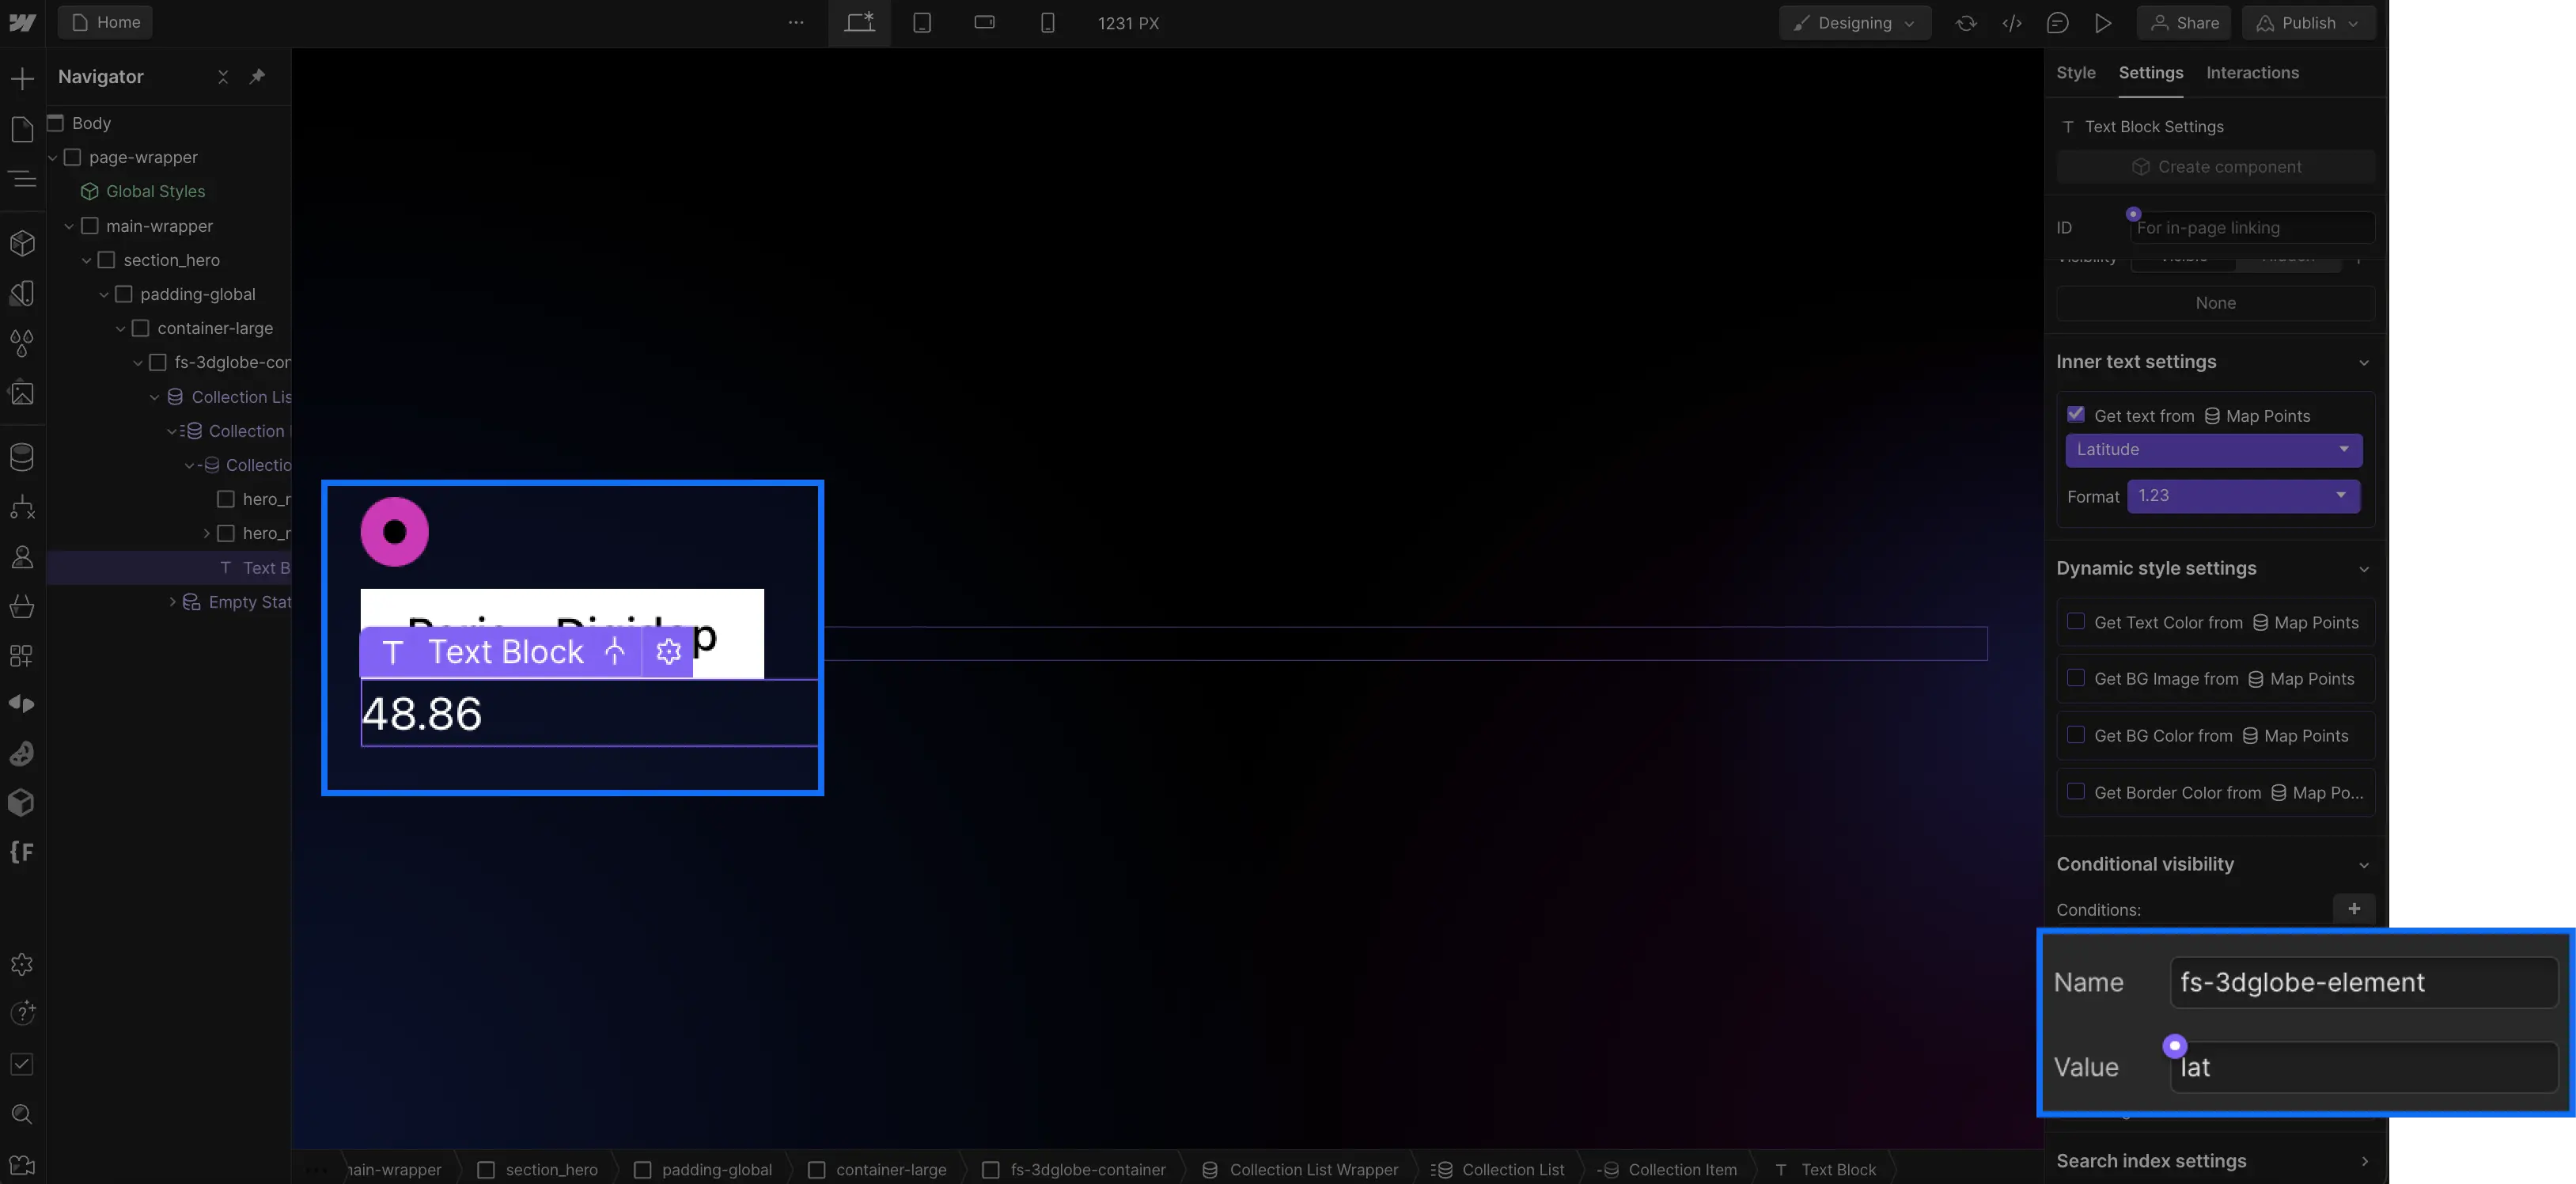
You will need to add a text block and connect it to your longitude field, then give it the attribute fs-3dglobe-element = lon (you can hide this element)

Step 5: Publish Your Project
Inside the Webflow Designer, you will not see the 3D map or the points. It is mandatory to publish your project and view the site online to see your 3D map with dynamically sourced points.
For more information, you can refer to the Finsweet documentation, which also includes a clonable example.
FAQ on Interactive Maps in Webflow
Integrating interactive maps on a Webflow site can provide an immersive and useful experience for users, allowing them to easily explore relevant geographic information. Here are some answers to common questions about using mapping tools in creating Webflow sites:
What advantages can an interactive map offer a Webflow site?
Integrating an interactive map on a Webflow site can provide an enhanced visual and interactive experience, allowing users to easily explore specific locations and find relevant information. This can be particularly useful for local businesses looking to showcase their physical location and provide directions to potential customers.
What tools can be used to integrate an interactive map on a Webflow site?
To integrate an interactive map on a Webflow site, tools like Google Maps can be used. These tools offer advanced features such as navigation, route directions, and place visualization, which can be extremely helpful for users searching for precise geographic information.
How can a business optimize its use of an interactive map on its Webflow site?
A business can optimize the use of an interactive map on its Webflow site by strategically integrating it into its content, providing accurate and up-to-date information, and ensuring the map is easily accessible and user-friendly. This can enhance the user experience and strengthen the company's credibility by offering relevant and useful geographic information to its customers.
What are the recommended image formats for the 3D map?
For the best experience, it is recommended to use a .jpg image with a resolution of 8192x4096 pixels, a file size under 4MB, and one that follows the equirectangular projection model.
The image formats for websites
How can I place points on the 3D map?
You can place points on the 3D map using the Webflow CMS. First, you need to create a collection and add fields for the latitude and longitude of each point.
Is it easy to add points on the 3D map with the Webflow CMS?
Yes, with the Webflow CMS, you can easily add a point on your globe by creating an item and entering the coordinates in the latitude and longitude fields.
Why can't I see the 3D map in the Webflow Designer?
The 3D map and points are only visible once the project is published online. Make sure to publish your project to see the 3D map with dynamically sourced points.
In summary, integrating a 3D map in Webflow offers an interactive and immersive experience for users. Follow the simple steps outlined in this guide to create your own 3D map and provide a unique experience for your visitors. Don't forget to publish your project to see the map in action. Explore the many possibilities offered by this feature to enrich your Webflow site and captivate your audience.
To go further, discover other Finsweet attribute solutions.

.jpeg)
.webp)


