Today, we are offering you a quick Webflow tutorial to help you verify the ownership of your Webflow website in Google Search Console.
What is Google Search Console?
Google Search Console is a tool that helps individuals monitor their website's visibility and track its performance on search engines. This is where you can submit your sitemap to Google and see how your web pages are indexed. Additionally, you can track the progress of your SEO (search engine optimization) efforts with performance data from search results. You will also be able to see the indexing coverage of your web pages and get information about potential indexing issues. There is also the option to remove certain URLs from search engines using this tool. These are just a few features of this powerful Google tool for SEO.
How to add your Webflow site to Google Search Console and verify ownership via domain name?
Step 1: Go to Google Search Console
The first step is simply to visit Google Search Console. Once you are in the tool, you will need to log in with a Gmail account (yours or your business's). At this point, two scenarios may arise:
1 - You have never used Google Search Console and therefore have no properties
In this case, you will be taken directly to a page that asks you to select the type of property to verify.
2 - You already manage other properties on your account
If you have access to the Search Console of another property, you will land on the interface of one of them. To verify a new property (for your Webflow site, for example), you will simply click on the current property (above the overview) and select “+ Add Property”.
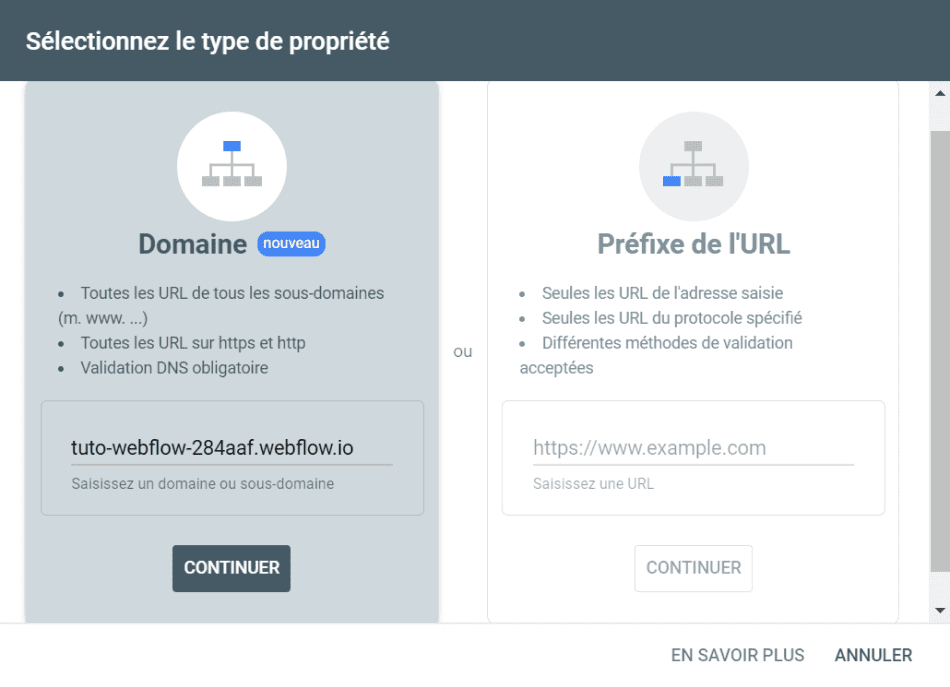
A pop-up will then appear for you to “select the type of property”.
Step 2: Enter your website's domain name
For this second step, you will need to enter the domain name (no https:// or www., for example, for Digidop the domain name is: Digidop.fr) of your website in the Domain section. Once typed, click on “Continue”.
Step 3: Copy the TXT record provided by Search Console
A new pop-up will open with information and a code. The most important part of this step is to copy the “TXT record” provided by Search Console.
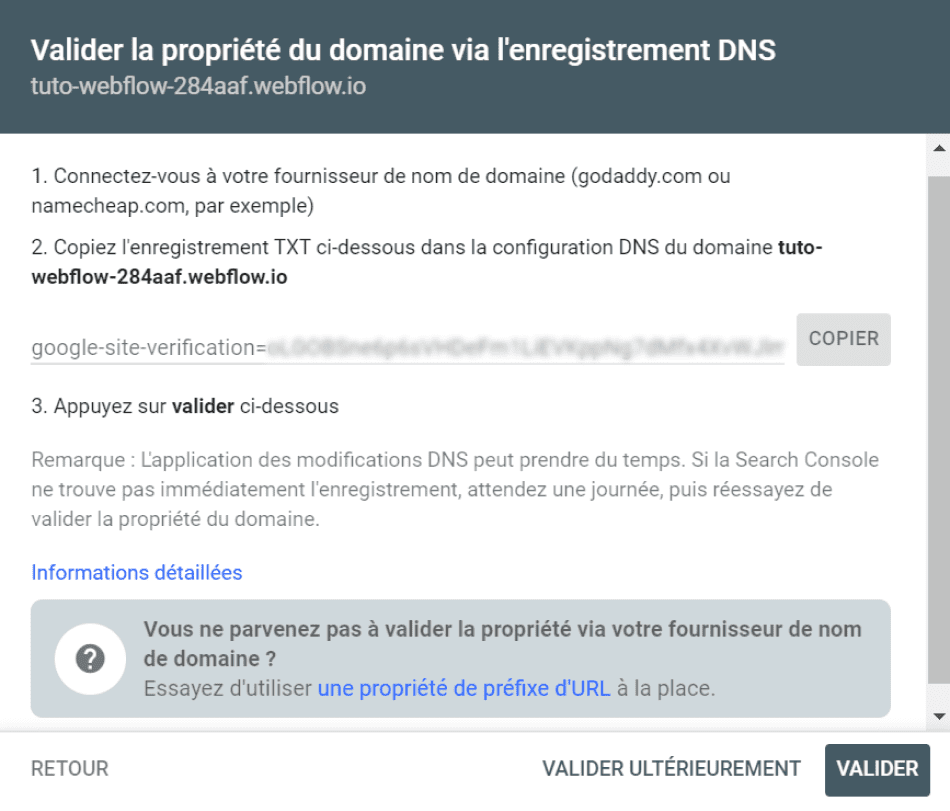
Warning: Do not leave the Google Search Console verification page!
Step 4: Go to your domain name provider to verify ownership
Depending on your domain name provider or hosting service, the exact process may vary, but the concept remains the same.
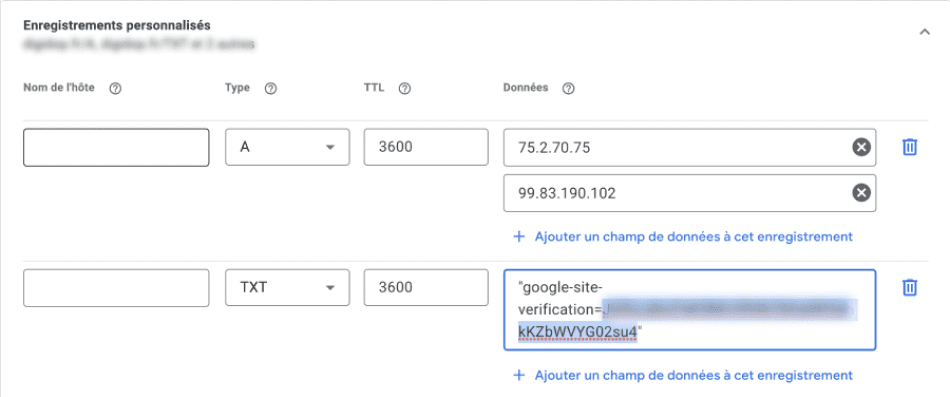
You need to access the DNS records of your domain. You will add a TXT record in the record settings. In the TXT field, simply paste the code you copied earlier.
Step 5: Verify ownership in Google Search Console
Now, return to the Google Search Console page (from Step 3). The final step is to click the “Verify” button (next to “Verify later”).
How to add your Webflow site to Google Search Console and verify ownership via URL prefix?
Step 1: Go to Google Search Console
This step is identical to Step 1 of verification with the domain name. To summarize, you need to log in to Search Console using a Gmail account and add a new property.
Step 2: Enter a URL from your website
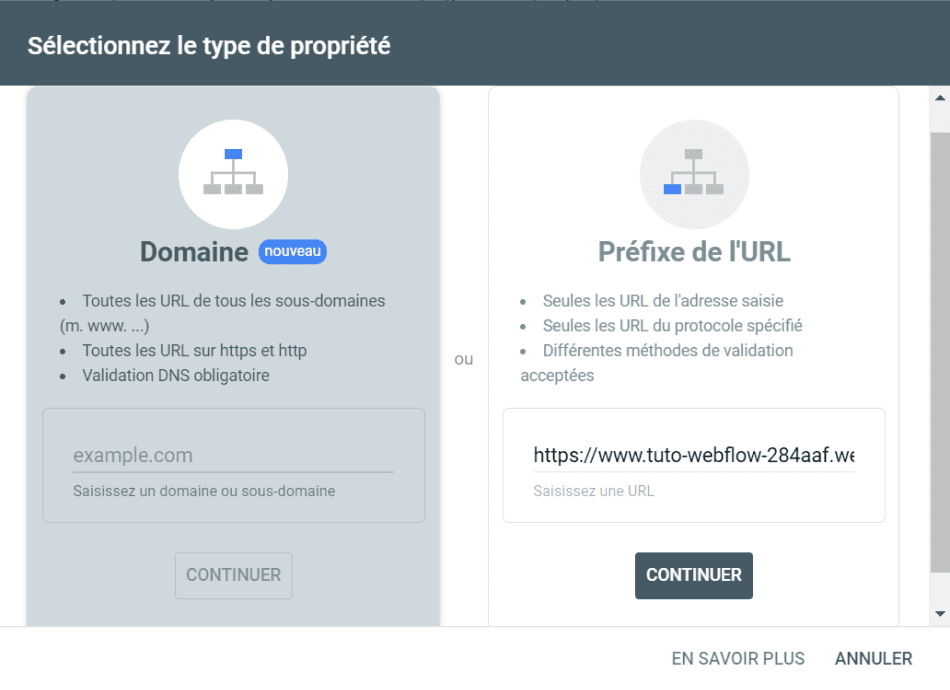
In contrast to Step 2 of verification with the domain name, here you will need to enter a URL from your site (usually that of the homepage) and click continue.
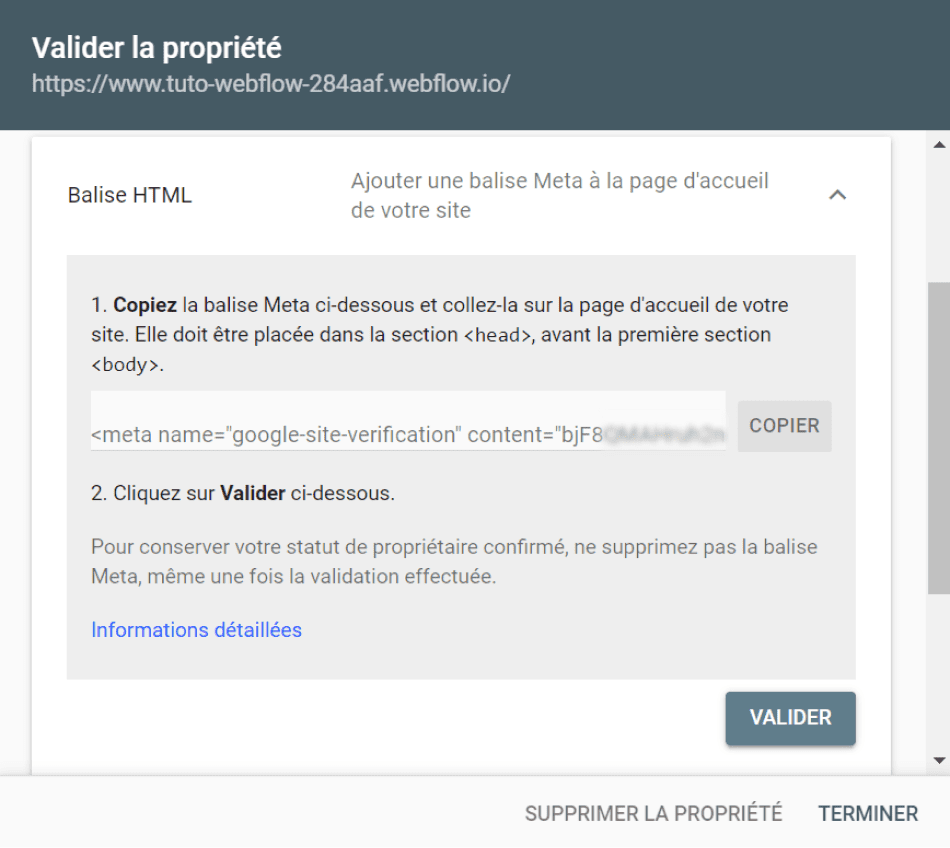
Step 3: Retrieve the Google verification ID
After clicking continue, a new page will appear (Verify Ownership). Several verification methods will then be offered to you. We will choose the “HTML Tag” method. Click on “HTML Tag”. A dropdown text will appear asking you to copy a “meta tag”. However, you will only copy the string that appears after: “content=". To do this, open a notepad, for example, copy and paste the meta tag, and keep only the character string.
Warning: Do not leave the Google Search Console verification page!
Step 4: Go to Webflow to verify ownership
After copying the character string, go to the settings of your Webflow project. Then, navigate to the SEO tab. Scroll down, paste the code into the “Google Site Verification” section, and click “Save Changes”.

Step 5: Verify ownership in Google Search Console
Now, return to the Google Search Console page (from Step 3). The final step is to click the “Verify” button (next to “Verify later”).
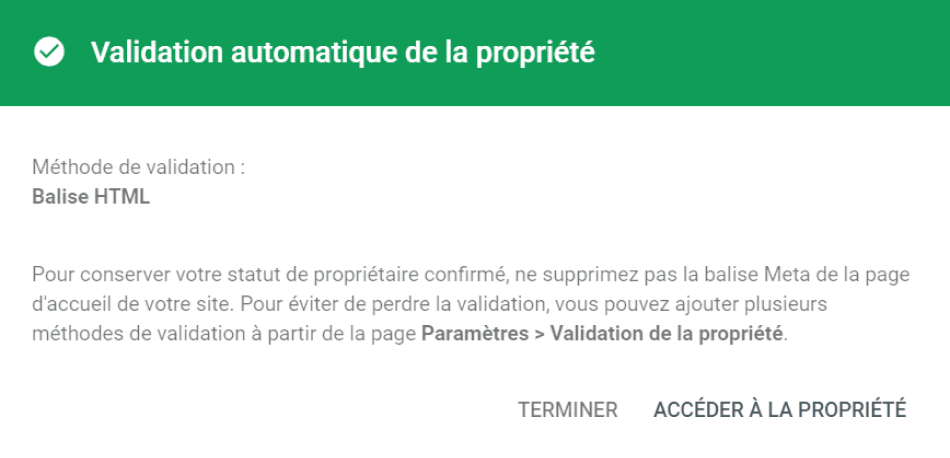
That's it! You can now check and control your online presence for your business/website. For more Webflow tutorials, check out our various blog articles.


.webp)


.jpg)
