Give custom names to your various forms on your Webflow site for numerous benefits! For instance, you can:
- Know from which page the user contacted you.
- Trigger actions (marketing automations) with Zapier when a specific form is filled out.
- Keep your Webflow site well-organized.
The step-by-step tutorial
1 - Select the form
Click on the form element (identified by its icon in the Navigator) to properly select the form.
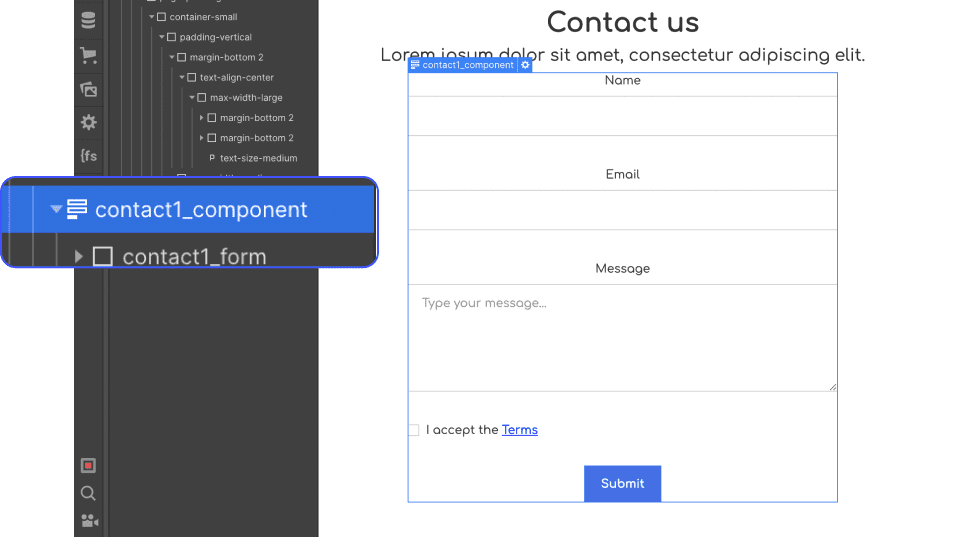
2 - Open the "settings"
Once the parent element of the form is selected, you can open the settings in three different ways:
- By pressing the Enter key
- By clicking on the small ⚙️ icon
- By pressing the D key (keyboard shortcut)

⚠️ To change the name of a specific field (e.g., name, email, phone, etc.), double-click on any element within the form block to open the settings panel for that field. You can also access the settings by selecting an element and pressing the Enter key.
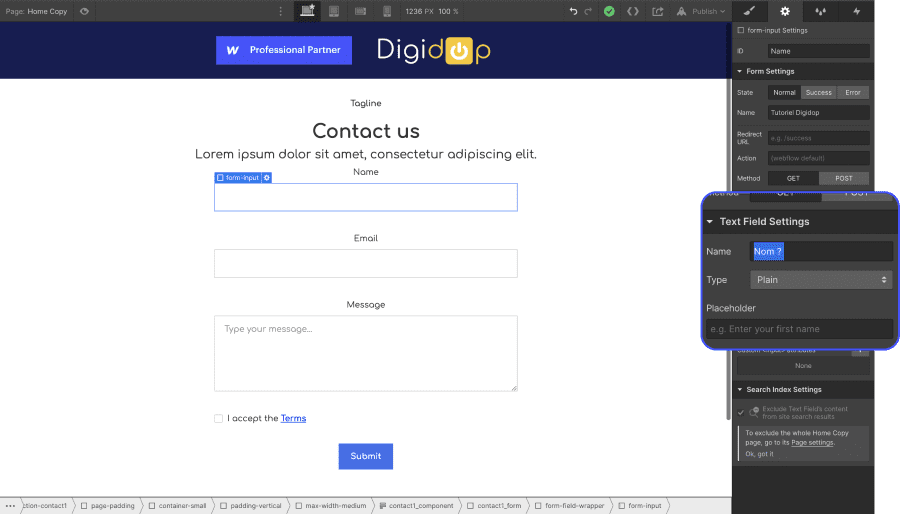
3 - Change the name of your form
In the forms blocks settings → field Name → Write the name of your form here
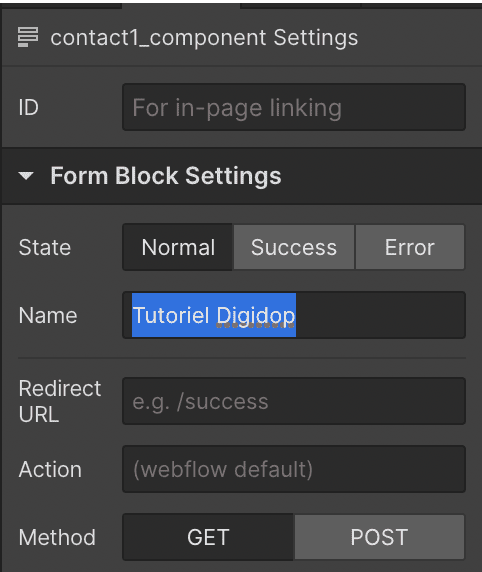
⚠️ Do not confuse this with the ID. The ID serves to name the element for creating links on your site.
4 - Verify the customization
To check that the form name change has been successfully executed, I recommend performing this small test.
- Publish your site
- Fill out and submit the form
- Go to your Webflow project settings → "Forms" tab
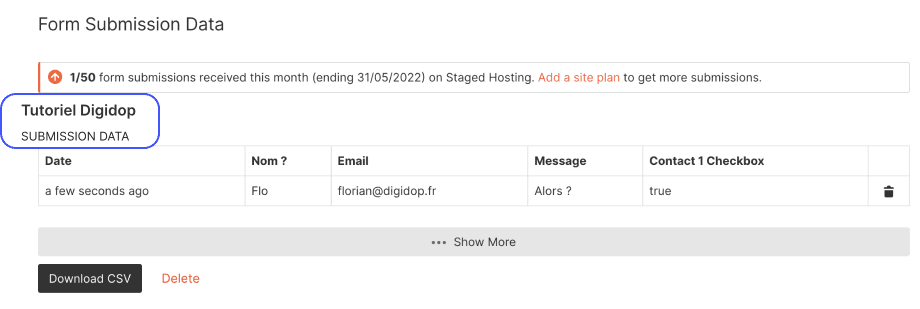
- Section: Form Submission Data
- Check that the form name is indeed customized ✅
Conclusion
And there you go, you now know how to change the name of a Webflow site form. This customization is very useful for keeping a Webflow site well-organized.
Bonus organization tip: you can give the same name to multiple identical forms. This is particularly handy if you, for example, want to create an automation for sending a whitepaper from a pop-up on your website.


.jpg)
.jpg)
