How to create a URL from your Webflow site to host a document? As a Webflow agency, this is a question our clients frequently ask us.
Whether it's PDFs, images, or other types of files, this Webflow tutorial will guide you through a few simple steps.
Why use your Webflow account as a host?
- Ease of access: Once the document is hosted, you can easily share the direct link with others.
- Centralize your resources: Use your Webflow account as the central tool in your tech stack and manage all of your marketing resources from one interface.
- Security: Webflow's security features ensure that your documents, whether images or PDFs, are stored securely.
How to create a URL for a document or image on Webflow?
💡 A secure and centralized hosting solution!
Step 1: Add your document to your asset library

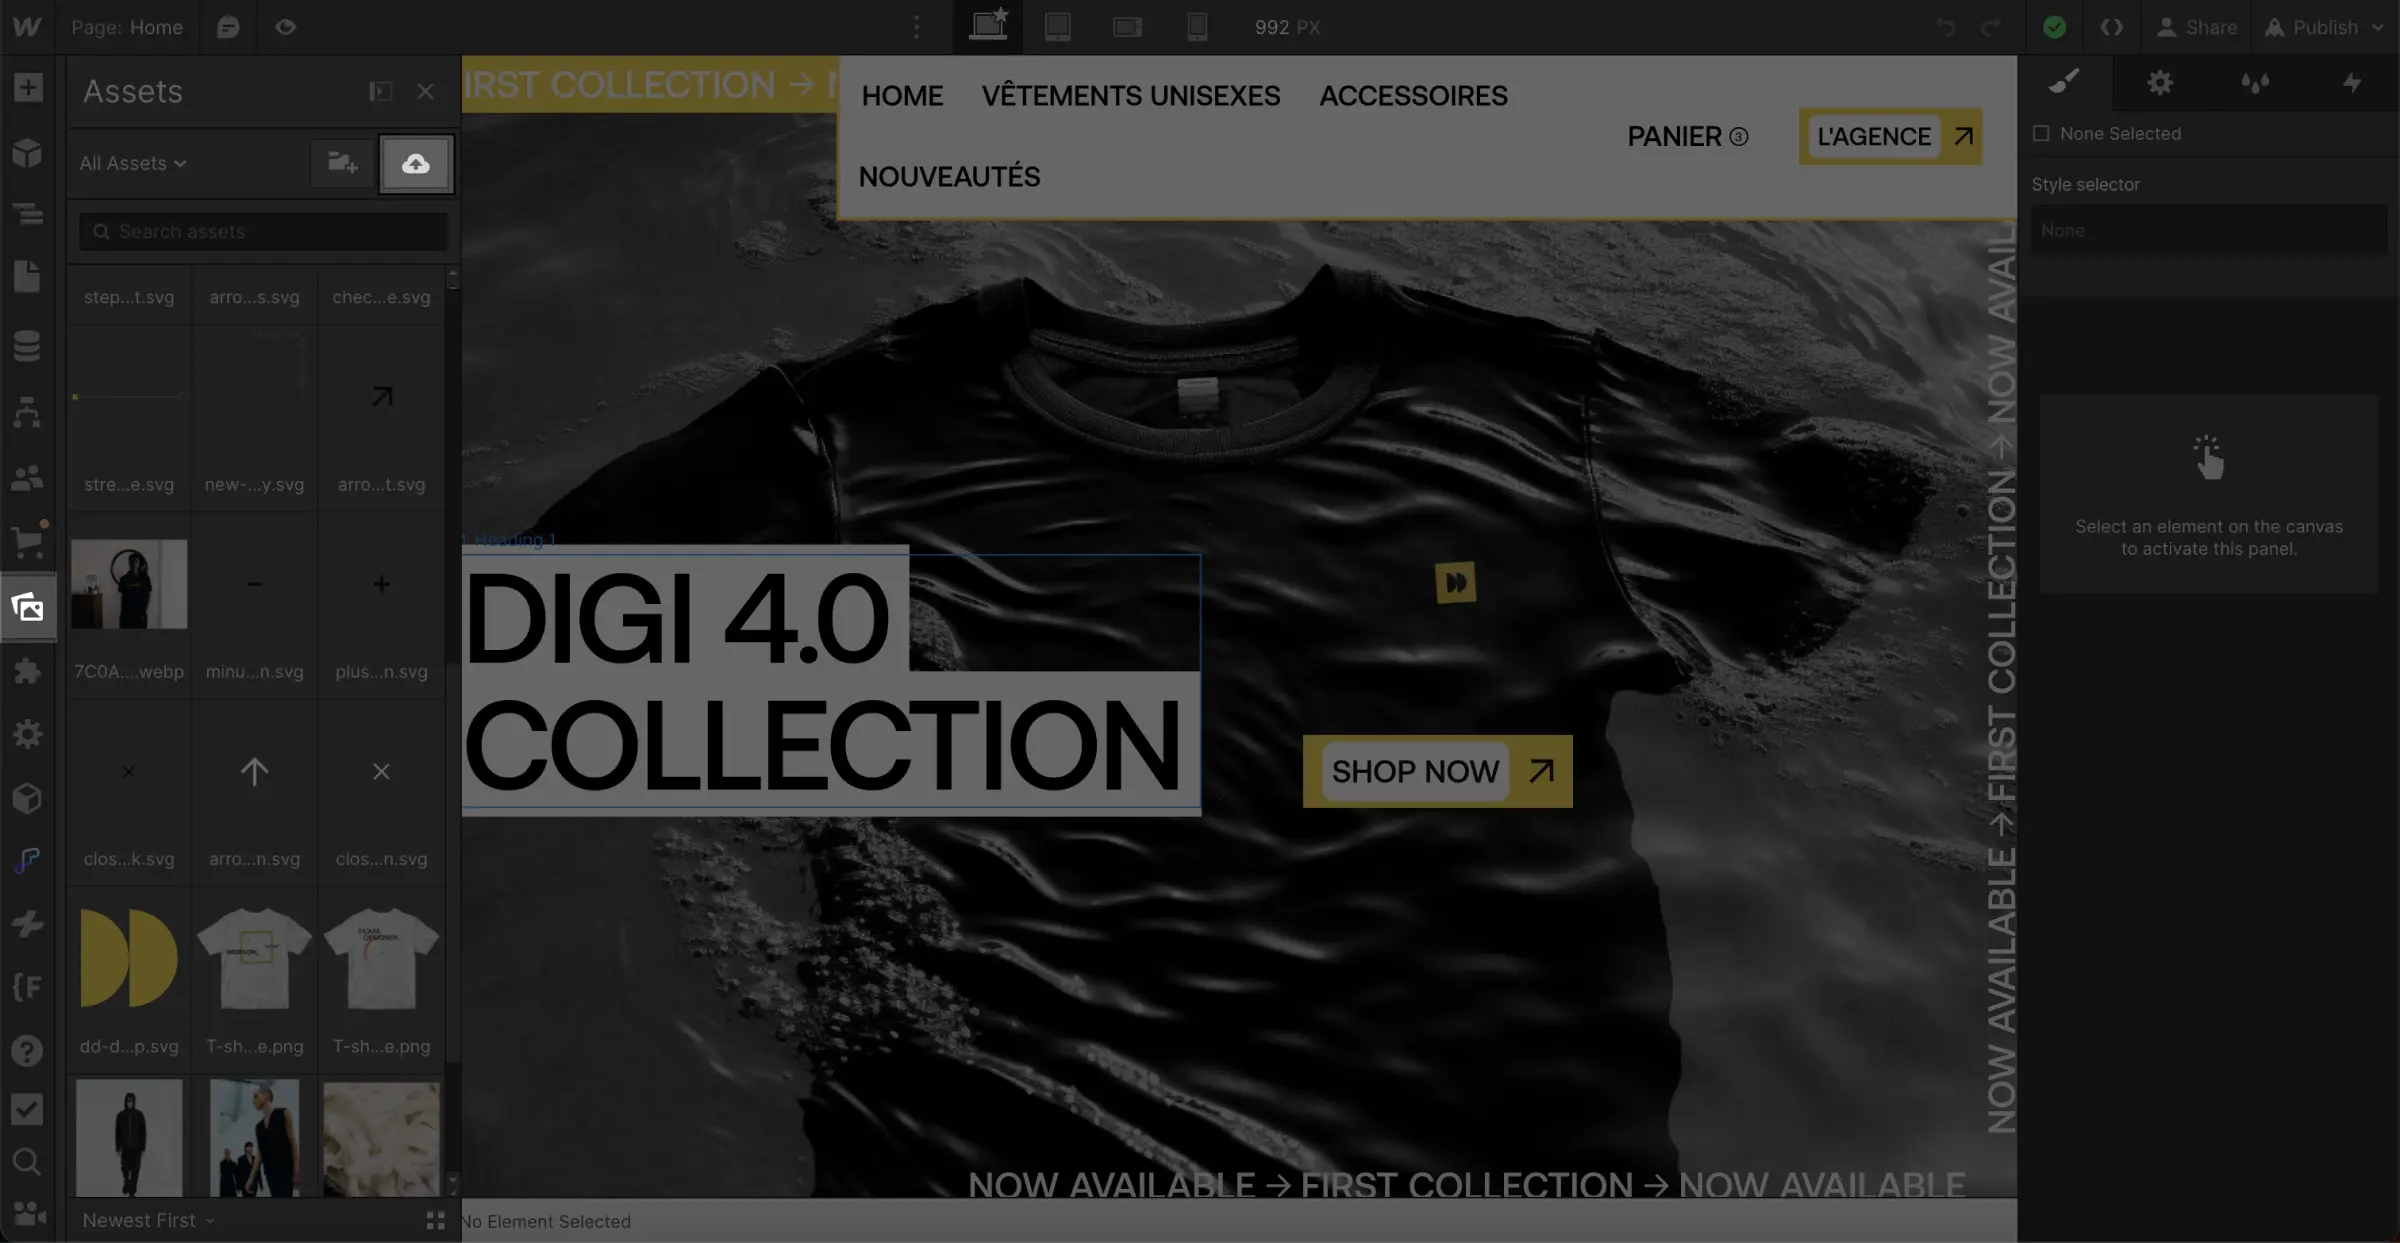
- Log into your Webflow dashboard.
- Select your project and navigate to the "Assets" tab.
- Click on "Upload" and choose the file you want to host.
Step 2: Select the document

- Once the file is uploaded, it will appear in your asset library.
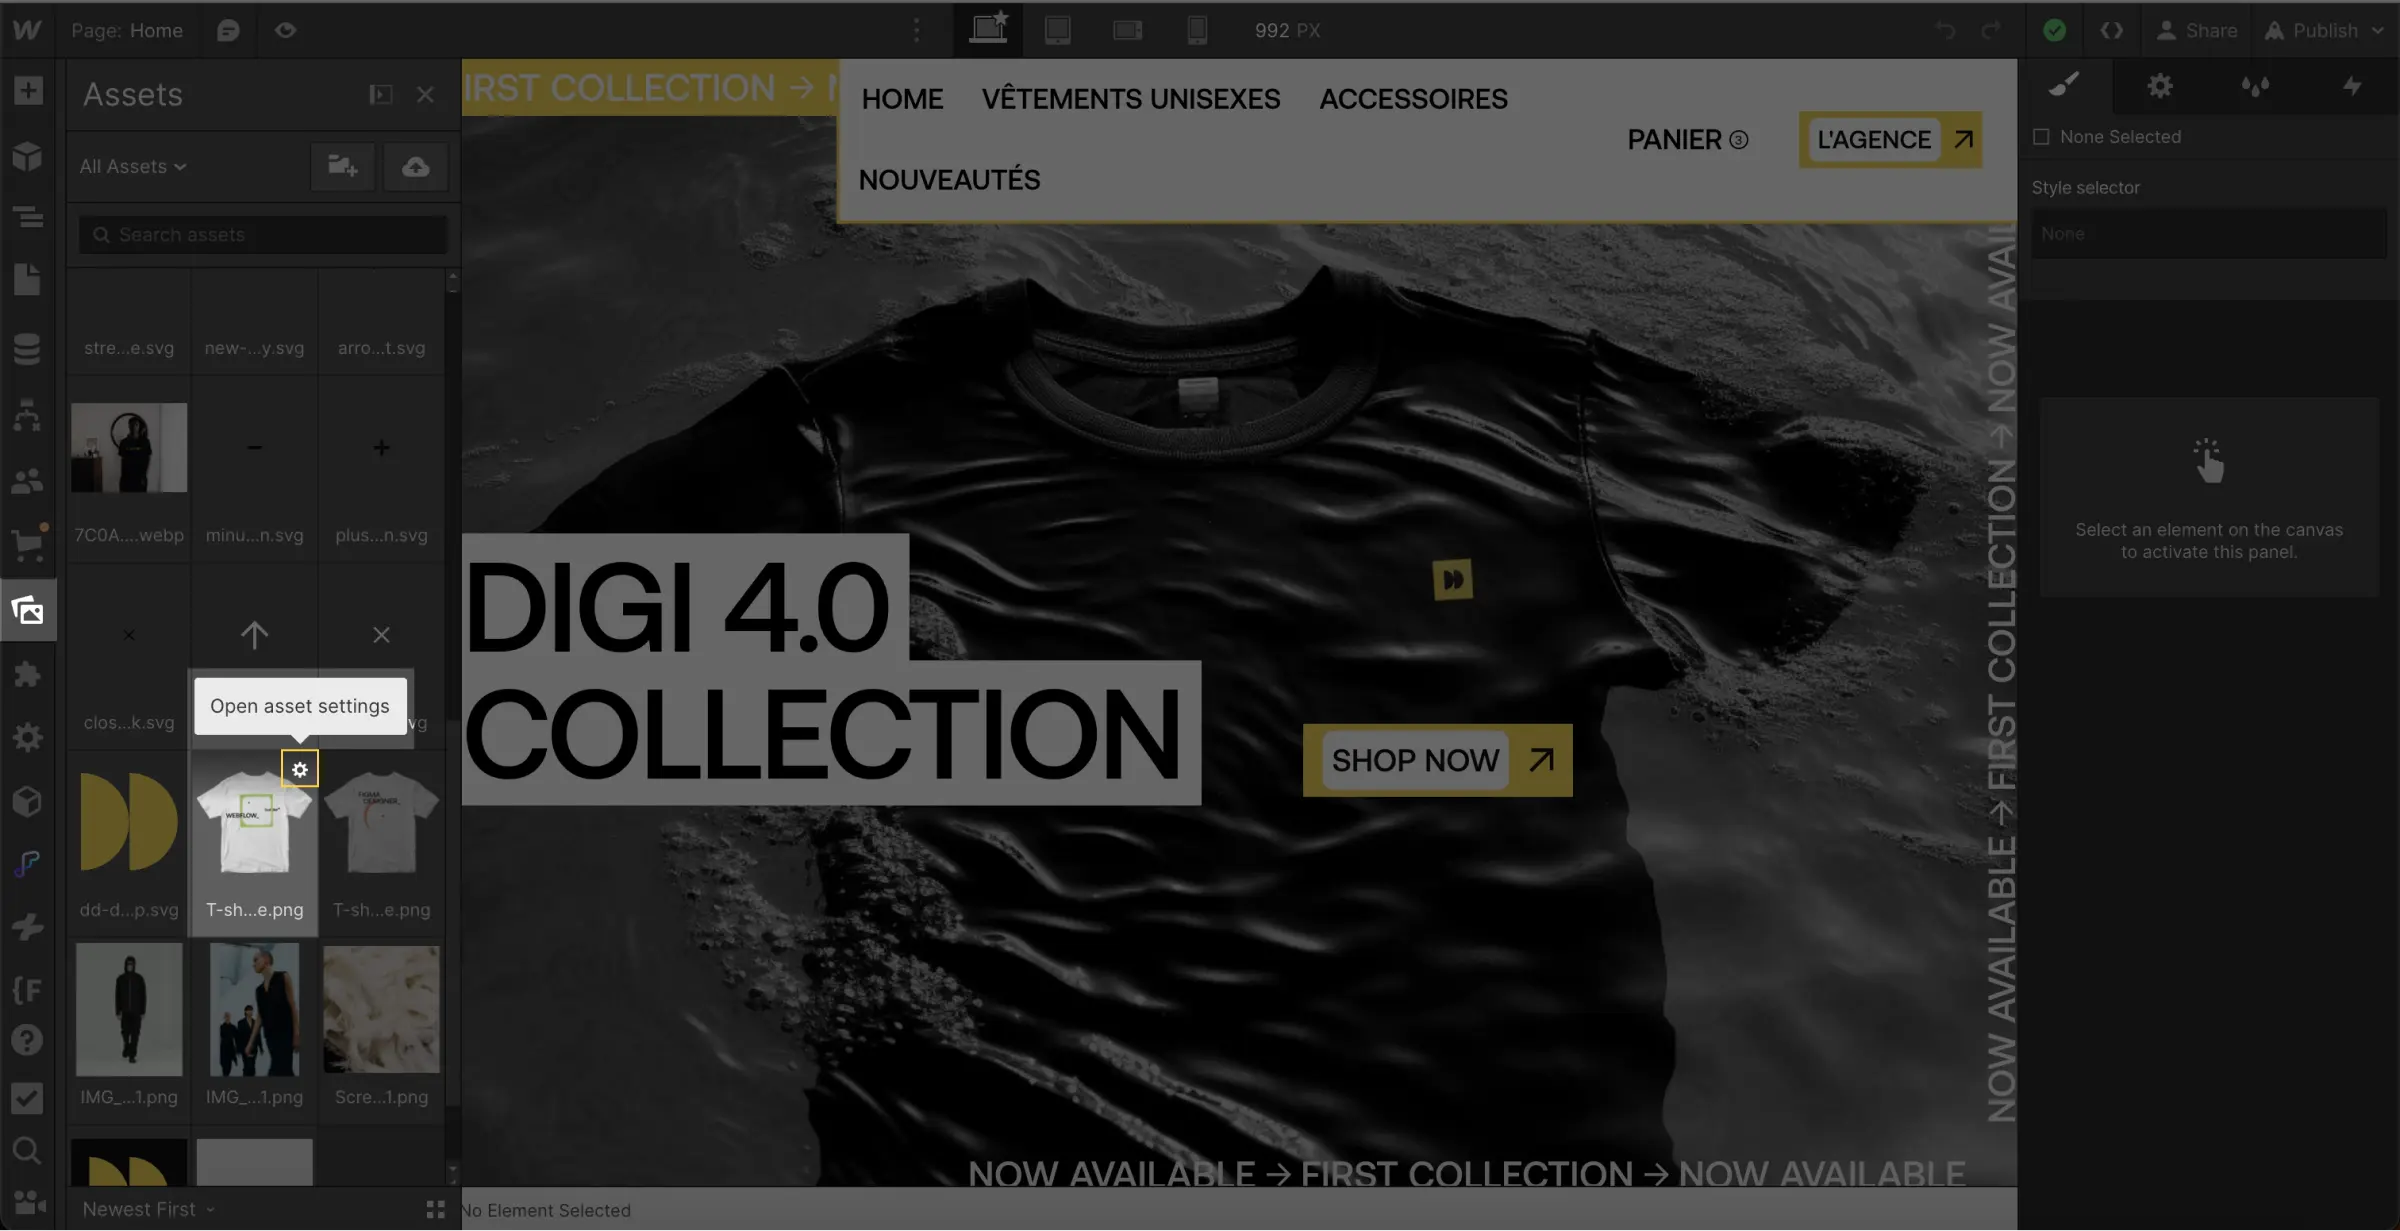
- Click on the ⚙️ icon of the file to select it and open its settings.
Step 3: Copy the URL

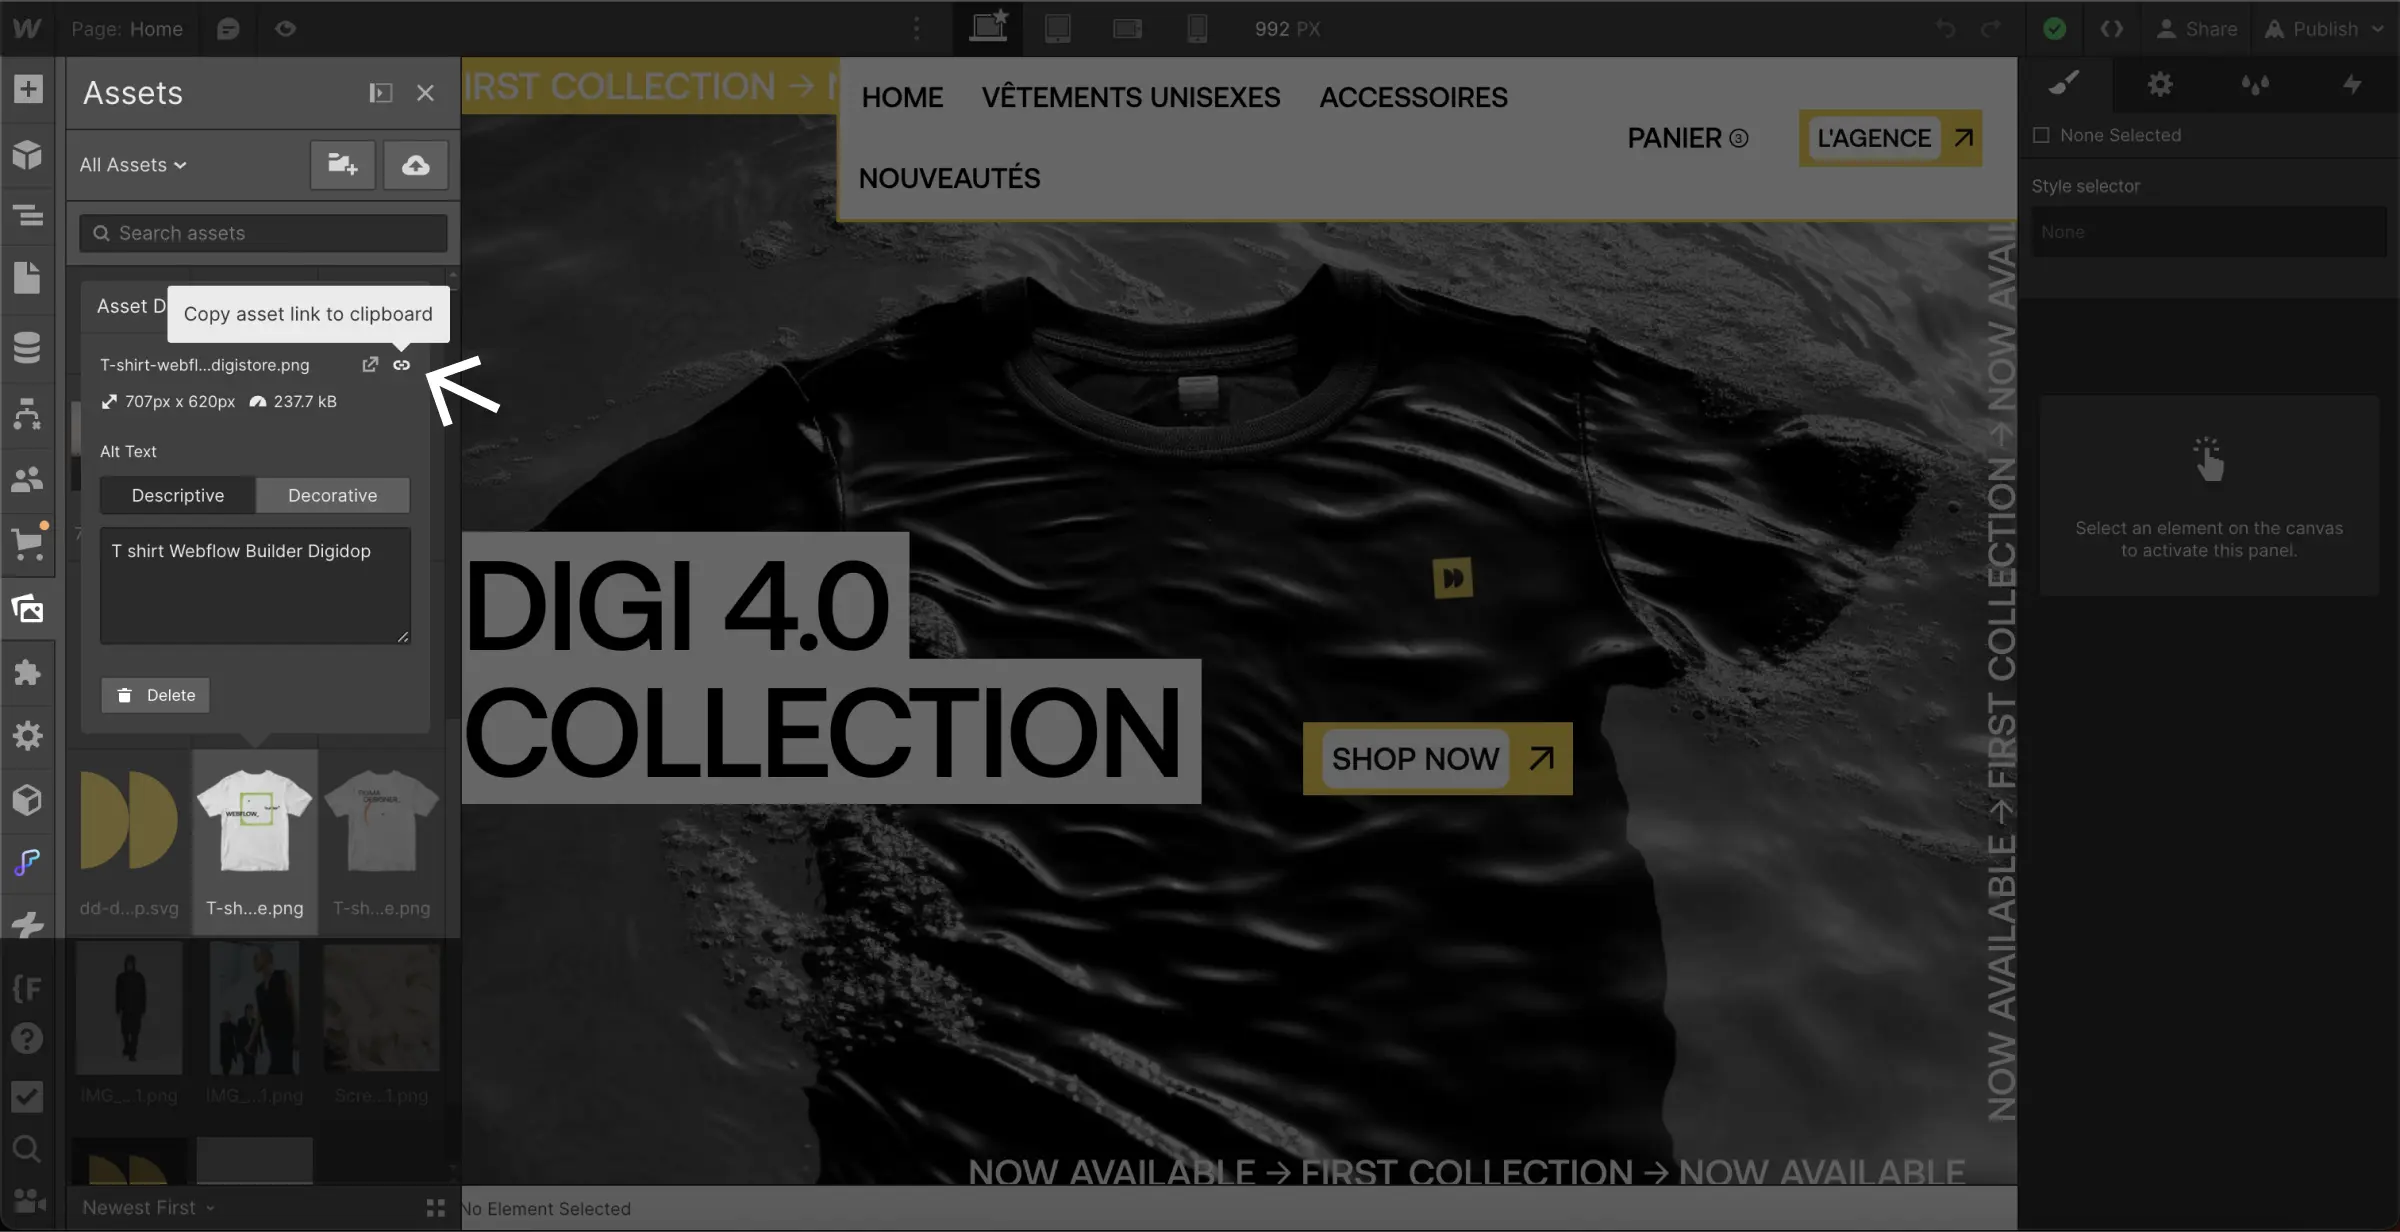
- Then once in the options menu,
- Click on the "Copy URL" option to copy the document's URL to your clipboard.
And there you go! 🎉
→ You now have a unique URL that you can share with anyone.
____________
This quick and simple tutorial has shown you how to host files, such as PDFs and images, directly on your Webflow site. If you found this guide helpful, feel free to share it and if you have...
Want to learn more about using no-code tools?
Explore a variety of free resources on Webflow, web design, and no-code in general at:
- The Digidop Blog (+500 articles)
- The Digidop YouTube Channel (+200 videos in French)
- The Digidop Academy (+5 hours of free training)


.jpg)
