Lightboxes in Webflow are very convenient, but it is "impossible" to customize their designs natively. In this tutorial, discover how to change the default design of a lightbox in Webflow using a bit of CSS code.
For this tutorial, we will modify the overlay used as the background color, changing it from a transparent black to a white background with a blur effect.
Customize a Lightbox in Just a Few Steps
1. Find the class you want to modify
To easily identify the CSS class you want to change;
- Open your lightbox on a published Webflow project (online, even on a webflow.io version)
- Open your browser's "inspect" option (cmd + option + I on Mac)
- Find the name of the targeted CSS class

2. Add an embed code
Add (as high as possible) an Embed Code element in your navigator

3. Define new CSS styles for the targeted Lightbox CSS class
Then, integrate the new styles you want to apply to your lightbox in this embed code for Webflow. For this example, we want to change the background color of the lightbox, so we will modify the values assigned to the CSS class .w-lightbox-backdrop (created by default by Webflow).
Example code:
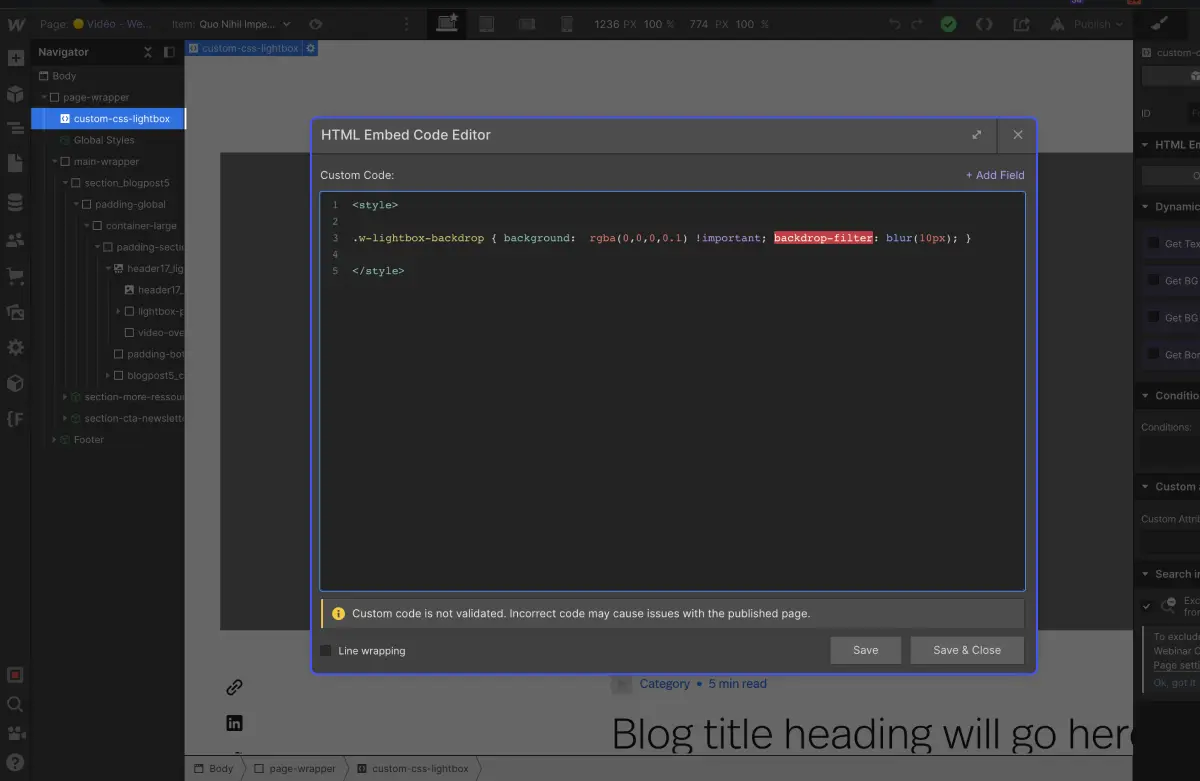
⚠️ To ensure that the values are prioritized and recognized by the browsers, it is important to add the "!important;" declaration at the end of your CSS styles. This "forces" the application of these CSS settings for your Webflow lightbox.


.jpg)
