Today, we will explore how to organize the information architecture of your website. We will see how we can offer a better user experience (UX) through relationships between products and CMS collections.
Indeed, it is important—if not crucial—for an e-commerce site to organize the many products it contains. To organize the information, you can add tags to your products. This way, users will be able to navigate your online catalog more easily and quickly.
This navigation format is called "Breadcrumb." It refers to the Greek mythology where Ariadne (daughter of Minos, king of Crete) gave Theseus (her lover) a ball of thread to help him find his way in the labyrinth that housed the Minotaur.
Today, we use this expression to denote a guiding path. On a website, the breadcrumb serves as a visual aid to help users understand which page they are on. It is a navigation system that allows for the identification of a site's structure.

Before we start, you need to have a clear vision of your e-commerce site's architecture. You can visually set up this e-commerce architecture using Miro. Once you know how to link your categories, subcategories, and products, you can head over to Webflow.
Step 1: Access Your Project
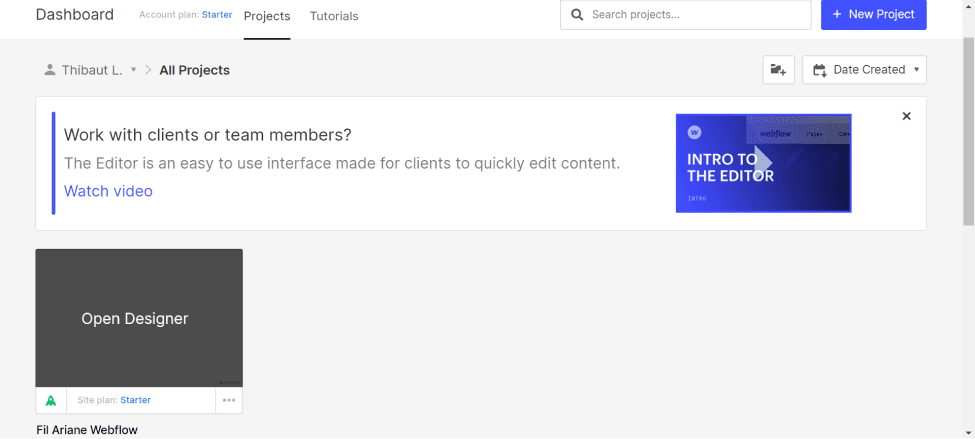
Go to Webflow and access your online store project.
Step 2: Create Your Categories and Subcategories
For this second step, navigate to the "CMS Collection" section.
Then, you will create a new collection that you will name "Category," for example.
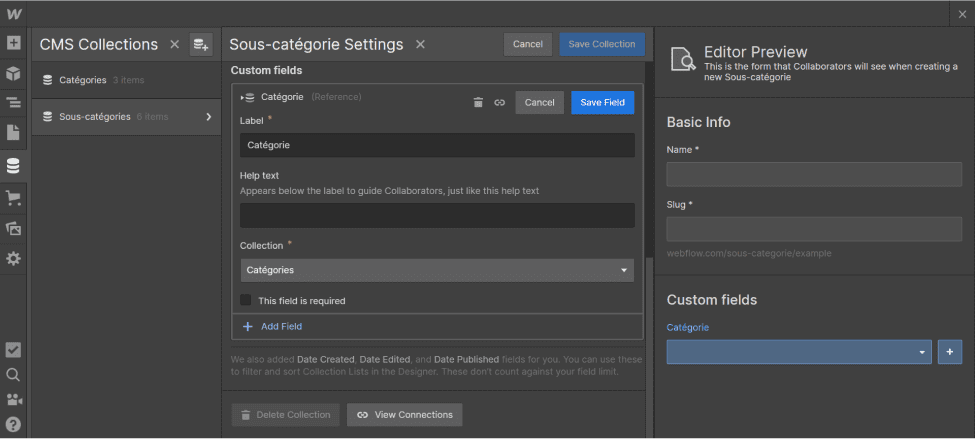
Do the same for subcategories, with the only difference being that you will need to add a custom field “Reference”: Name it “Category” (if you previously named the collection “Category”) and select the collection you created earlier (In our example: “Category”).
Step 3: Your Product Settings
In your product settings, you will add 2 new custom fields “Reference.” The first will be for your “Category” collection, and the second for your “Subcategory” collection. Be sure to check the box “This field is required.”

Step 4: Add Categories and Subcategories to Your Products
In the Ecommerce - Products page, edit your products to add the categories and subcategories you previously defined in Webflow's CMS section. Since the custom fields are “Reference” and not “Multi-Reference,” each product belongs to 1 category and 1 subcategory. However, in Ecommerce - Categories, you can insert categories and assign them to several products to showcase similar items on your pages.

Step 5: Formatting the Breadcrumb on the “Products Templates” page
You will need to create a Flexbox with 4 links separated by a symbol (In our example, we opted for the symbol “>”).
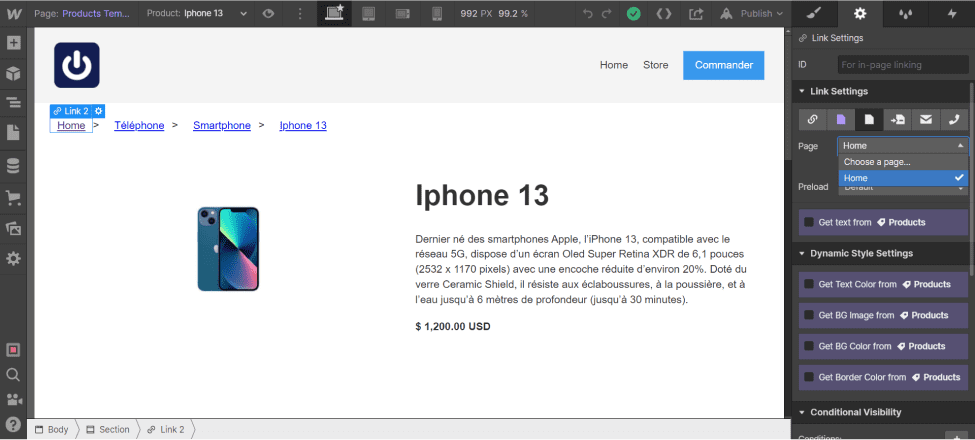
You can rename the first link “Home,” “Store,” or any name you prefer (This will be the link that redirects to your homepage). Then go to the “Links settings,” select “Page,” and choose the “Home” page.
For the second link, still in the “Links Settings,” you will select not “Page,” but “Collections Page.” Then, select “Category” (or the name of your first collection) in “References.” Finally, in “Get text from,” scroll down to “Custom Fields,” and select “Name” from “Category.”
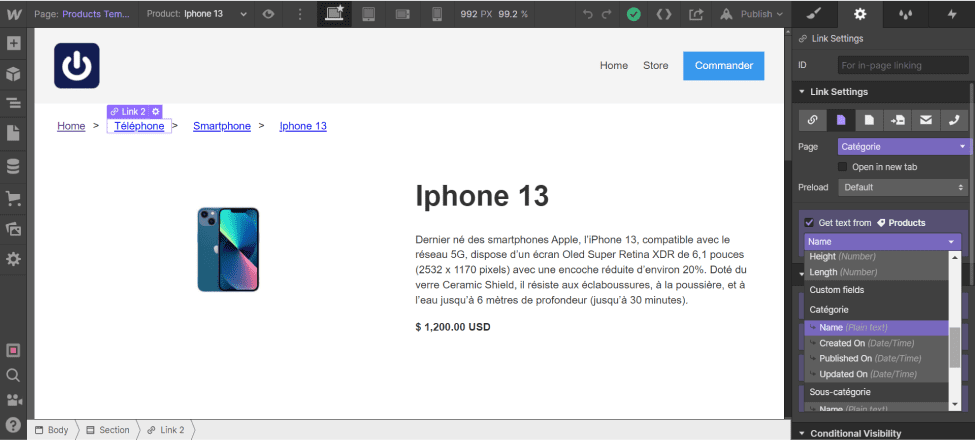
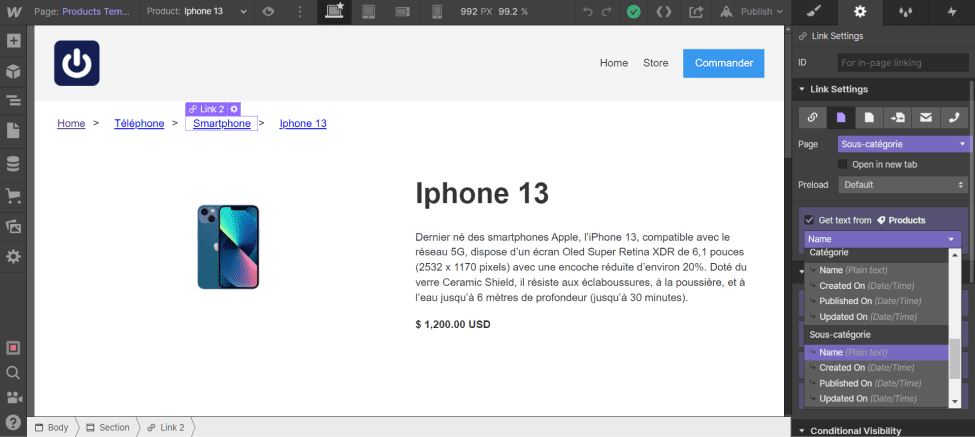
For the third link, repeat the same process, but for the “Subcategories.”
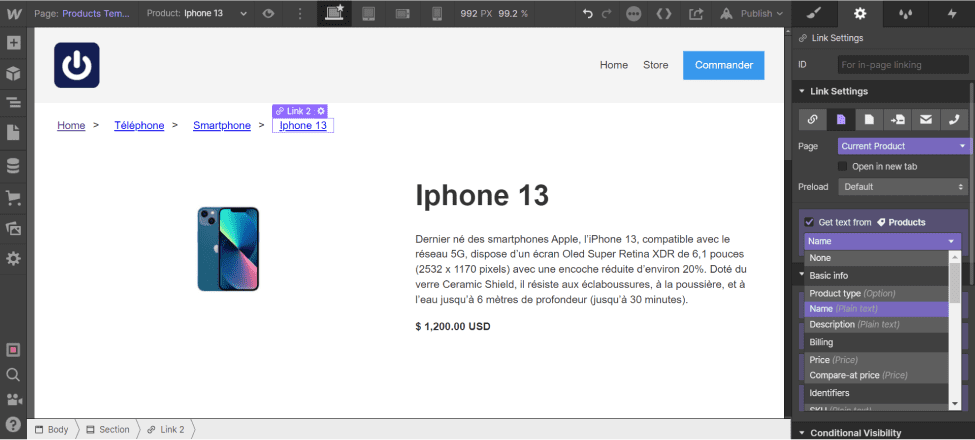
Finally, for the last link, select in “Page Collection,” “Current Product.” And in “Get text from,” choose “Name” from “Basic Info.”
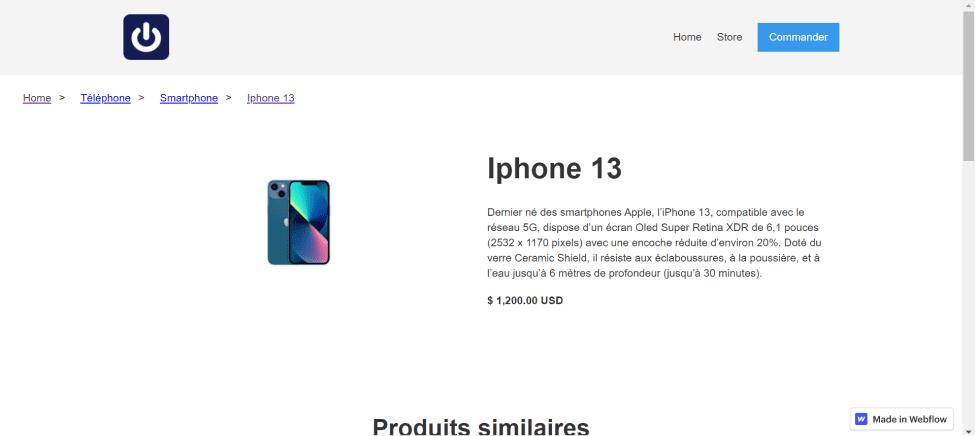
Here's a preview once the modifications are published in our example:
Step 6: Repeat the Process for Your Various Pages
Now, you can reuse the same process for your different dynamic pages: Category Templates, Subcategory Template (Note: for categories, there will only be 2 levels, and 3 for subcategories). Similarly, you can repeat the operation for your static pages.
Bonus: Use Structured Data for Your SEO
To go further and to comply with SEO best practices, you can add structured data dedicated to the breadcrumb on your site. This will take the form of a JSON-LD code within an HTML Script tag. You can reflect your site's architecture (Category - Subcategory - Products) along with their positions.
For more information, you can check out the article from Google Search Central on breadcrumbs. Otherwise, Digidop can also assist you with your Webflow projects while adhering to SEO best practices.


.webp)


.jpg)
