Introduction
A few days ago, we discussed GSAP: a JavaScript library that allows you to create advanced animations.
Although Webflow's native animations allow for a lot without needing to touch a single line of code, GSAP offers almost limitless power and flexibility for your animations. Even if using a library like GSAP may seem a bit intimidating, it is actually not as complex as you might think!
In this practical introduction to GSAP, we'll explore how to take the animations of your Webflow projects to the next level. Let’s get started!
GSAP vs Webflow Interactions
But first, why use GSAP when you already have Webflow interactions natively integrated within the Designer? Let’s summarize the advantages and disadvantages mentioned in Florian's article:
The Advantages of GSAP:
- Performance:
GSAP is renowned for its outstanding performance. If you're working on an animation-heavy website, using GSAP instead of Webflow Interactions will provide you with a significant performance boost. - Power:
GSAP allows you to animate nearly anything in almost any way. If you need to animate specific properties that may not be available in Webflow Interactions, you’ll find what you need with GSAP. - Flexibility:
GSAP also offers great flexibility. If you want more control over the timeline of your animations or need to target elements in a more flexible manner (such as using attributes), you can.
The Drawbacks of GSAP
- Learning Curve:
The primary limitation of GSAP is its learning curve and the requirement to code your animations manually. However, as mentioned in the introduction, GSAP is likely less complex than you might imagine, especially if you're already accustomed to manipulating some JavaScript.
In summary, if you're looking for more powerful, customizable animations, GSAP is a no-brainer. On the other hand, if you only need simple, small animations without diving into code, you might prefer the Webflow interactions.
Now that we've covered that, let’s get hands-on. In the next section, we’ll review the anatomy of a GSAP animation to understand the basic workings of the library.
The Basic Anatomy of a GSAP Animation
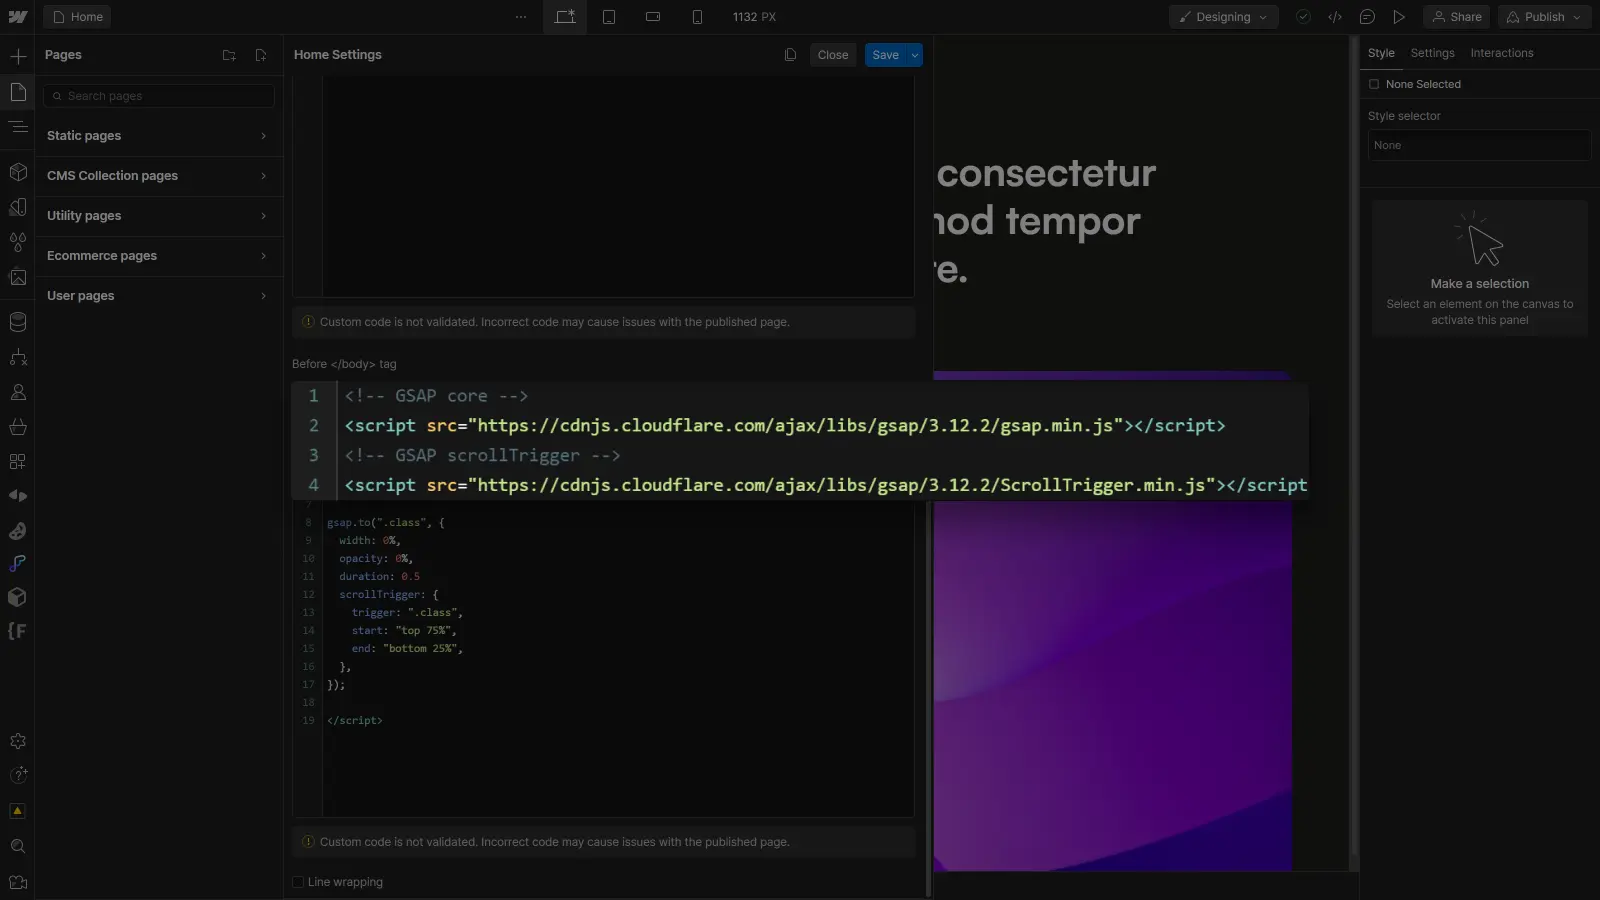
Now that we’ve explored the benefits of the library, let’s dive into the essence of GSAP: its code. First, to integrate GSAP code into a Webflow project, you’ll need to import the library in the footer's custom code:
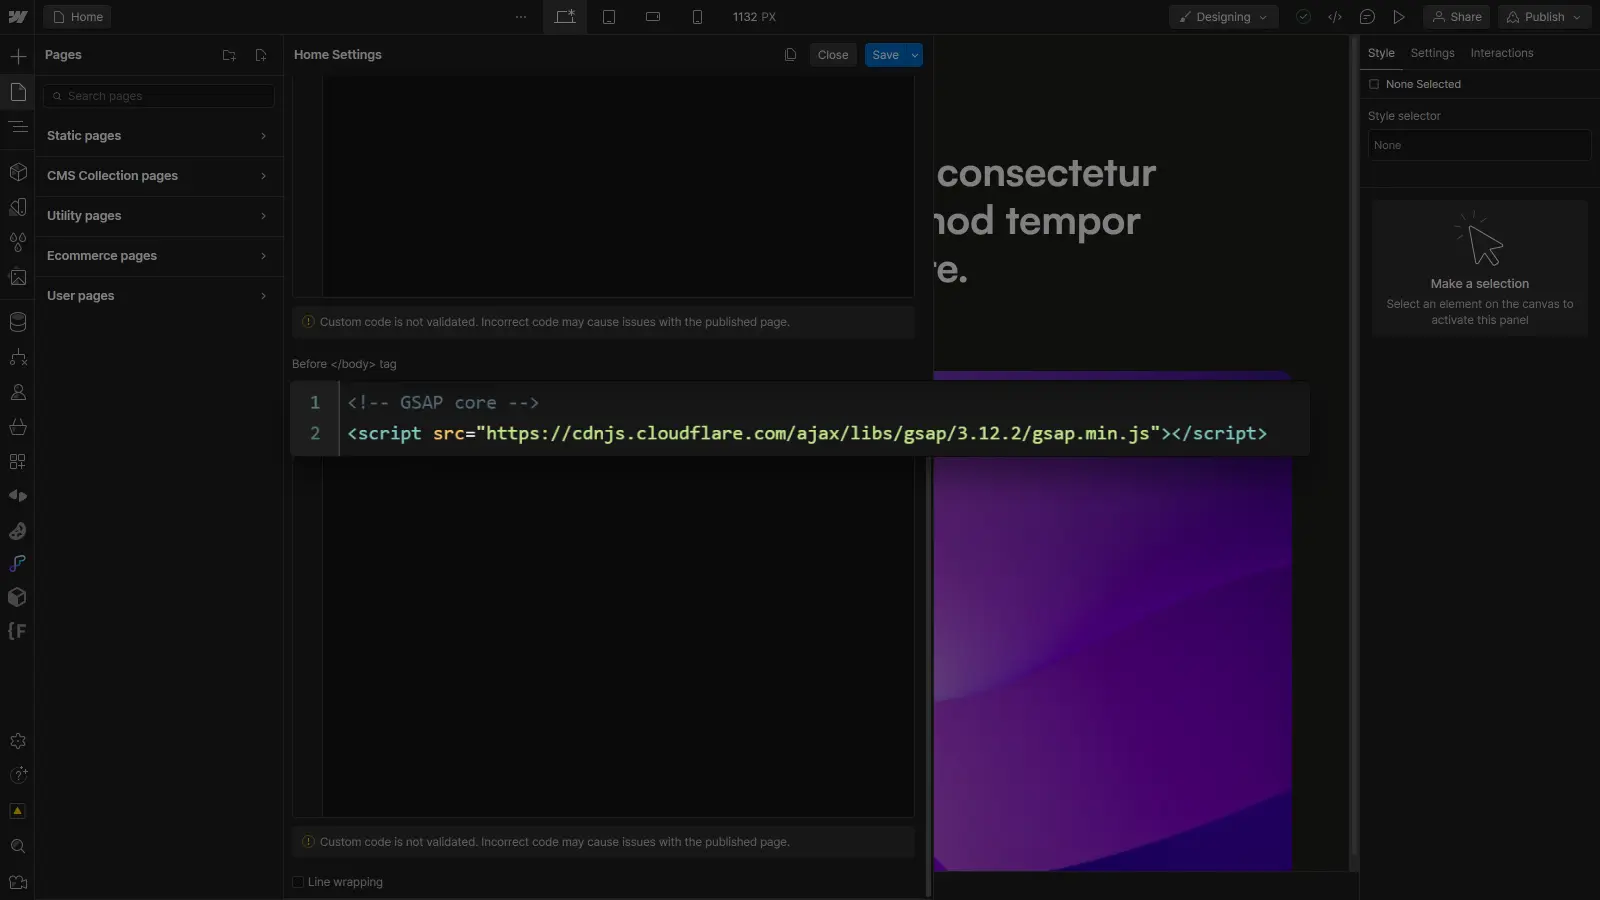
Once the library is added, you can then insert GSAP code in the custom footer code of your page (or site).
For a basic animation with GSAP (referred to as a tween), here’s how the code looks.
Not very complicated, is it? Let’s break it down:
Part 1: Indicate the Method (“gsap.to”)
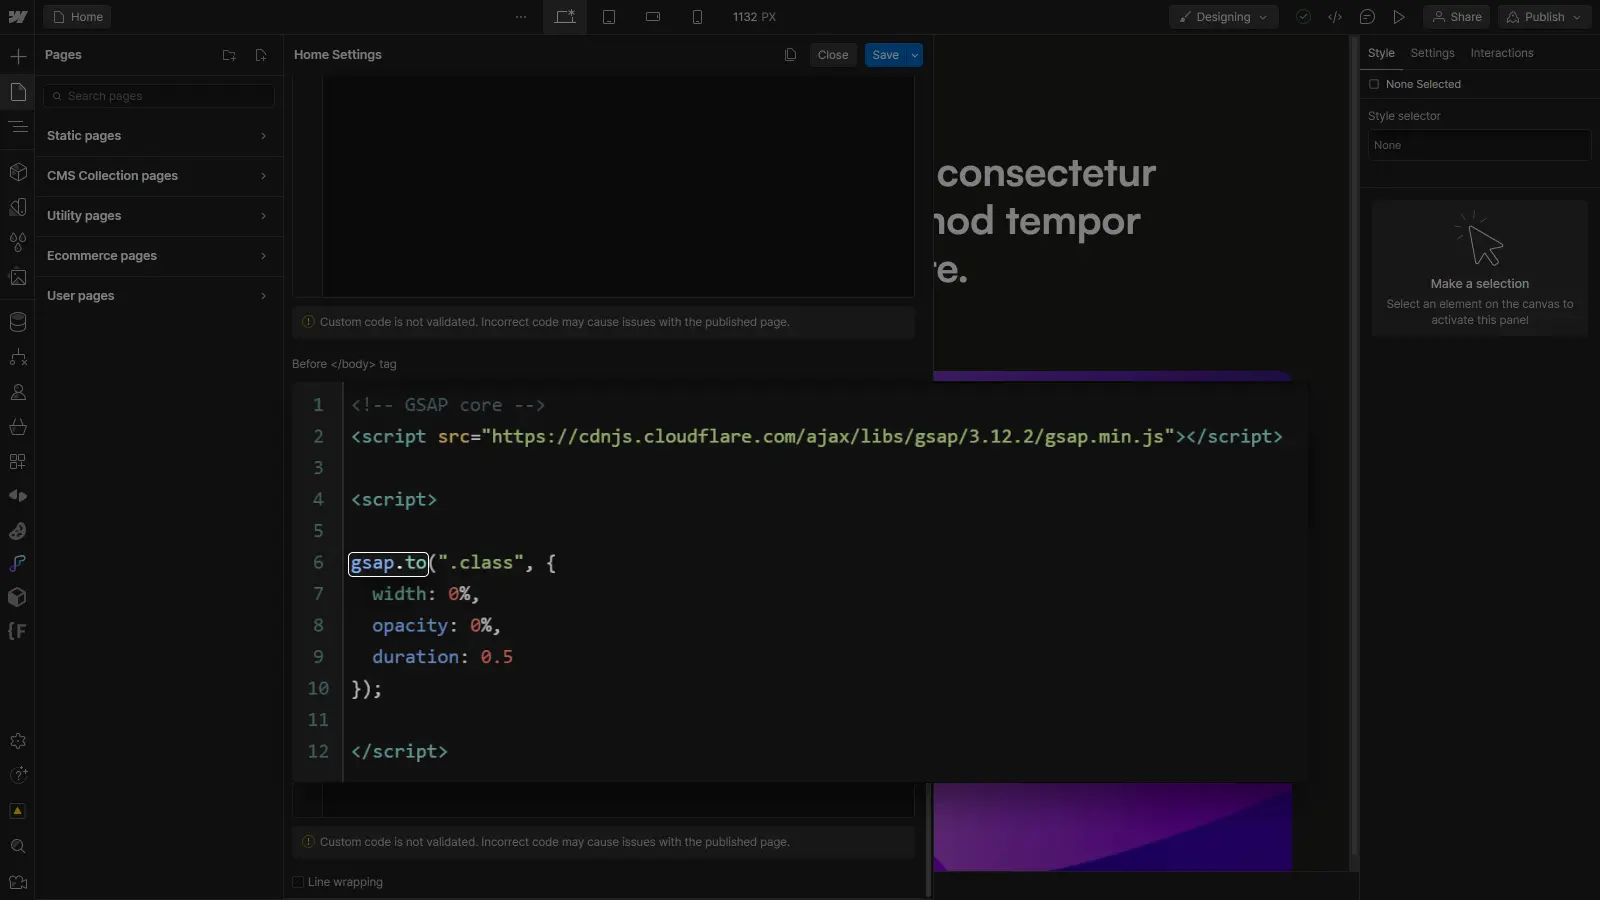
By using “gsap.to”, we animate the element from its default state (set in the Webflow Designer) to the state specified in the animation parameters.
If we had used “gsap.from”, we would have animated the element from the specified state in the animation parameters to its default state.
Part 2: Specify the Target (”.class”)
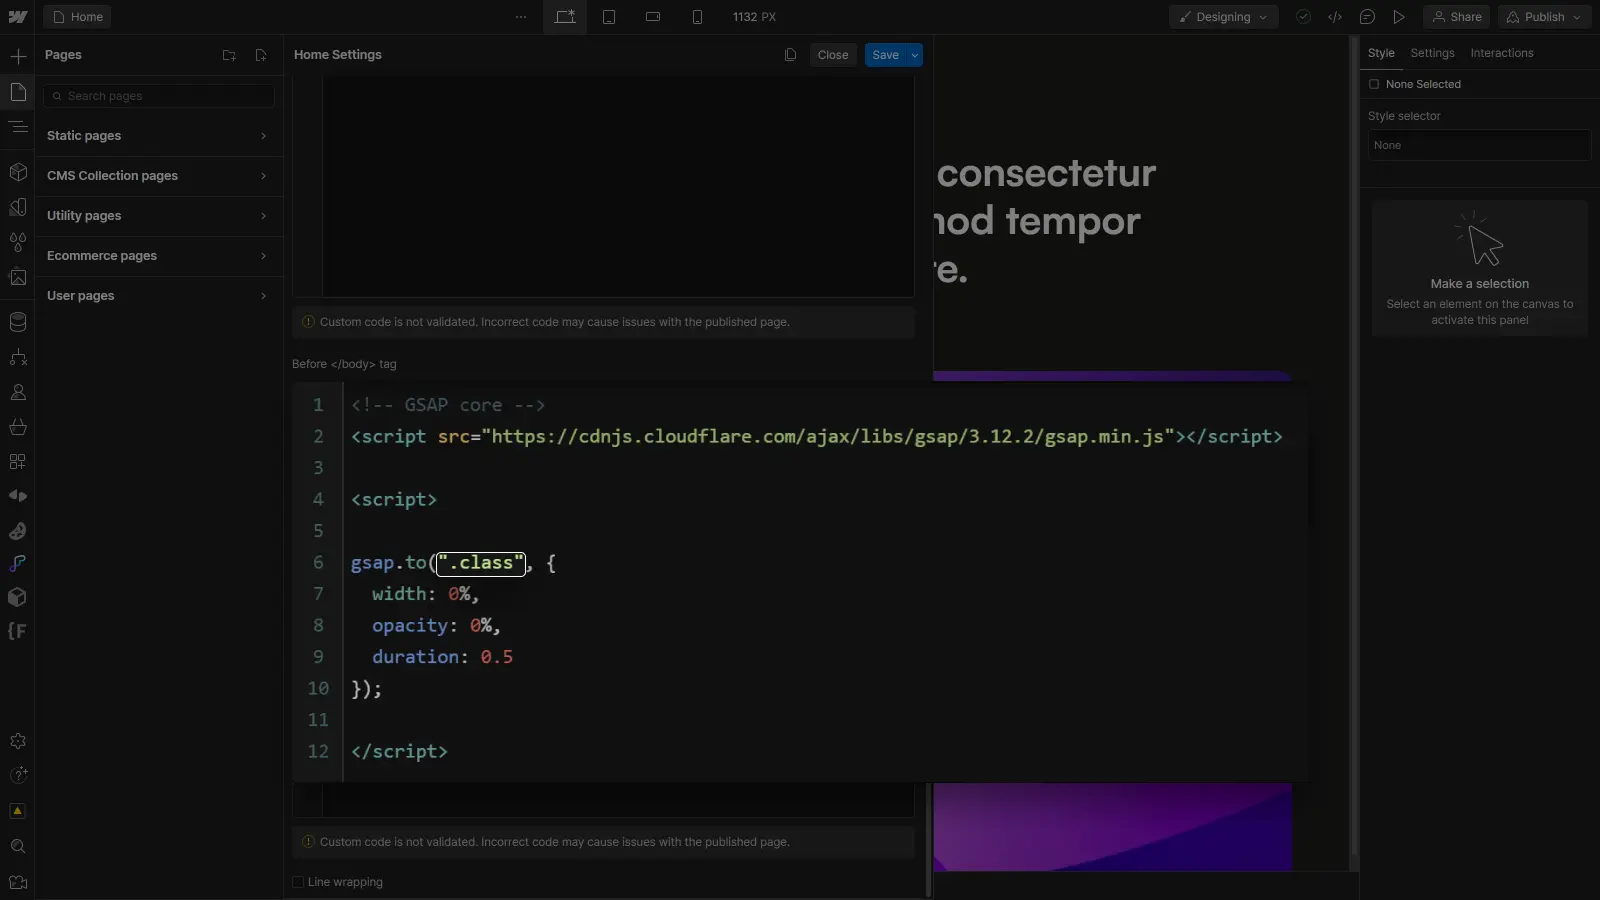
In this example, we are targeting a CSS class (”.class”), but we could just as easily target an ID (”#my-element”) or an attribute (”[my-attribute]”).
Part 3: Indicate the Properties to be Animated and their Target Values
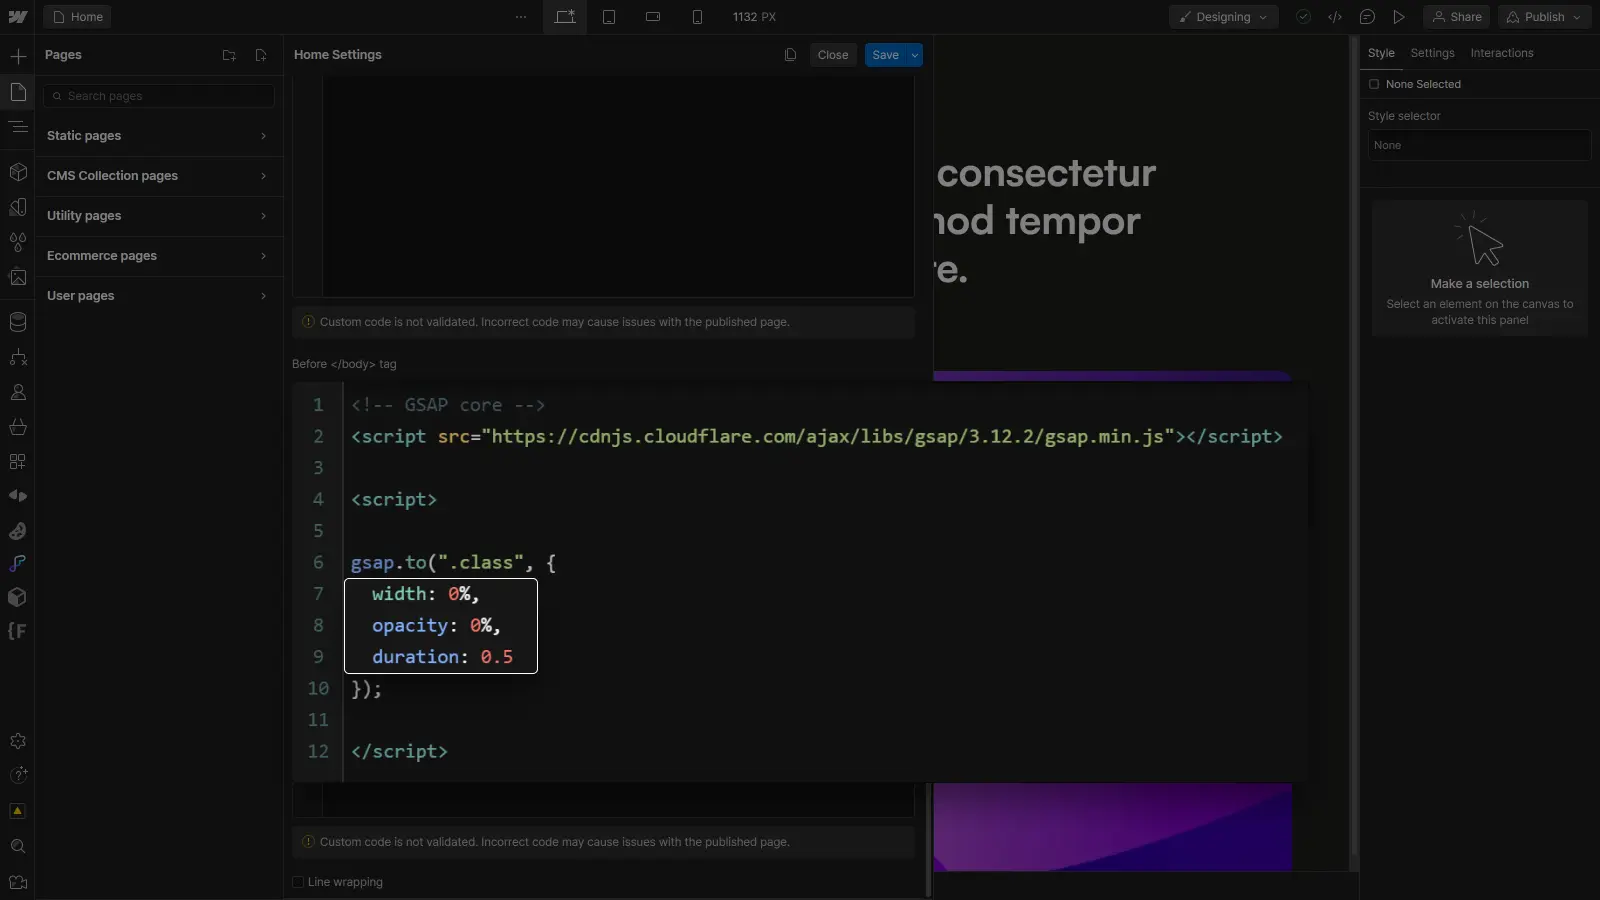
In this example, we animate the element from its initial state to a width and opacity of 0% over a duration of 0.5 seconds.
The basic anatomy of a tween is not more complex than that, but we can then enrich this basic structure by adding additional properties/options, advanced plugins, or by incorporating multiple tweens into a timeline, depending on the needs of the animation we want to recreate.
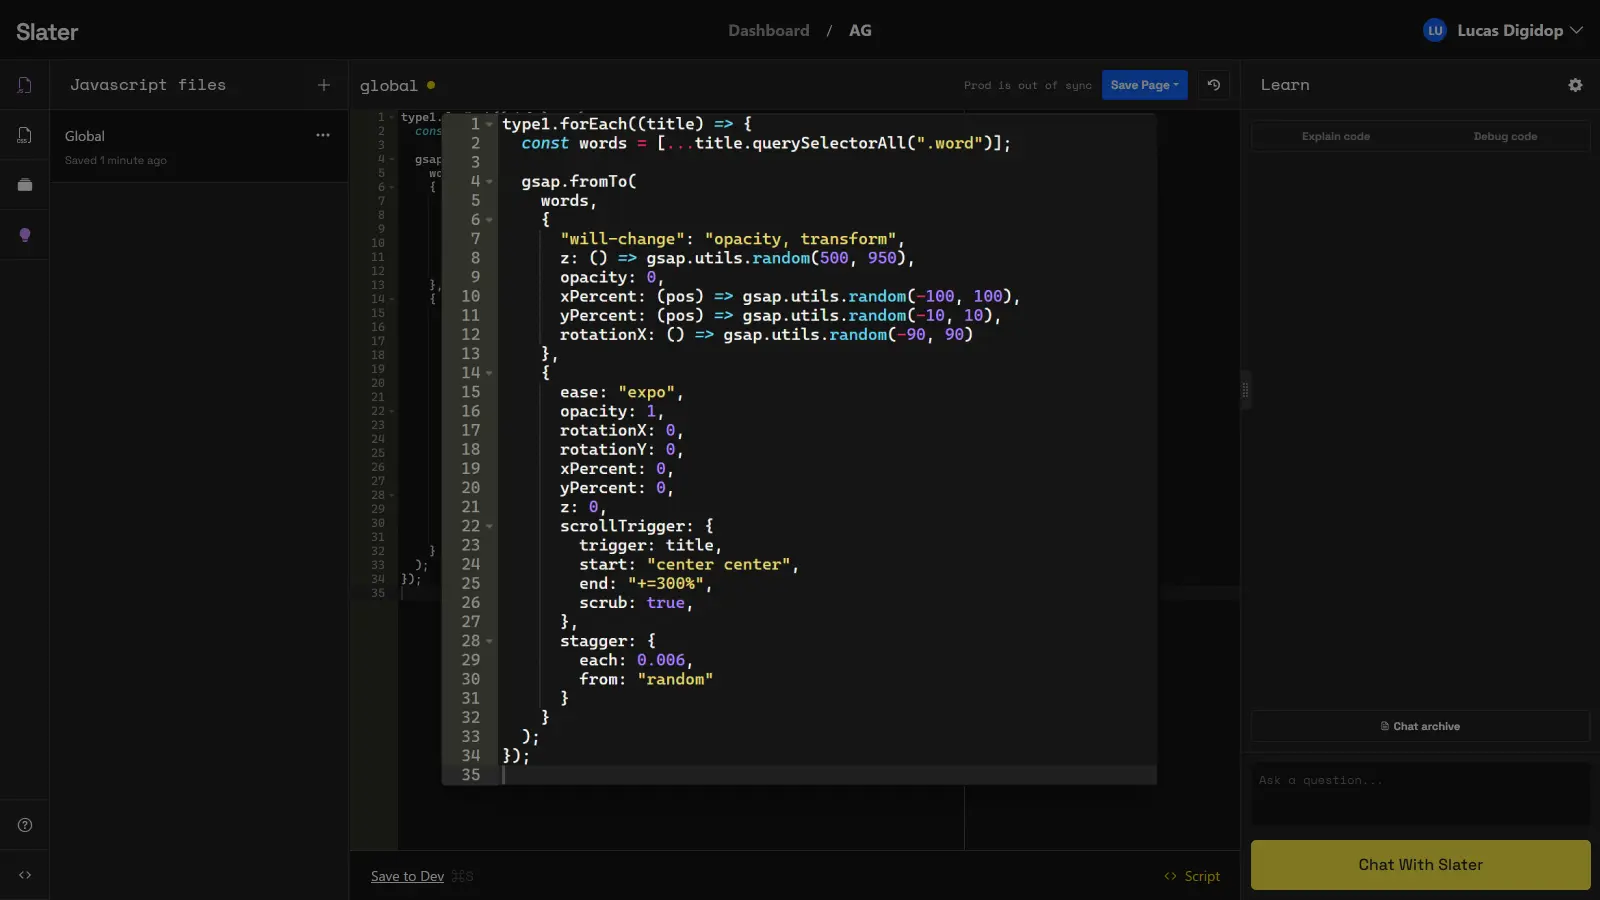
Timelines in GSAP allow you to group multiple animations (tweens) to create a more complex, organized, and structured set:
And with a simple line of code, we've animated our element! Often, this single line of code will not be sufficient. As it stands, the animation will occur just once, immediately when the page loads.
But now that our animation is created, we can make it trigger at the right moment (rather than directly when the page loads).
Creating Triggers for Animations
Now that our animation is created, we can make it responsive by wrapping it in JavaScript functions that will execute based on user actions (such as a click or hover on an element).
Triggering an Animation on Click of an Element
To trigger an animation on click of a button, for example, we can wrap our animation in a click event listener:
In this example, the animation will trigger when clicking on an element with the class “.trigger”.
Triggering an Animation on Hover of an Element
To trigger an animation on hover of a section, for example, we can wrap our animation in a hover event listener:
In this example, the animation will trigger when hovering over an element with the class “.trigger”.
Triggering an Animation on Scroll When an Element Enters the Viewport
Finally, a very useful feature of GSAP is the ability to trigger an animation when an element enters the viewport (equivalent to the "Scrolls into view" interaction in Webflow).
For this type of trigger, GSAP offers the ScrollTrigger plugin (which you may have heard of) that allows you to configure the animation trigger directly within a tween:
Important: For the plugin to work, don’t forget to import it after the core GSAP library:
Conclusion
In conclusion, GSAP is an excellent tool for creating powerful, efficient, and flexible animations for your Webflow projects. Additionally, the tool is more intimidating than complex. The learning curve is, of course, higher than a no-code/low-code solution, but the reward is worth the effort.
Once again, if GSAP interests you and you want to go further, here are some resources we recommend:
- GSAP Documentation - a great resource to discover all of GSAP's options,
- Free GSAP Course - follow this for a visual learning experience,
- Finsweet’s Video on GSAP - watch this for a longer and more visual introduction,
- Timothy Ricks' Videos - great for seeing generally advanced use cases,
- Digidop's YouTube Channel - follow for upcoming GSAP content!
Otherwise, we’ll see you in the next Digidop YouTube videos for more content on creating GSAP animations with Webflow!


.jpg)
