Here's how to create a native Instagram slider in Webflow. In this tutorial, we will show you how to automate the publication of all your Instagram posts on your website. We will use the no-code automation tool Integromat for this.
Step 1: Create an Instagram Collection in Webflow
To start, you will need to create a new Webflow collection dedicated to your Instagram posts. To do this, log into your project's designer mode.
- From your collections, click on the “Create New Collection” icon

- Give a name and a URL to your collection. For example, “Instagram”
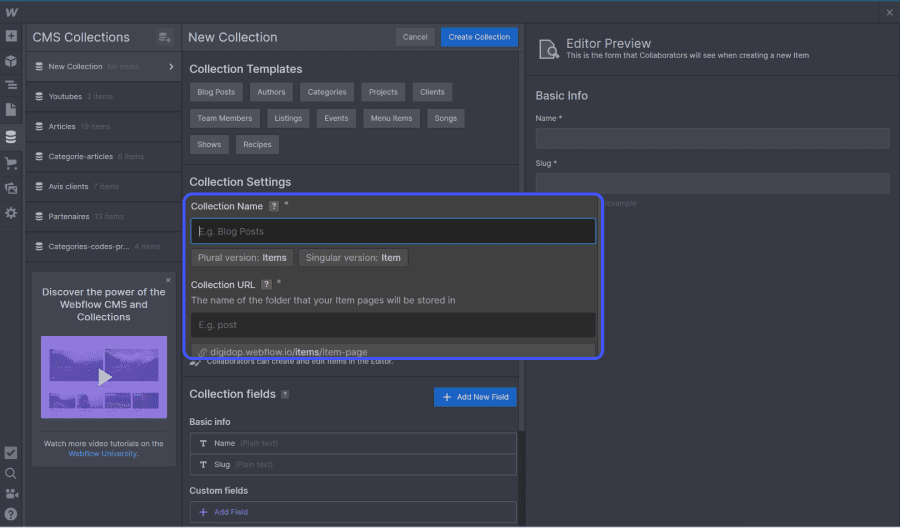
- Add custom fields
Plain text: for the Instagram description
Image: for the Instagram photo
Link: for the link to your Instagram post
Plain text : for the Alt tag of the image (which will not be automated)

Step 2: Create an Instagram Slider in Webflow
We developed the Instagram slider using the Client First method, which you can download for free from the Webflow Showcase Digidop.
Link to the feed to clone.
- Clone the project
- Copy/paste it into your designer
- Connect it to your CMS collection
- Integrate the Finsweet Slider Attributes code in the <Head> section of your page
- Check that the attributes are properly placed on the slider
- Publish!
Step 3: Automate Instagram and Webflow with Integromat
This step will allow you to automate the creation of new items in your Instagram collection and publish them live on your site. To automate your Instagram slider, we will use the no-code automation tool Integromat.
1. Connect Instagram and Integromat
Add a new Instagram module as a trigger. You will have the option to choose either the default Instagram module or the Business module, which allows you to automate your Instagram pages. In this example, we will use the “Instagram for Business” module. Then select the “Watch Media” trigger. This trigger will fetch data from your Instagram posts at defined time intervals.
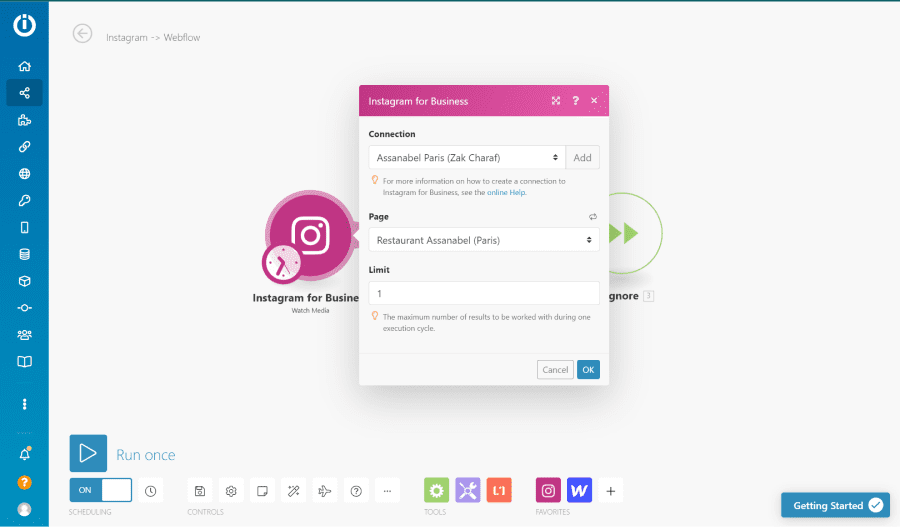
Here's how to set up your Instagram module step by step:
- Connection : click on “Add” to create a new connection. Enter your login credentials to allow Integromat to access your Instagram data.
- Page : Select the Instagram page you want to connect to your Webflow site
- Limit : Indicate the maximum number of results that the Instagram module will fetch at each time interval. This means the number of
Tips💡You can set custom time intervals by clicking on the trigger's clock icon.
2. Add a Webflow Module
Add a new Webflow module with the action “Create Item” to create a new item in your Instagram collection. Once your Webflow account is linked to Integromat, you will be able to choose your project and select the collection you want to connect.
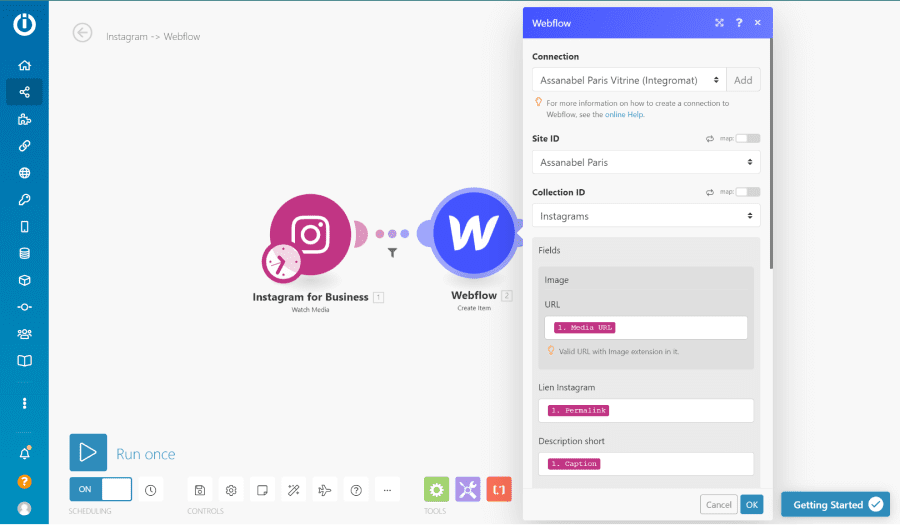
You will see the various fields of your Webflow collection, and you can complete them with the tags from the previous Instagram module.
- URL : Media URL
- Instagram Link: Permalink
- Short Description: Caption
- Name : Media ID
- Slug : Media ID
The last section “Live” must be set to “Yes” to allow the item to be automatically published on your site.
3. Limit Duplicates
To avoid publishing the same image twice on your site, you will need to set up two things:
- Add a filter : create a filter between the Instagram module and the Webflow module to pass only the images from your posts. This will allow you to exclude videos and Instagram carousels, which could create issues when creating the item. The Webflow field is an “image” field designed to accept only images.

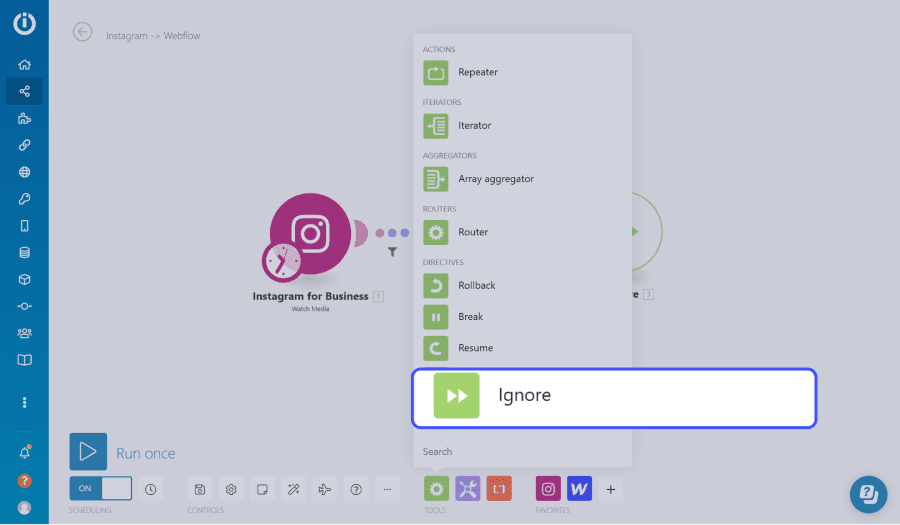
2. Add a Flow Control: if your automation tries to add the same image twice, the Webflow module will reject it. Indeed, a Webflow item must have a unique slug. To prevent issues in your automation, you need to add the “Ignore” flow. This will ignore the error, and your automation will continue to function correctly. No duplicates will be added in this way.


.jpg)
