If you're using multiple tracking tools, analytics platforms, or even a cookie solution like Axeptio on your Webflow site, it can be beneficial to consolidate them into a single piece of code using Google Tag Manager.
In this guided tutorial, we will walk you through the process of integrating a Google Tag Manager tag on your Webflow site in just a few minutes.
1. Open the "Google Developers" documentation
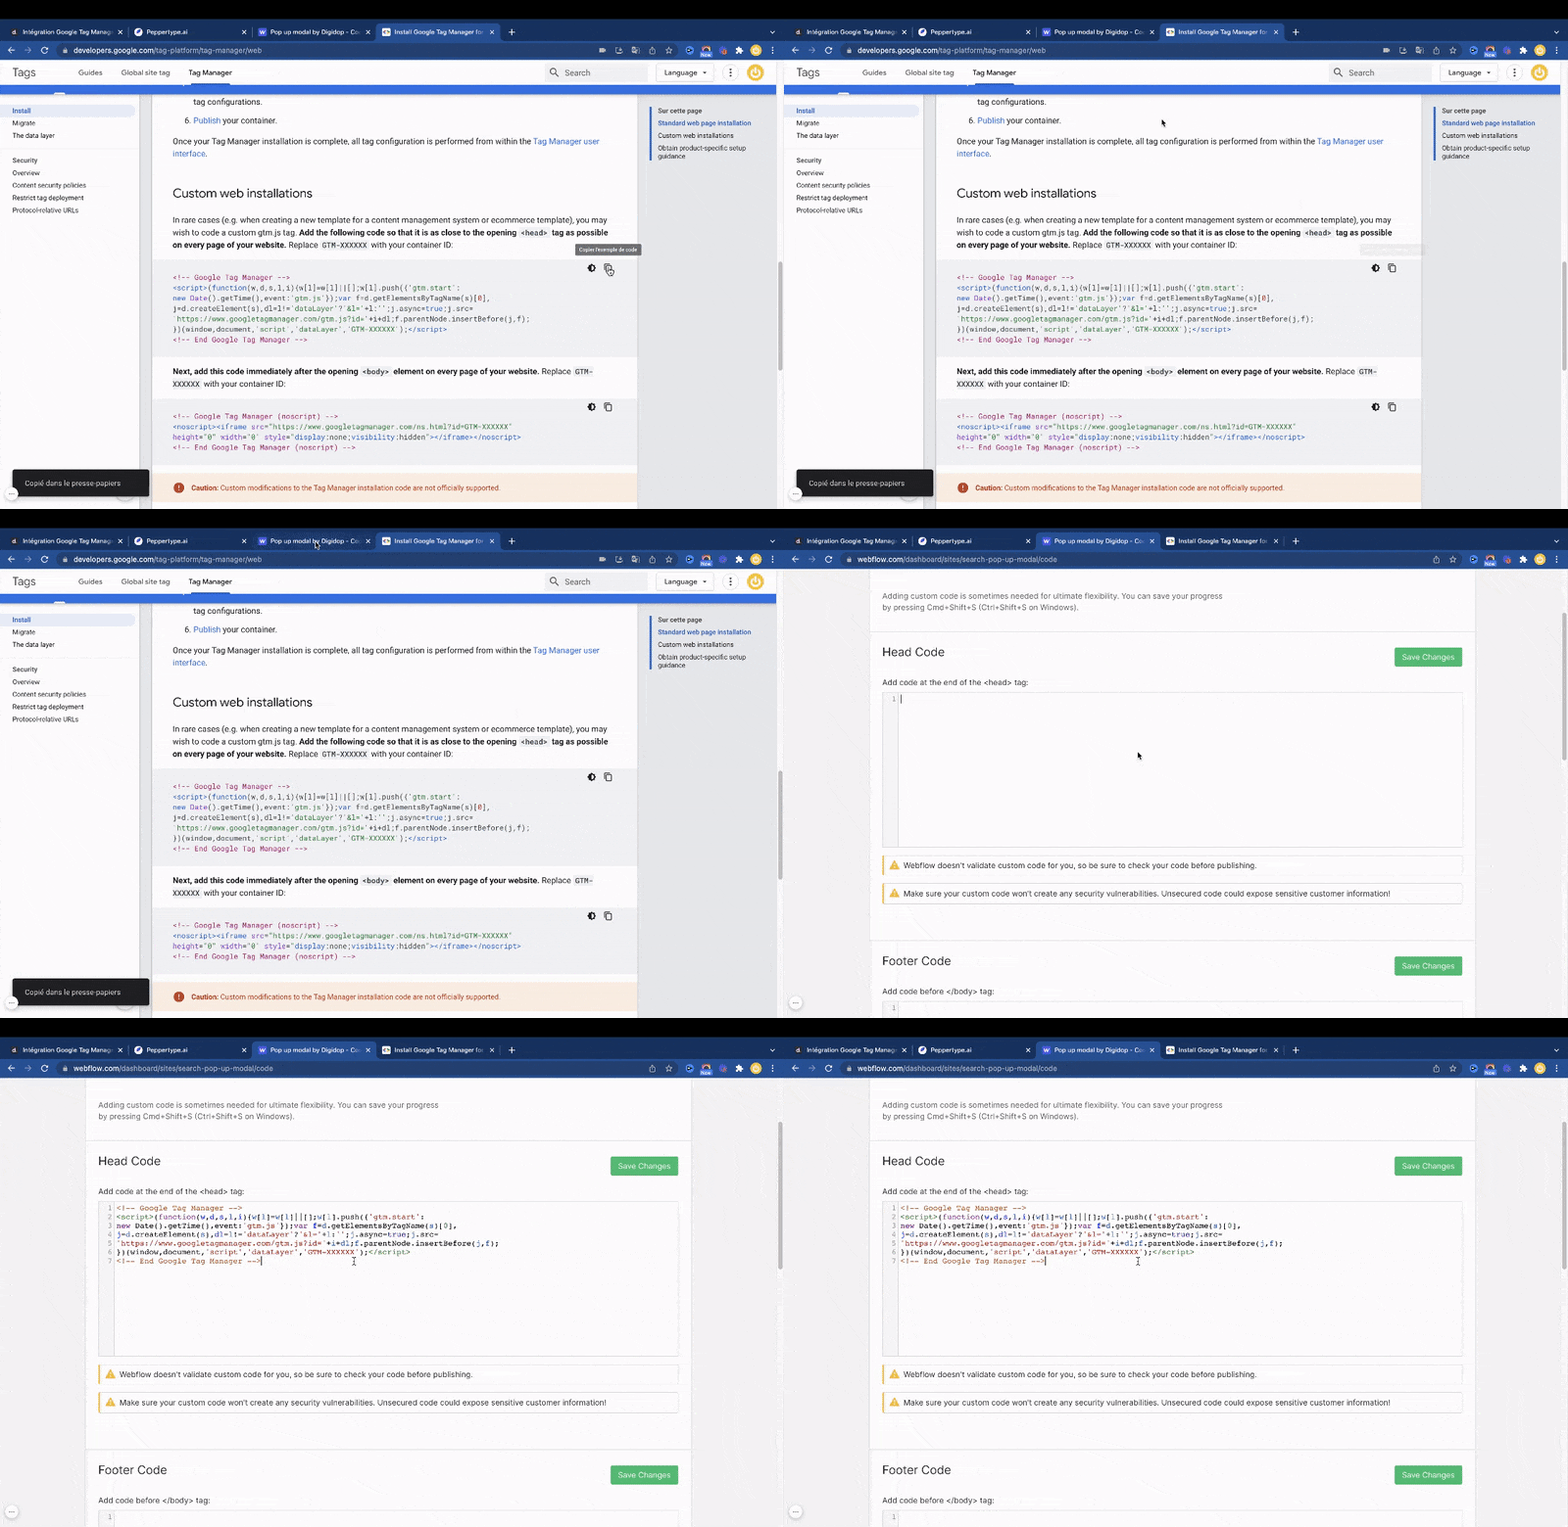
https://developers.google.com/tag-platform/tag-manager/web
In this documentation, you will find the codes to copy and paste to install GTM in your project (compatible with Wix, Shopify, WordPress, Webflow, etc.).
2. Retrieve your tracking code
Your Google Tag Manager ID has the following format: GTM-XXXXXX
You can find it in your Google Tag Manager "Workspace."
3. Integrate the code into Webflow
Adding Google Tag Manager is a two-step process. Step 1 involves adding the tracking code to all "Head" elements of your site via the "Custom Code" section in the Webflow settings under the "Project Settings > Custom Code" tab, and then Step 2 involves adding the tracking code to all pages of your site using an <!-- fs-richtext-ignore --><embed> element.
3.1 Integration into your "Head Code"

⚠️ Note: Be sure to replace GTM-XXX with your GTM ID, for example, GTM-12345.
3.2. Integration before <!-- fs-richtext-ignore --><body>

Once the embed is integrated, place it as high as possible in your navigator. Ideally, just after your <!-- fs-richtext-ignore --><body> tag.
To speed up deployment and simplify tag management, I encourage you to convert this embedded element into a symbol, allowing you to easily duplicate it across all pages of your website!
How to create and use a symbol in Webflow? (YouTube Tutorial Video)
Congratulations, you have installed your tag
And there you have it! (If you don't have access to the designer mode of your Webflow project, please consult your developer). You can now track all analytics on your website and centralize all your integrations with Google Tag Manager!


