Webflow is a comprehensive tool for optimizing your website for organic search engine optimization (SEO). We have native access to several settings that allow our website to attract traffic without spending any money!
Here is a list of all the SEO optimizations to implement in your Webflow project to enhance its online visibility.
One of these includes adding a robots.txt file! In today's article, we will show you how to set up this file for your site and how to configure it correctly.
What is a robots.txt file?
A robots.txt file is a text file that informs search engine indexing robots (crawlers) about which pages they are allowed to visit or not.
With this guidance, you can instruct indexing robots not to crawl certain pages of your website.
Note: You can restrict access for indexing robots, but not for users using the robots.txt file.
Why add a robots.txt file (for SEO)?
Organic search engine optimization relies heavily on the indexing of pages on search engines. For search engines (such as Google, Bing, Yahoo, etc.) to index a page on your website, they explore your content through their robots.
The purpose of the robots.txt file is to inform these robots that certain pages do not add any value to the site and that there is no need for indexing robots to "crawl" these pages.
While this may not have a significant impact on your SEO, it helps optimize your "crawl budget" (in summary: the number of pages that Google will browse on your site). However, it may potentially allow your high-quality content to gain more importance.
What does a robots.txt file look like?
Robots.txt files contain different commands. For all these commands, you will need to specify which robots will be targeted (user-agent) and which pages should not be analyzed (disallow). You can also allow the crawling of certain pages with "allow".
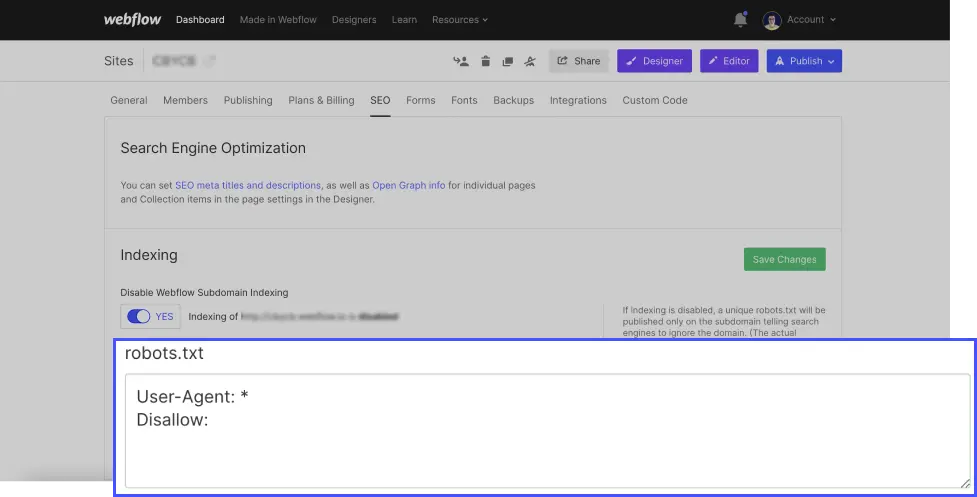
If you're unsure what instructions to provide, we recommend allowing crawling and thus indexing of all your pages with the following robots.txt file:
User-agent: *
Disallow:
Here the asterisk (*) means that the instruction applies to all robots without exception. We leave nothing after Disallow because we want all our pages to be accessible.
Be careful not to add a / after Disallow (except in very specific cases) as this would block the indexing of all the pages on your website!
We can block the indexing of a page by adding its slug after Disallow. For example, I can block the indexing of my contact page by using the following robots.txt file:
User-agent: *
Disallow: /contact
I can block all pages in a directory from being indexed, such as a blog:
User-agent: *
Disallow: /blog/
Additionally, I can allow the indexing of one of the pages in the blog directory:
User-agent: *
Disallow: /blog/
Allow: /blog/post-1
Here is the official Google documentation on robots.txt for further reading!
How to add a robots.txt in Webflow?
In Webflow, adding a robots.txt file is straightforward. Simply go to the general settings of your project, navigate to the "SEO" tab, and add your file in "robots.txt". Then, save your changes (Save Changes) and publish your project.

How to check if your robots.txt is working?
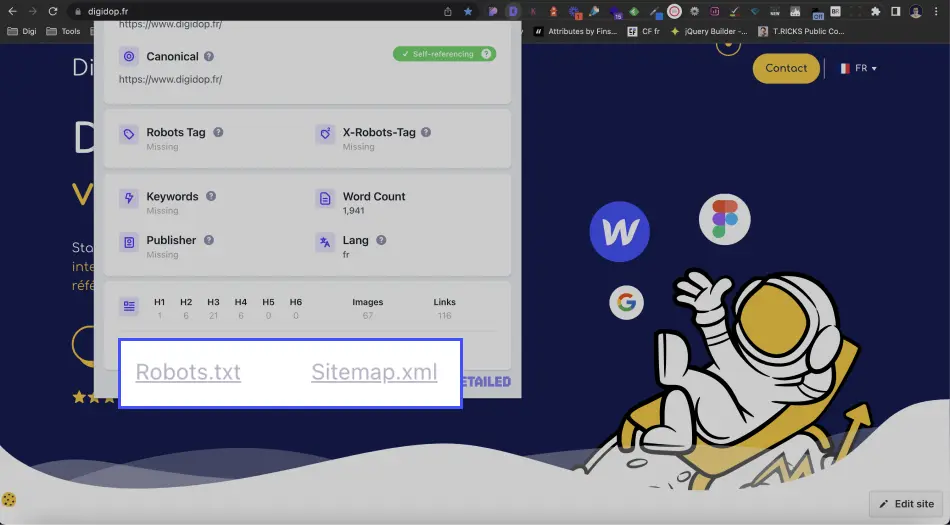
To verify that your robots.txt is properly set up on your site, you can use a Chrome extension like "Detailed SEO Extension" and click on "Robots.txt".

That's it! You can now optimize your robots.txt for your Webflow site! For a customized and SEO-optimized website, feel free to contact our agency!


.webp)

.jpg)


