Last month, Webflow took a significant step forward in Low-Code development by introducing a new feature into its development tool: the Custom Element.
In this article, learn more about this new feature—also known in the web industry as DOM—and how to use it on Webflow with some examples.
1 - A step further towards tech?
Since its rebranding on October 5, 2023, Webflow has clearly embraced its position as a tech tool. As I mentioned in a previous article, Webflow is no longer "just" a no-code tool, but a professional development platform (low-code + no-code). This introduction exemplifies that transformation well.
1.1 Simple definition of the Custom Element for the web
You should think of the Custom Element as "a magic box" into which you can place almost anything:
- HTML Functionality: By adding a TAG that adheres to W3 standards,
- Style: By assigning a CSS class with styling properties,
- Content: Your box can contain virtually anything you desire (Image, Video, Text)
In short, the Custom Element lives up to its name, as it is a highly customizable web element. But I’ll let you discover it for yourself, along with some examples.
2 - How to use the Custom Element on Webflow?
As of November 2023, the Custom Element is natively available on Webflow. (This article is an update on the DOM Hack element)
You can find it directly in the designer interface of your Webflow project and use it to add HTML elements to your site.
2.1 How to find the DOM element in Webflow?
The DOM element is available natively in Webflow under the name "Custom Element". You can access it directly from your element panel:
- Open your Webflow Designer interface
- Go to the Panel (A) Add Element
- Scroll down to the Advanced tab
- Here is the Custom Element
Or you can use the search keyboard shortcut (A):
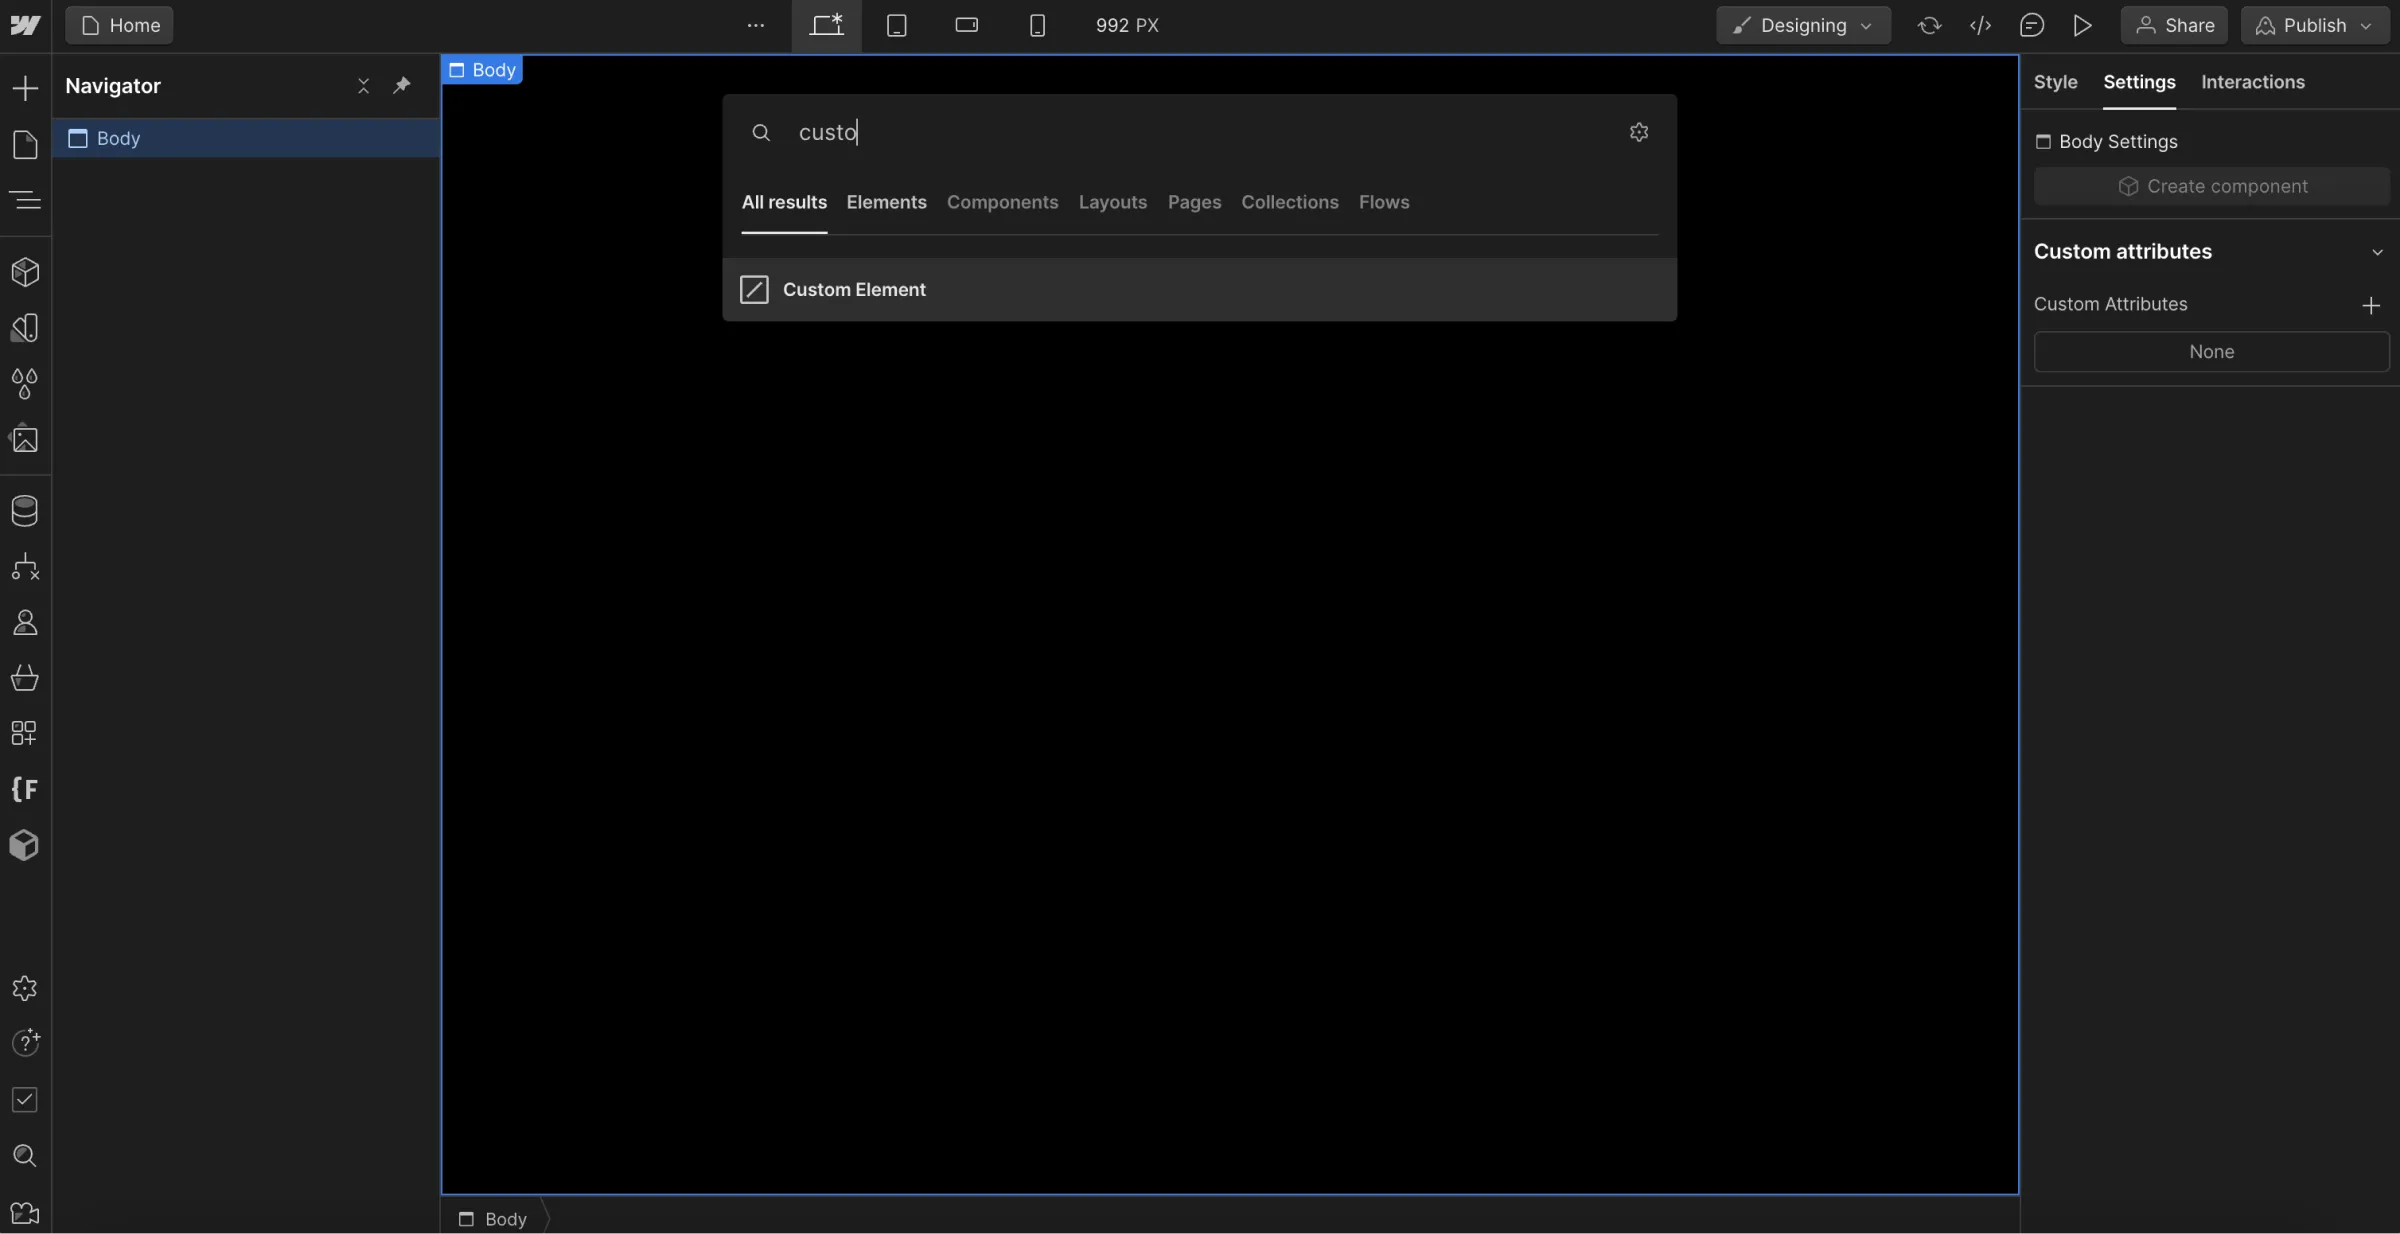
Then, just drag it into your Navigator. The integration doesn't stop there, as you can also "Design" it by giving it style properties through CSS classes.
2.2 Three examples of usage on the web
Let's get concrete with three examples of how to use the Custom Element on websites.
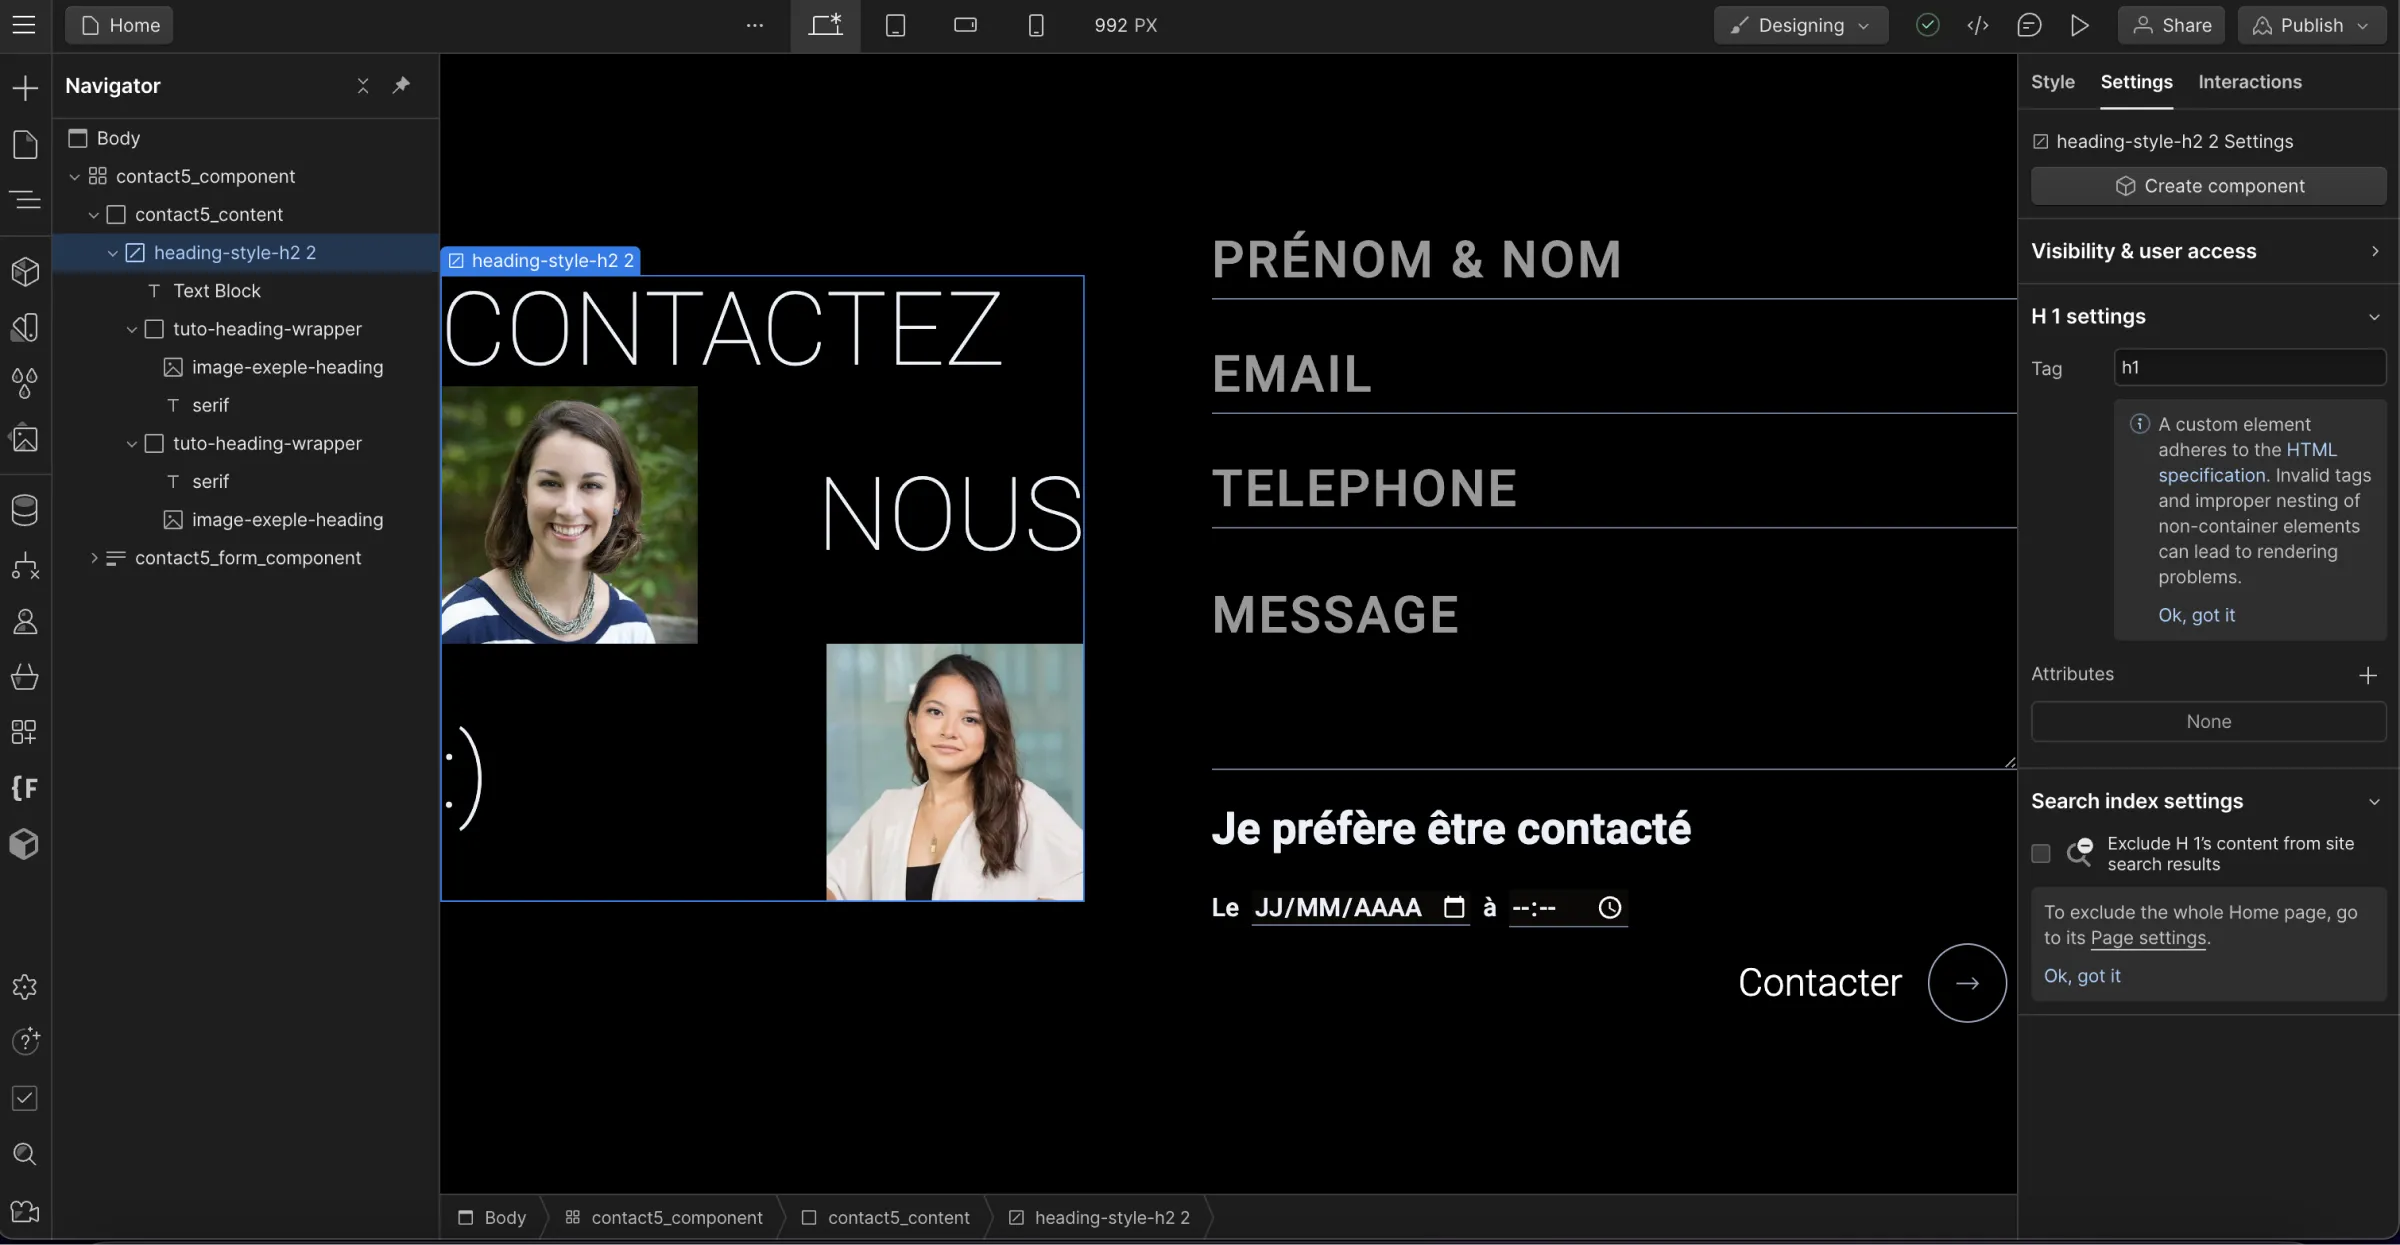
Example 1: Create an SEO-Friendly heading 1 with different elements inside
- Add the Custom Element
- Change its tag to: H1
- Add the elements of your choice inside
- Style it as you wish by adding a CSS class
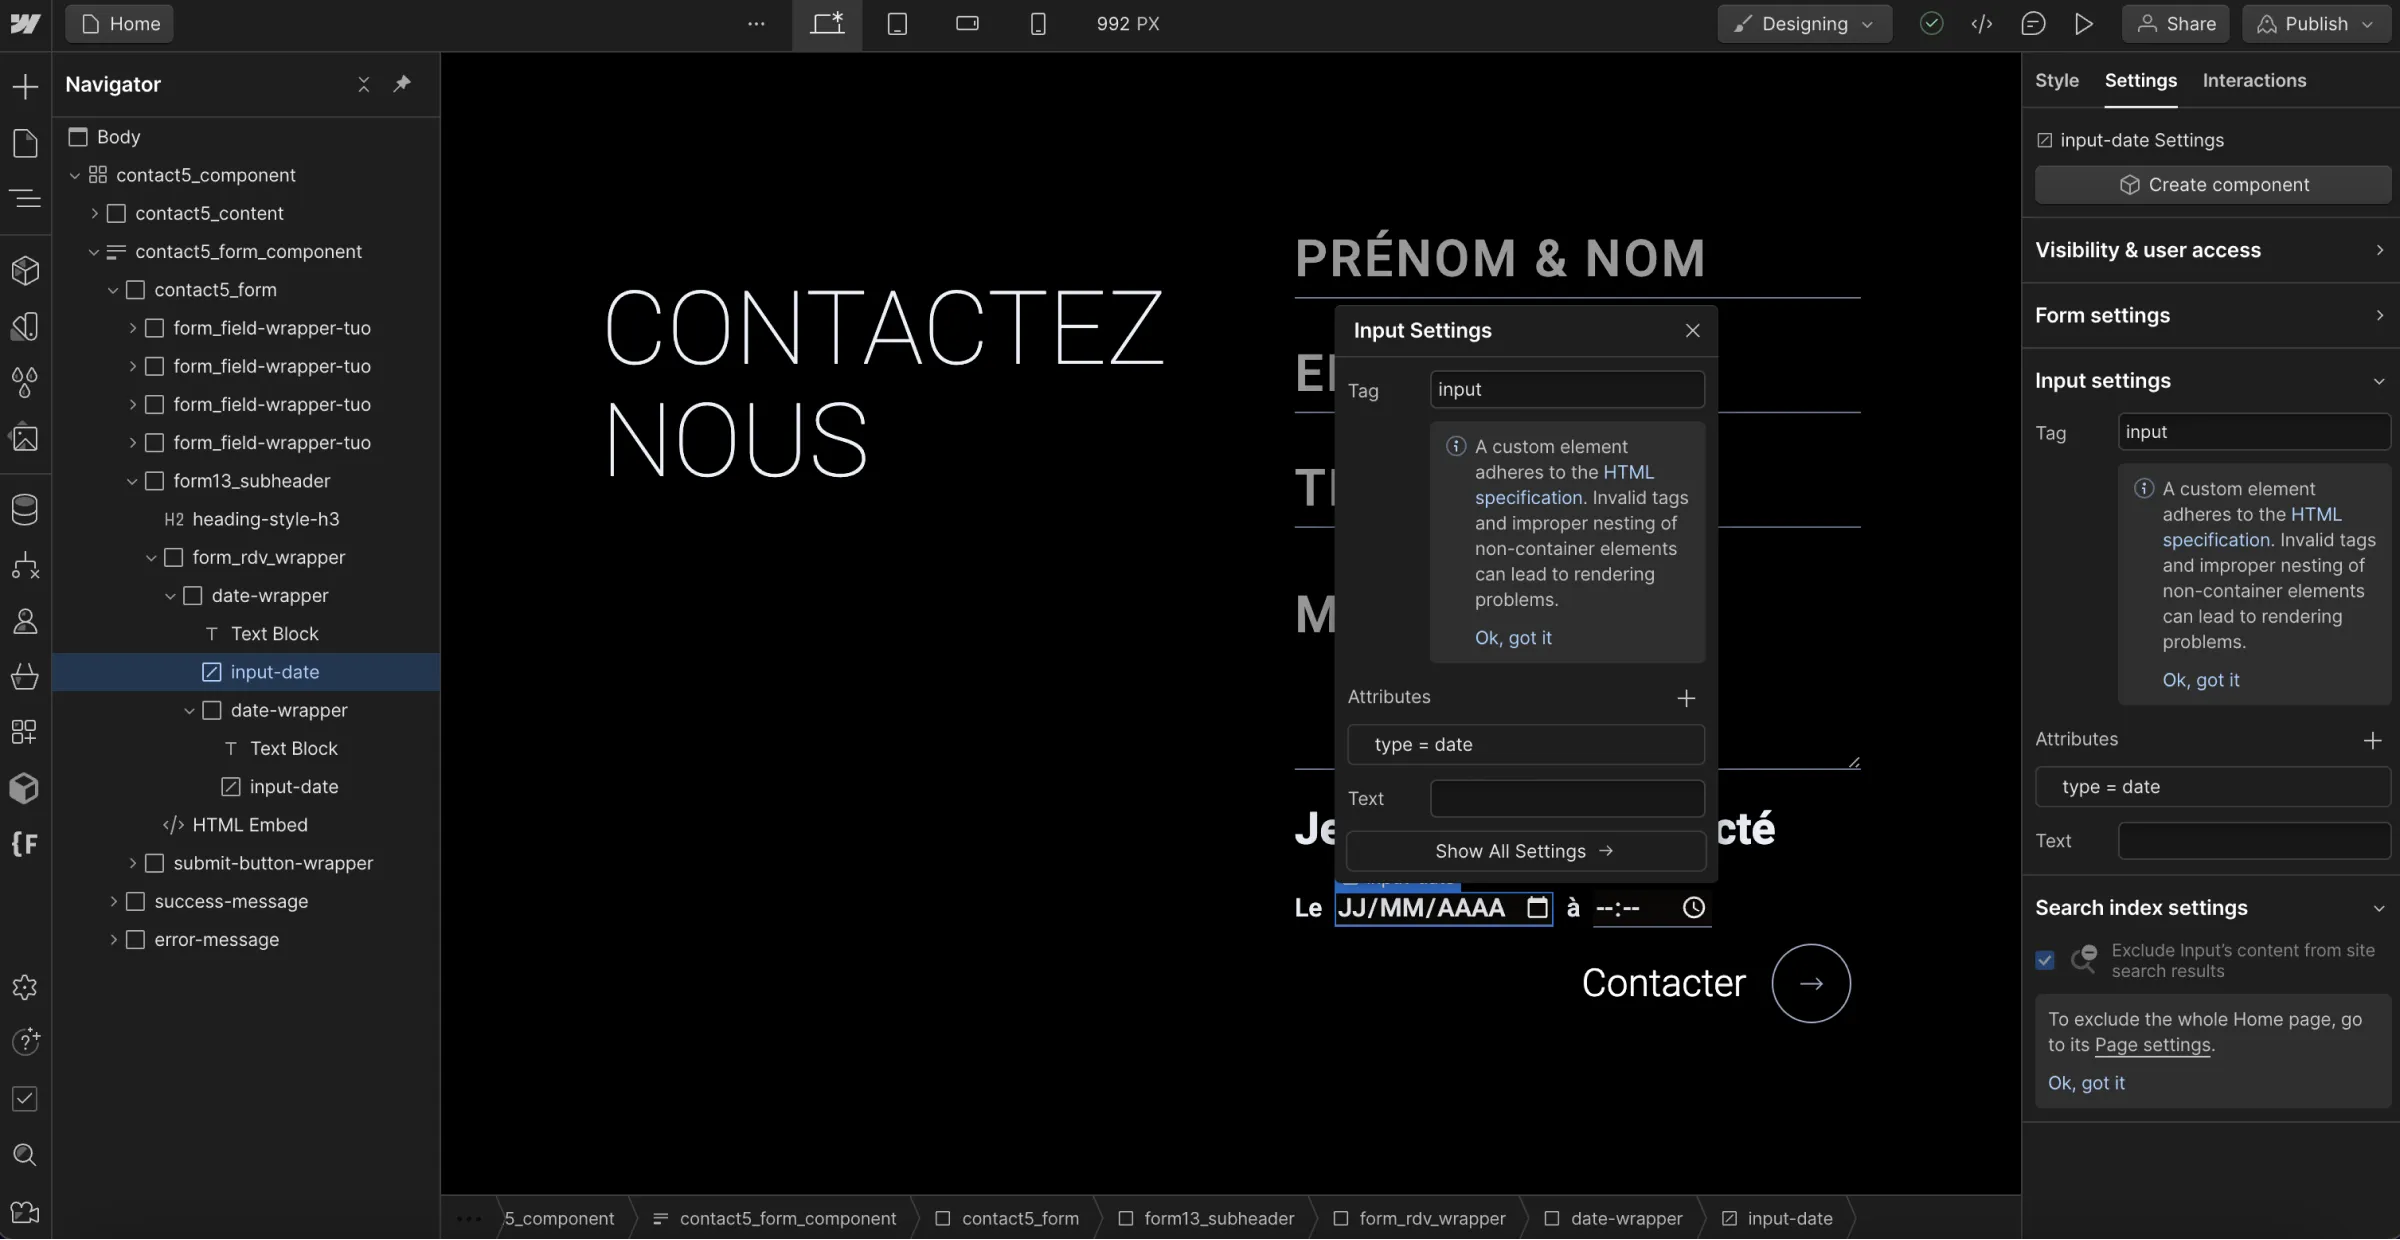
Example 2: Create a calendar for a form
- Add the Custom Element
- Change its tag to: Input
- Add an attribute: Type=date
- Insert it into a form
Example 3: Create a native HTML button
Or even create real buttons to enhance your site’s accessibility. This is a topic worth exploring fully on its own. So I encourage you to watch the video or read this blog article to understand the issues surrounding the difference between a link and a button on a web page →
And this is just one example, as you can go much further by utilizing...
2.3 - Create without limits using W3 HTML documentation
The W3 documentation encompasses all web standards and various terminologies needed "to make the web work." In this official documentation, you'll find all the available TAGs on the web. You just need to retrieve the tag equivalent to the functionality you wish to create and integrate it into your web projects.
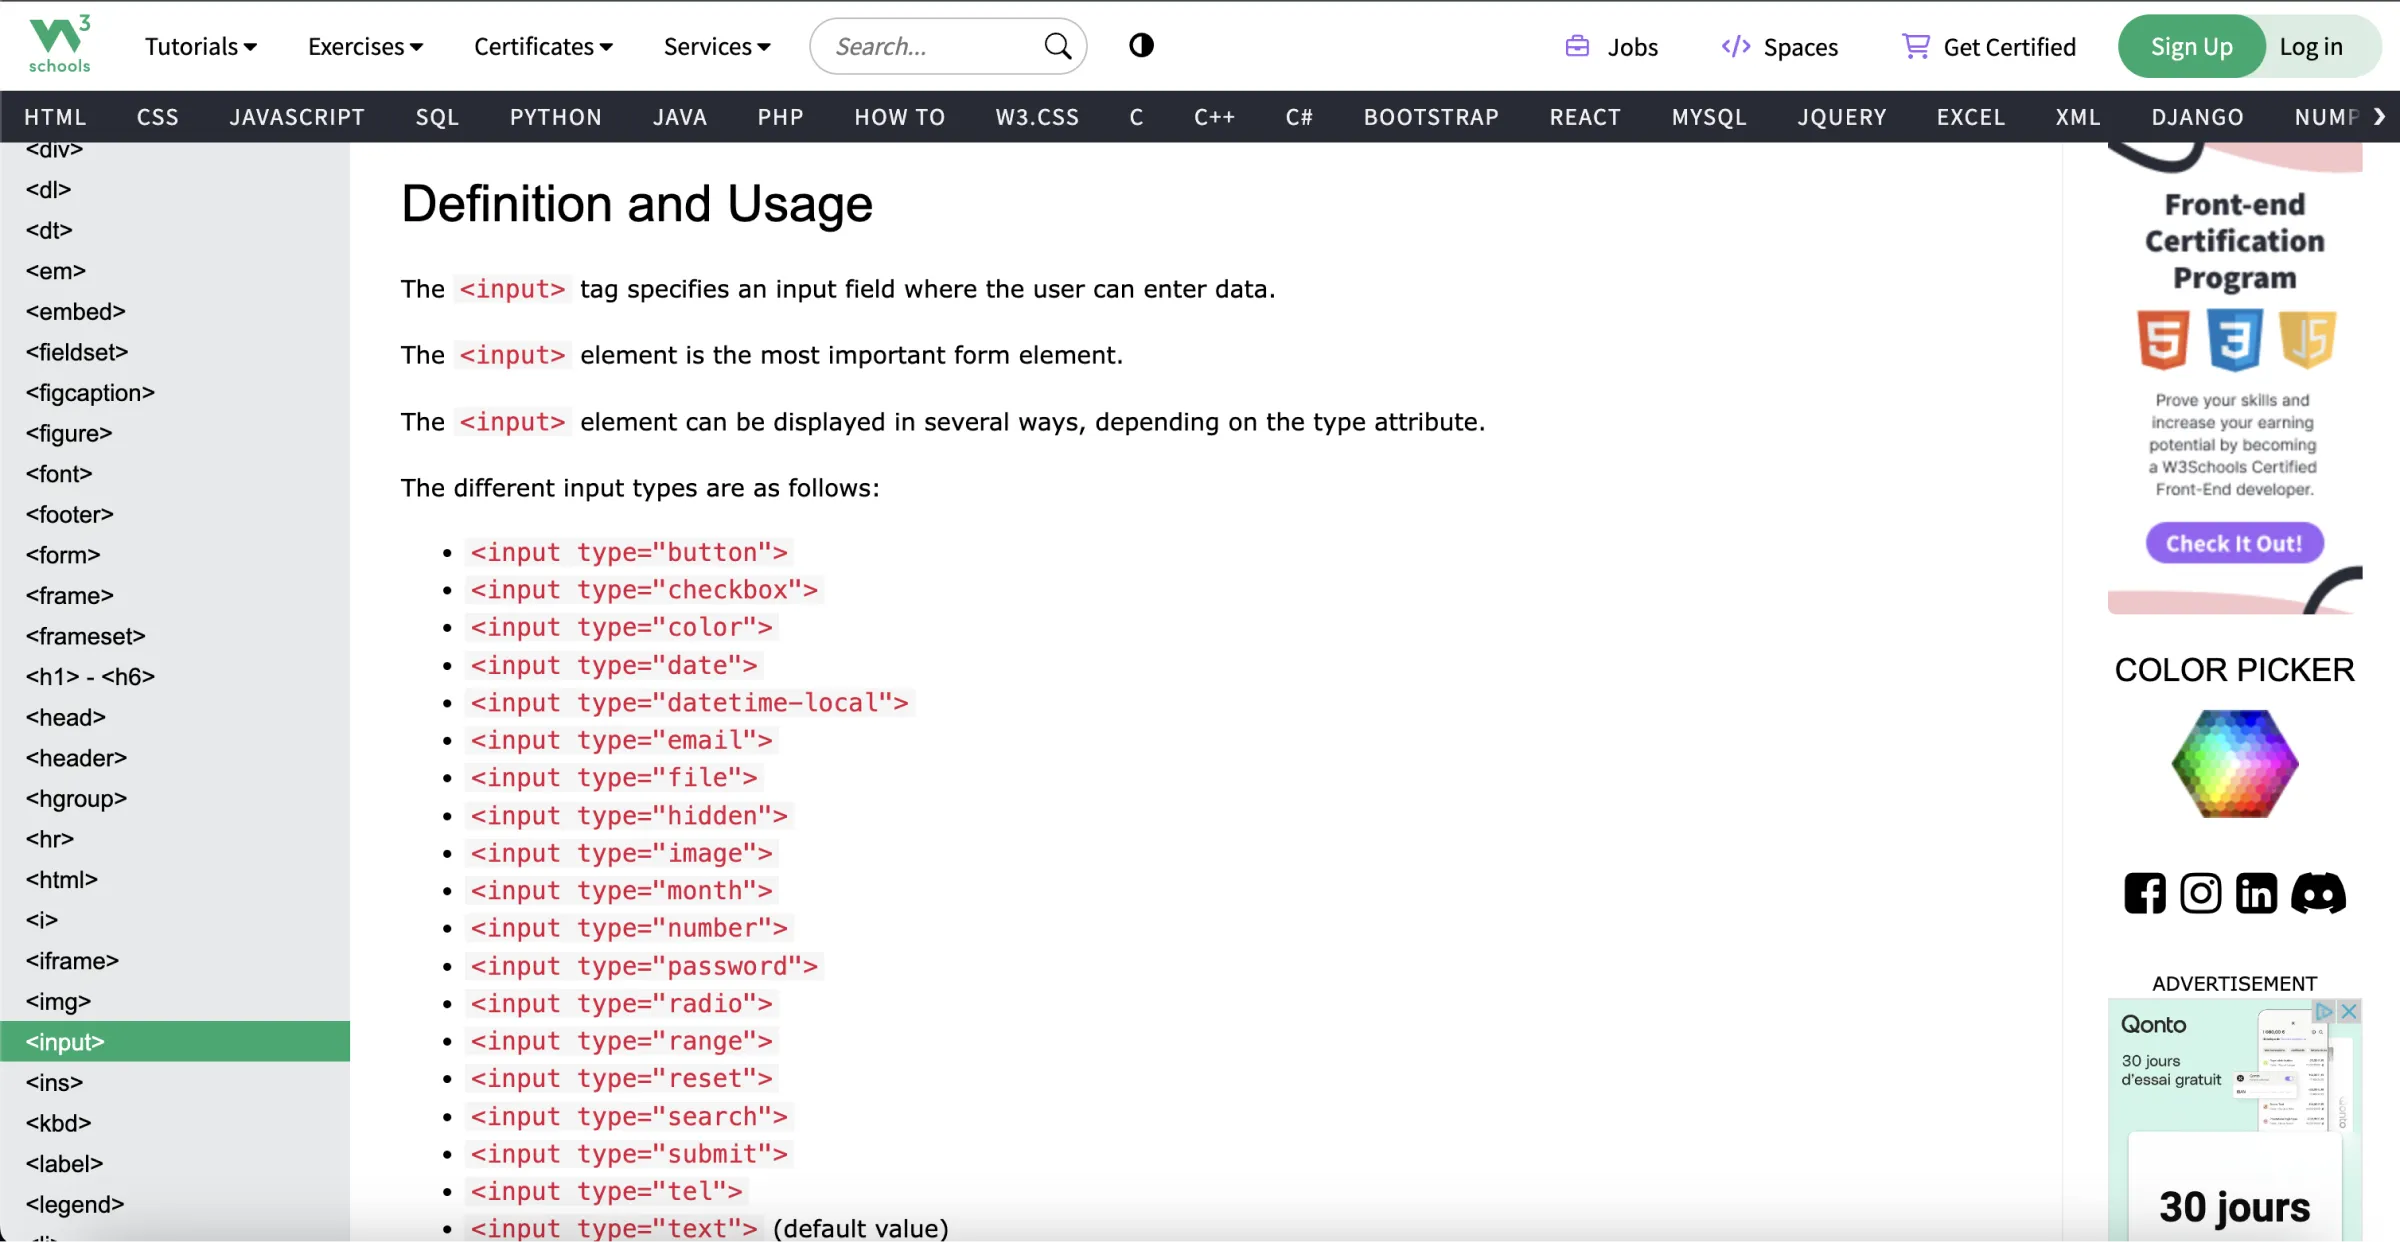
Link to the official documentation ↗
⚠️ Don’t forget to check its compatibility with browsers (Hello Safari 😅). This is also available in the W3 documentation under the "Browser Support" section.

Conclusion
The arrival of the Custom Element on Webflow is excellent news for professionals using Webflow as a web development platform. It is aligned with the "Low-Code Development" positioning that this visual development tool is adopting, enabling users to save time and even develop more quickly and with best practices by utilizing the official HTML standards.
All this, without losing the benefits of Webflow’s design mode strengths:
- Creating from a visual interface (WYSIWYG),
- The ability to customize these elements through CSS classes.
In order to always create better websites in 2024 with Webflow.

.jpeg)


