If you're looking for a simple new booking system for your restaurant and you're not very tech-savvy, you've come to the right place!
In this article, we want to share a tool that will allow you to easily and quickly set up a reservation system for your restaurant.
Jotform is a no-code tool that enables the creation of customized web forms. This tool offers many features to create and manage both simple and complex forms:
- Page or card form layout
- Multiple field formats (email, phone, etc.)
- Multiple field types (lists, text, numbers, etc.)
- Customization (colors, shapes, images, etc.)
- Form management (spreadsheet, statistics, PDF generation, etc.)
- Workflows (email sends, reminders, notifications, etc.)
- Advanced features (approval systems, form rules and conditions, etc.)
Among all these features, one particularly interests us for creating a reservation system for restaurants: the calendar
1. Create a new Jotform
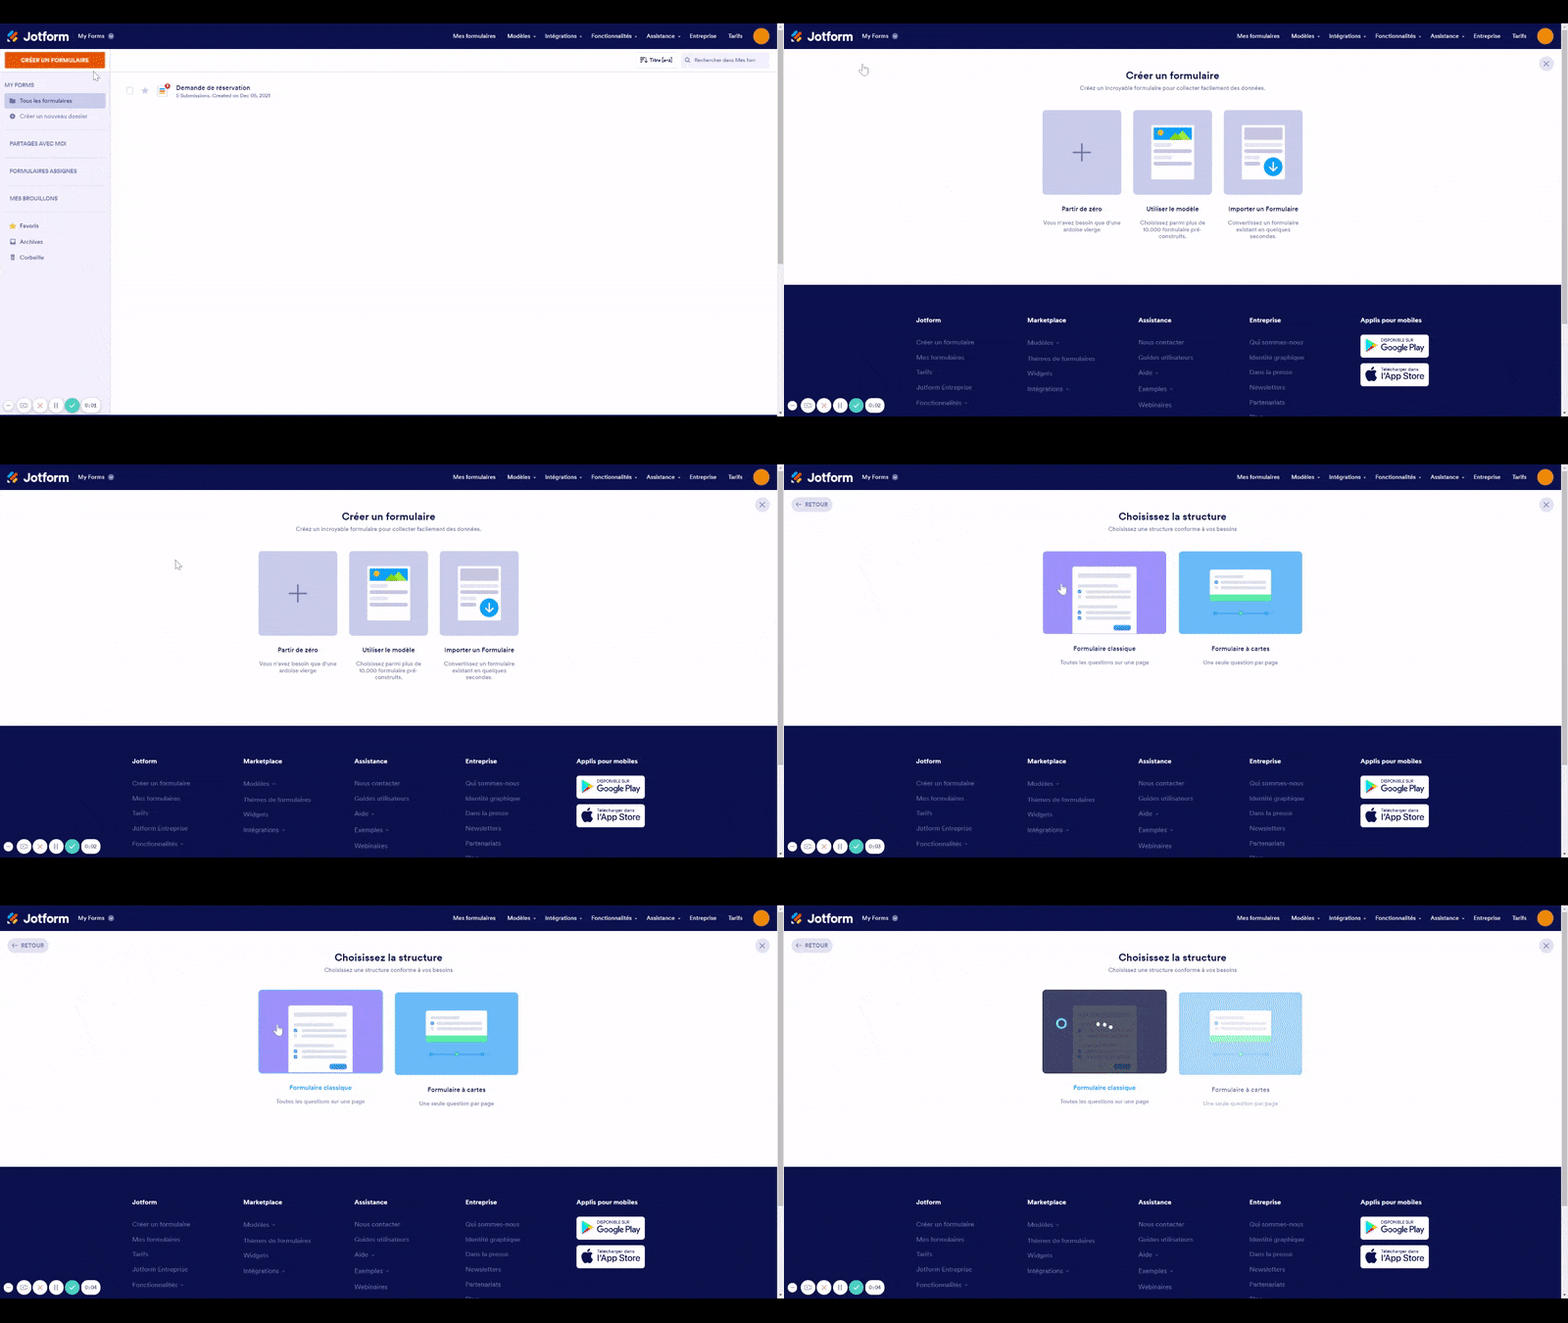
Start by creating a form from scratch in your main Jotform interface.
- Click on “Create a Form” in the top left
- Choose to “Start from Scratch”
- Select the “Classic Form”. A card form will break your reservation system into several steps, but we prefer to stay on a single page to simplify and accelerate the booking.
You will now arrive in the Jotform form creation space, which will allow you to start building your customized reservation system.
2. Configure your reservation system
2.1 Add fields for the reservation
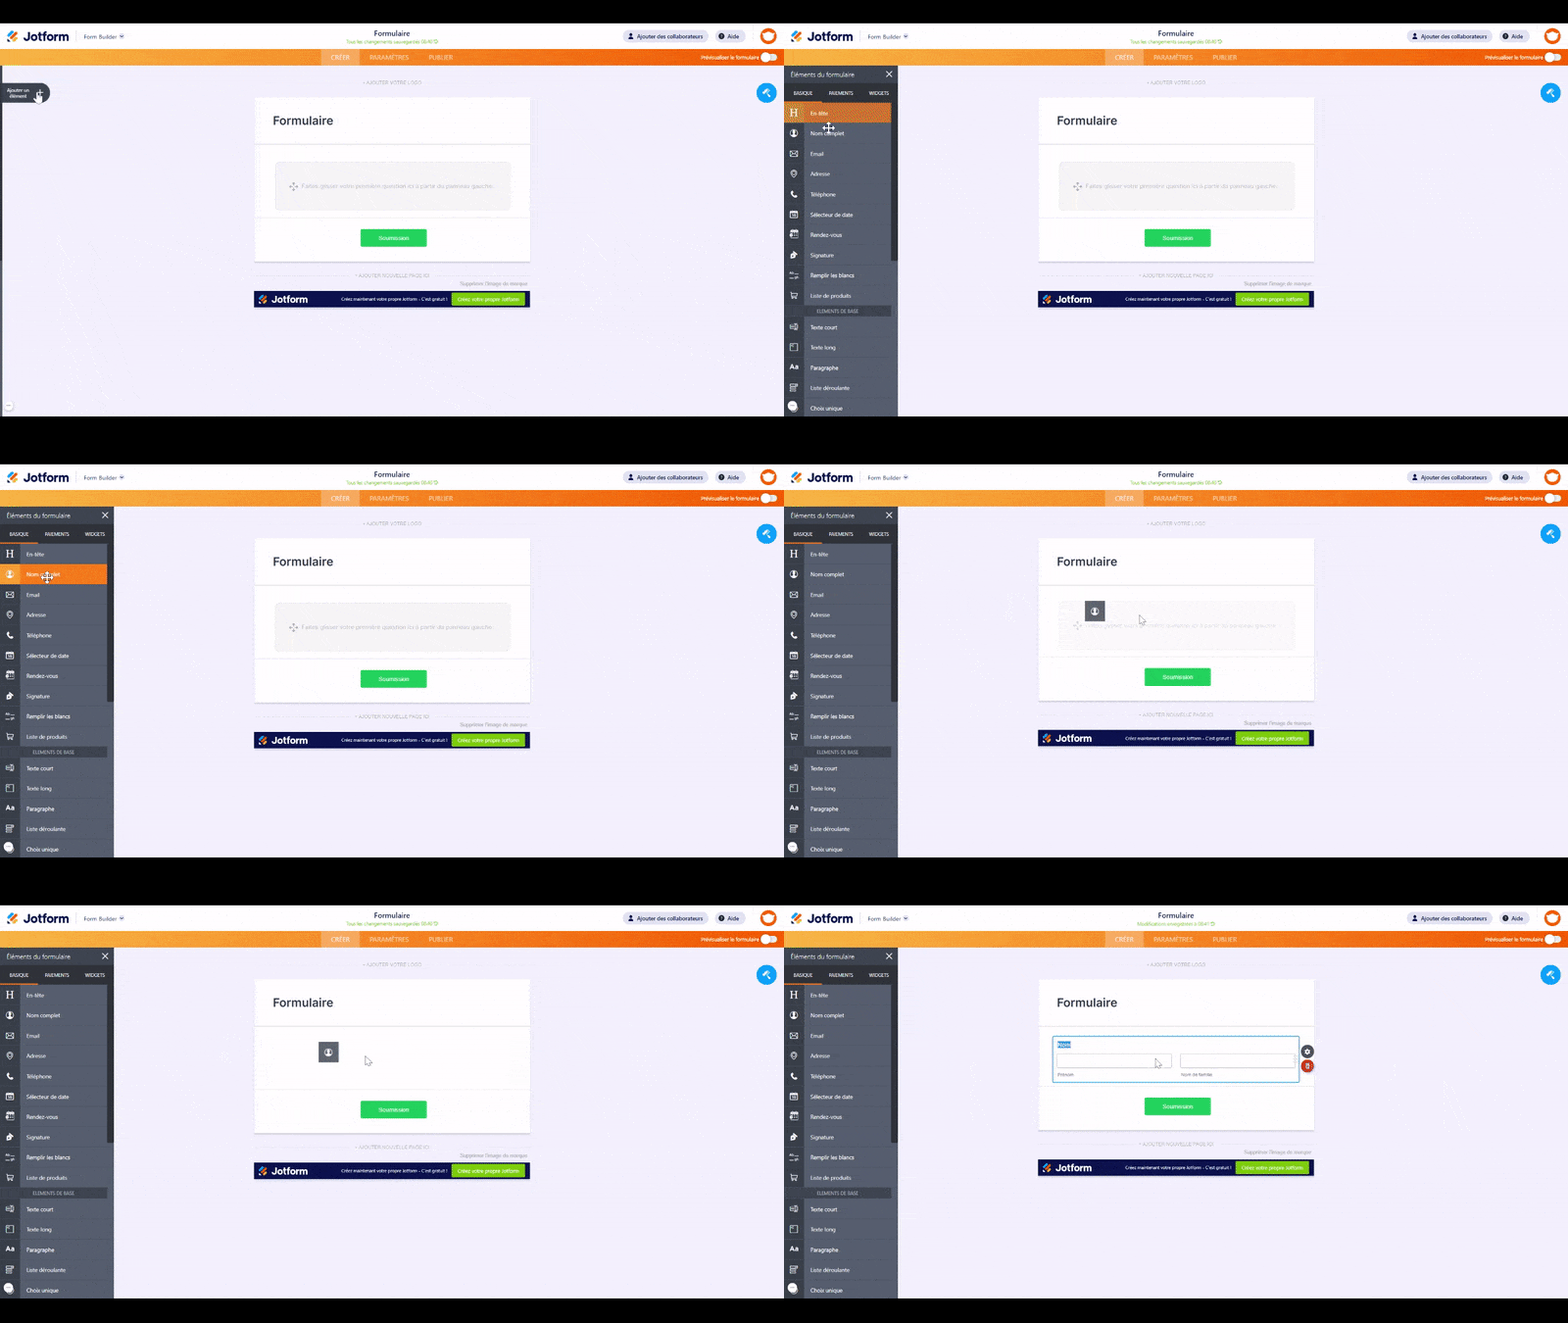
Several types of settings will be necessary to build this reservation system. This will depend on how you handle bookings in your restaurant.
Start by adding new fields by clicking the “+ Add an Element” button on the left side of your screen. You can add fields via drag and drop from the elements to the form:
- “Full Name” field to collect the name for the reservation
- “Phone” or “Short Text” fields to gather the phone number
- Add a “Dropdown” element to collect the number of guests
- Finally, you can retrieve the email address with the “Email” element
To make these fields mandatory, you will need to access the settings for each field by clicking the “⚙️ Properties” icon of the field. Then activate the “Required” button in the general settings.
2.2 Set up the online reservation calendar
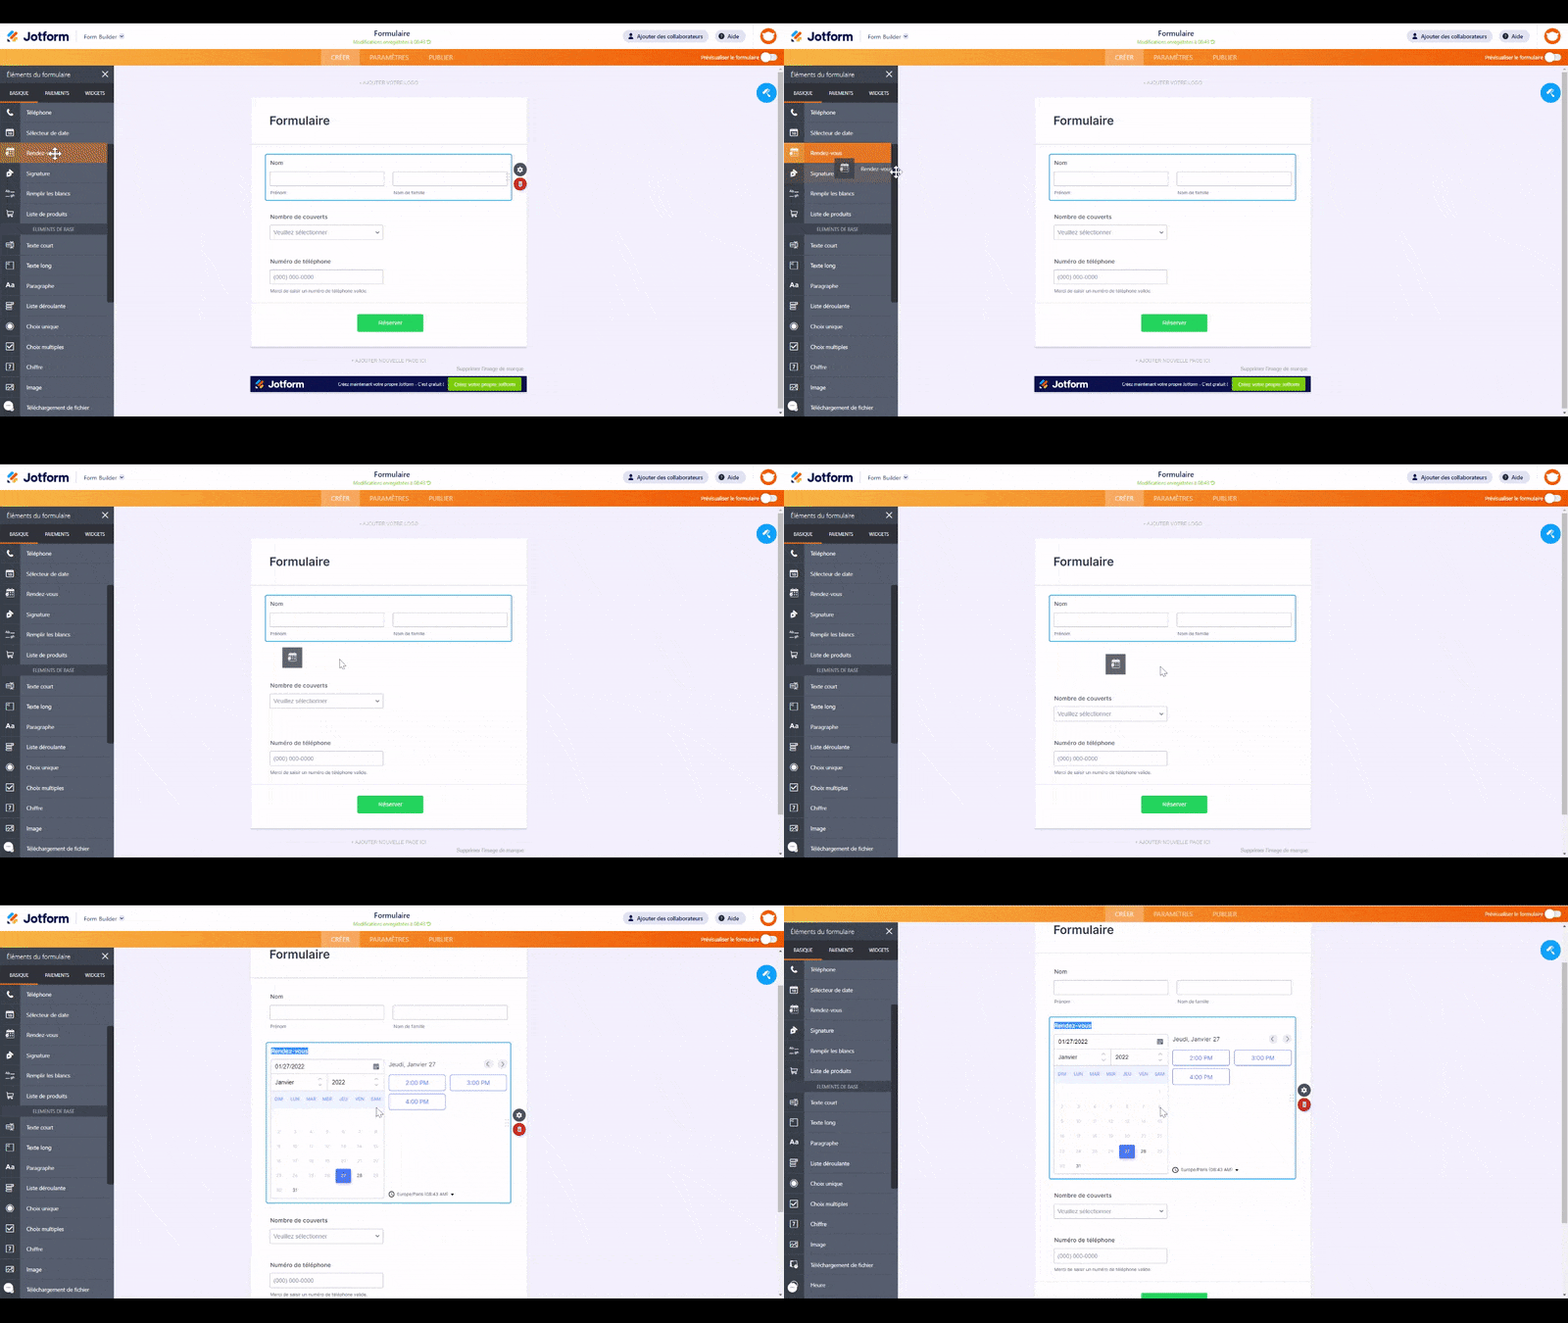
Now you can add the reservation field that will allow your clients to choose their reservation date and time. To do this, start by adding a “Appointment” element to your form. Directly access the appointment settings to configure the reservation system according to your needs:
General
Add a title, such as “Reservation Request” and make this field mandatory.
Availability
Choose the time intervals you wish to display. For example, every hour, every half hour, every 15 minutes, etc. You can customize this time range. You can then configure specific reservation slots. For example, from 12:00 PM to 2:30 PM and then from 7:00 PM to 9:30 PM.
Limits
You have the option to schedule rolling days, for example, to only show booking options for the next 60 days. This is actually a way to limit no-shows. Also, add closing times for the restaurant to avoid offering reservations on those dates.
Advanced
For your reservation system to function, you must set your “Appointment Type” to “Group” and not “Individual” as it is set by default. This will allow multiple clients to book at the same time. You can limit the number of reservations for each time slot. For example, no more than 20 online reservations at once for the 12:00 PM slot.
Also, define:
- the time zone “Europe/Paris”
- the date format in French MM/DD/YYYY
- the start of the week on “Monday”
- the time format in “24 hours”
That's it, the new reservation system for your restaurant is set up! Now move on to the design.
2.3 Advanced reservation features
You can add advanced features to your reservation system, for example:
Emails
To set up a confirmation email following the reservation
Conditions
To customize the thank you page or display fields based on certain criteria, etc.
Thank You Page
To customize your thank-you page without conditions, or choose to redirect to a URL.
Integration
To connect your reservation system to hundreds of no-code tools like Gmail, Google Drive, Mailchimp, Airtable, Zapier, etc.
Approval Flows
To create an approval flow based on certain reservation conditions. For example, if you want to confirm or deny reservations for more than 5 people, while a reservation for fewer than 5 people will be automatically confirmed.
2.4 Customize the reservation form
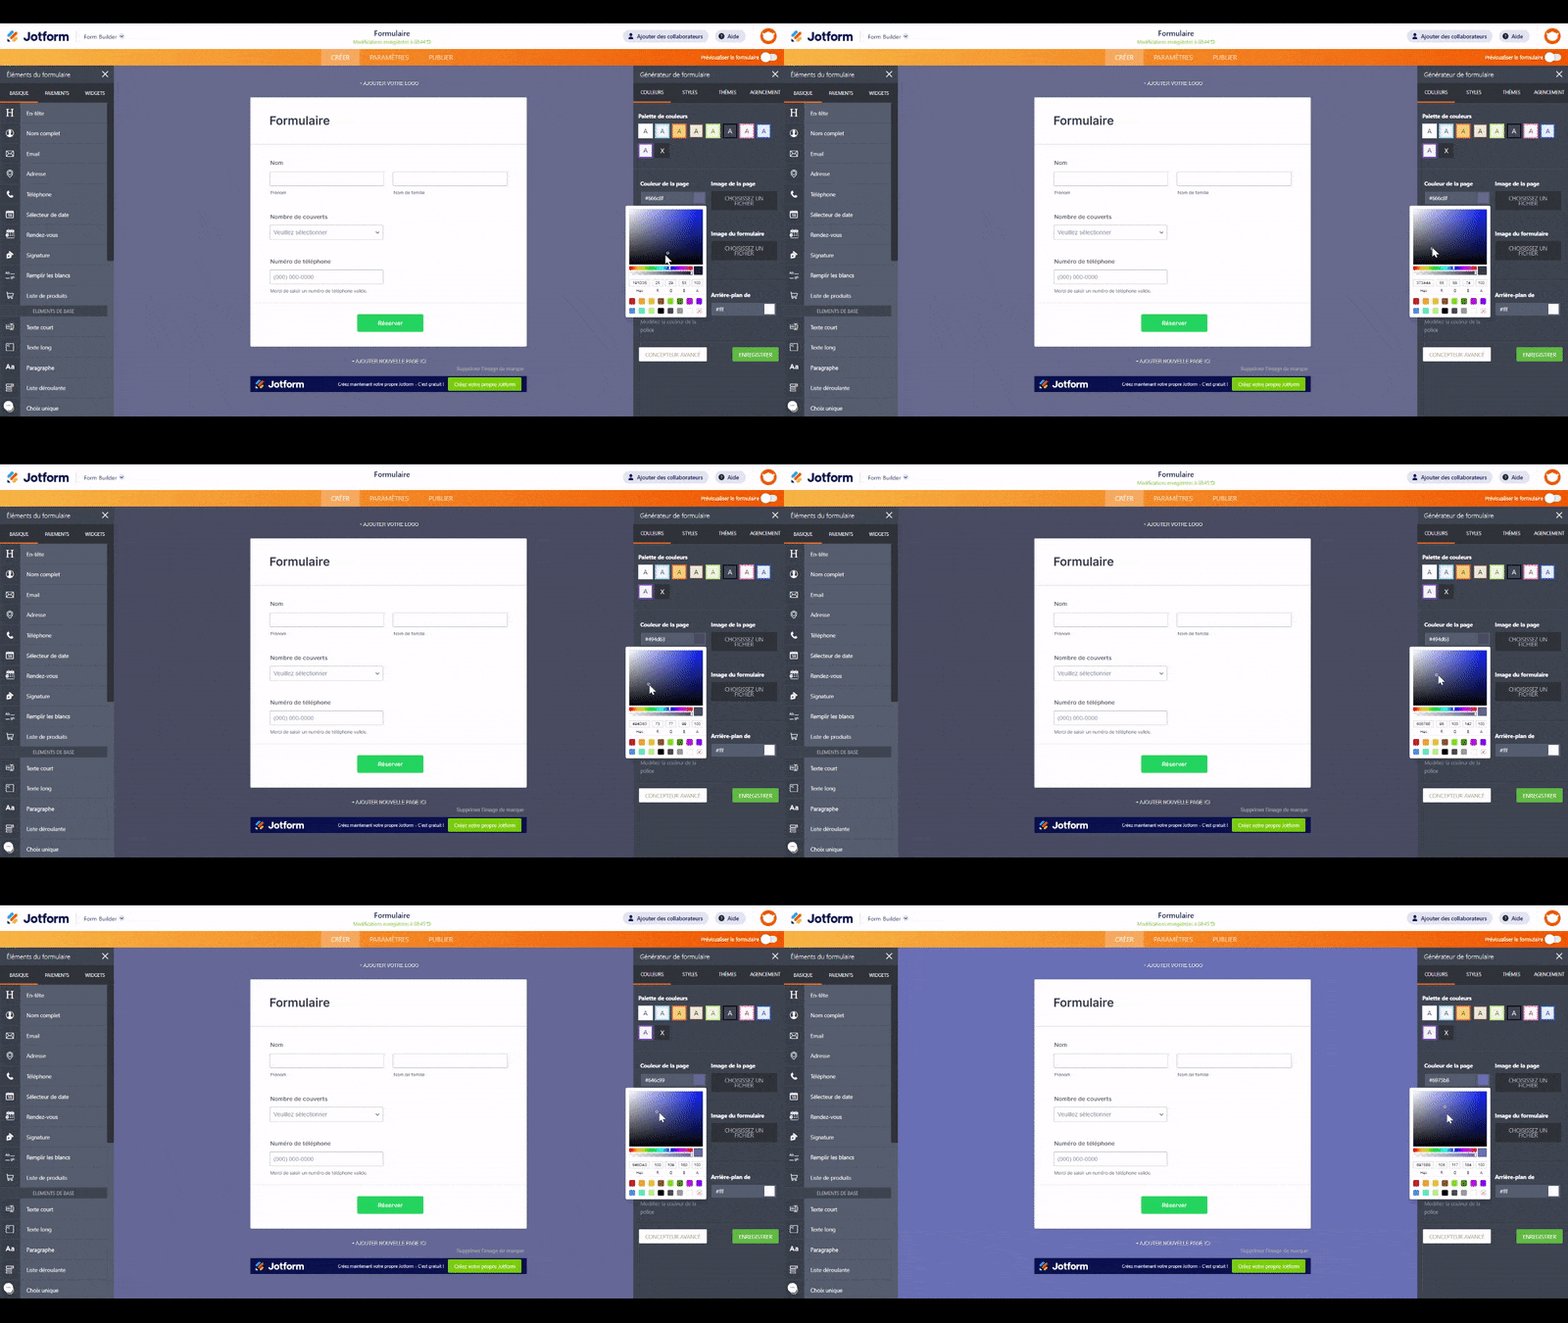
Once your restaurant's reservation system is operational on the technical side, it's time to design it in line with your brand identity.
To access the customization features for your reservation system, click on the blue paintbrush in the top right. A customization window will open where you can:
- Customize the colors of the page, form, buttons, and font
- Customize the style by adjusting the spacing between sections, font size, etc.
- Choose a predefined theme
Let your imagination run free to create a reservation system that integrates perfectly with your Webflow site.
3. Integrate your reservation system into Webflow
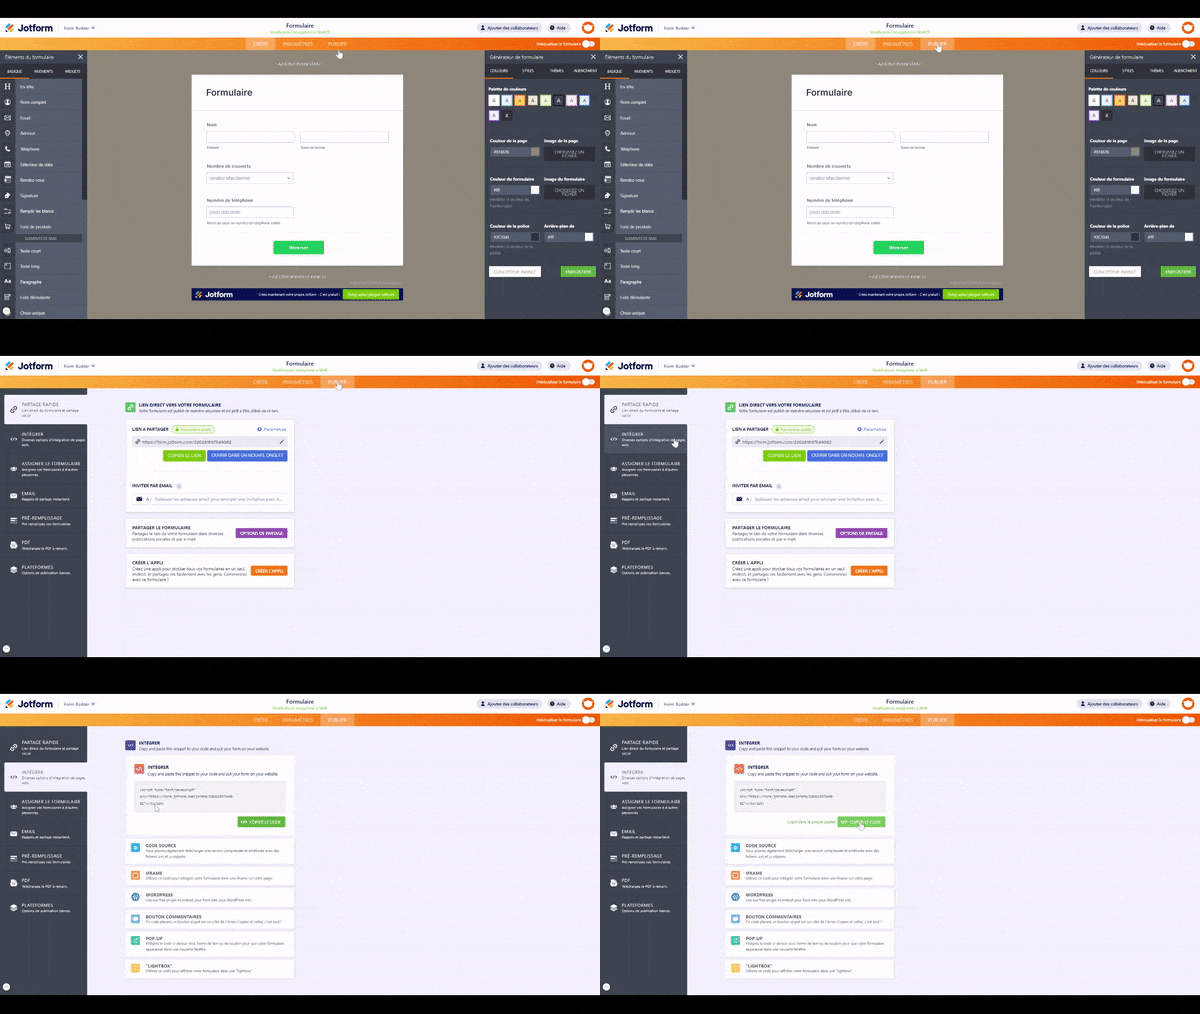
Let’s move on to integrating the reservation system into your restaurant's Webflow site. From your Jotform, go to the “Publish” tab. Jotform offers you several ways to integrate your reservation system:
- Via a URL: you can directly embed this link into text or a button in Webflow. This URL will redirect your visitors from your site to the reservation page.
- Via an embed: the reservation system will then be integrated as is into Webflow, and your clients will be able to interact with the form directly from your site. The embed code should be integrated directly into an “Embed” element from the Webflow designer. Once the code is added to your page, save and publish your site to access the form. This embed is also available in IFRAME version. Choose the one that suits your restaurant best.
- Via a floating button: the floating button will be located on all pages of your restaurant's site and aims to simplify reservations. You will need to integrate the embed code directly into your Webflow project settings Project Settings > Embed Code > Head Code. Save and publish your site to test your button.
- Via a pop-up: the pop-up is a new web page that will open after a click on a link from your site. Add this pop-up the same way as for a standard embed.
- Via a lightbox: the lightbox works on the same principle as the pop-up, with a window that opens, except it is not a web page. The integration principle is the same as for a standard embed.


.webp)


.jpg)
