
Here’s how to connect the instant messaging tool Slack to Webflow in 15 steps. To connect Slack and Webflow, we will use the automation tool Make (Integromat)
Integromat is a no-code automation tool that allows you to easily link Webflow to your other tools. Here’s how to connect a simple contact form to Make (Integromat).
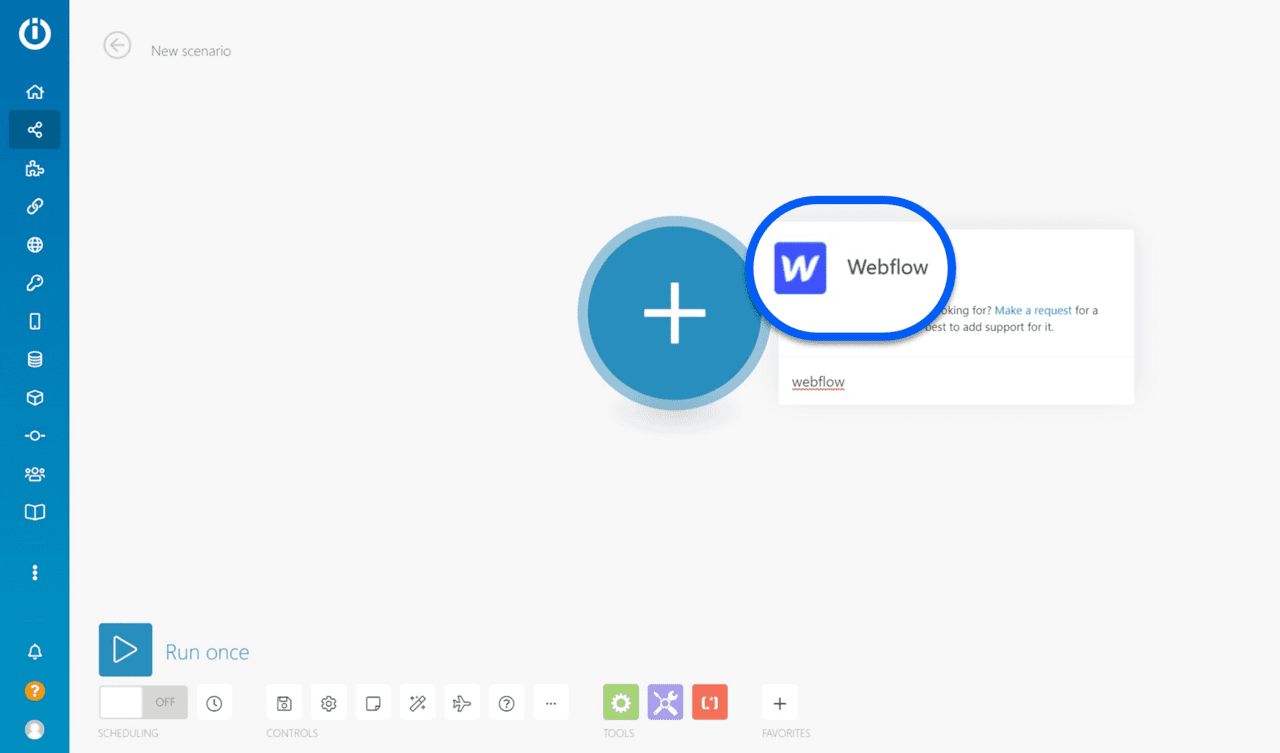
1 - Connect Webflow to Make (Integromat)
Here’s how to connect Webflow to Make (Integromat) very easily.
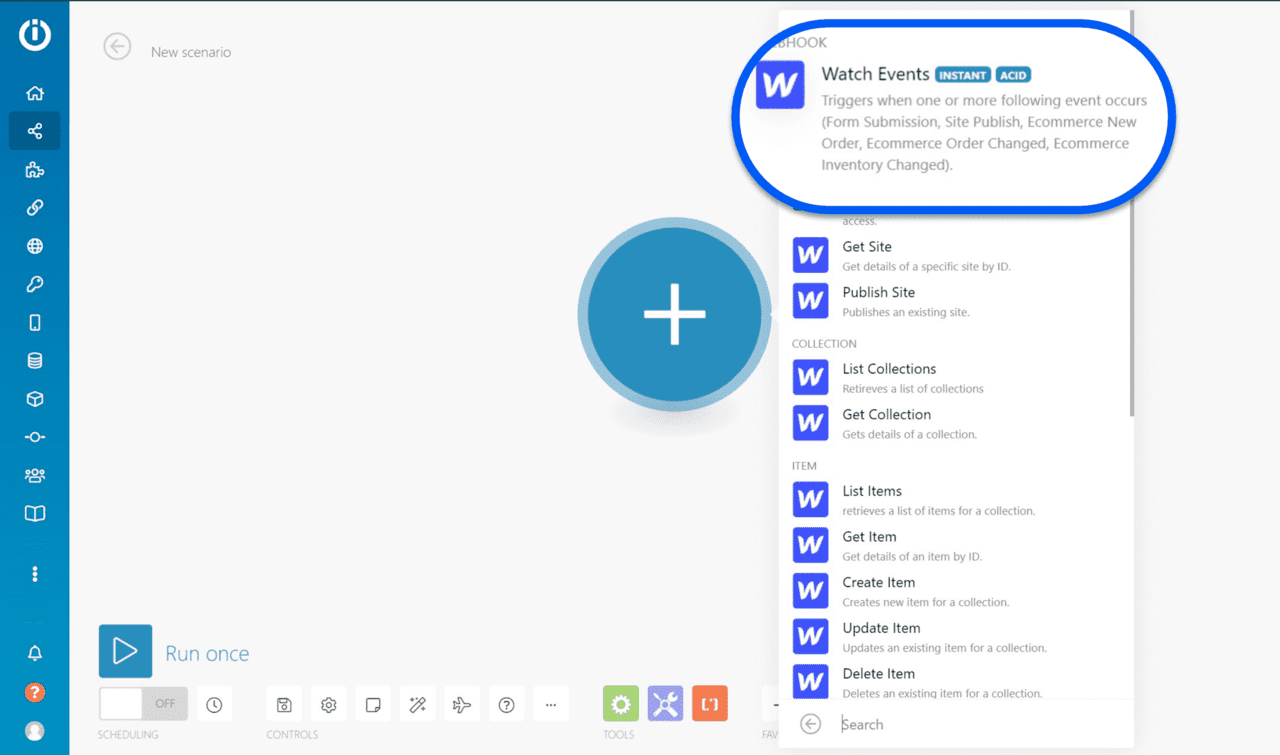
2 - Add a “Webhook” Trigger
Select the “Watch Events” webhook trigger. The advantage of the webhook is that it is triggered instantly when a form is submitted from Webflow. Unlike other triggers that inspect periodically (every minute, hour, day, etc.) whether or not to activate the automation chain.
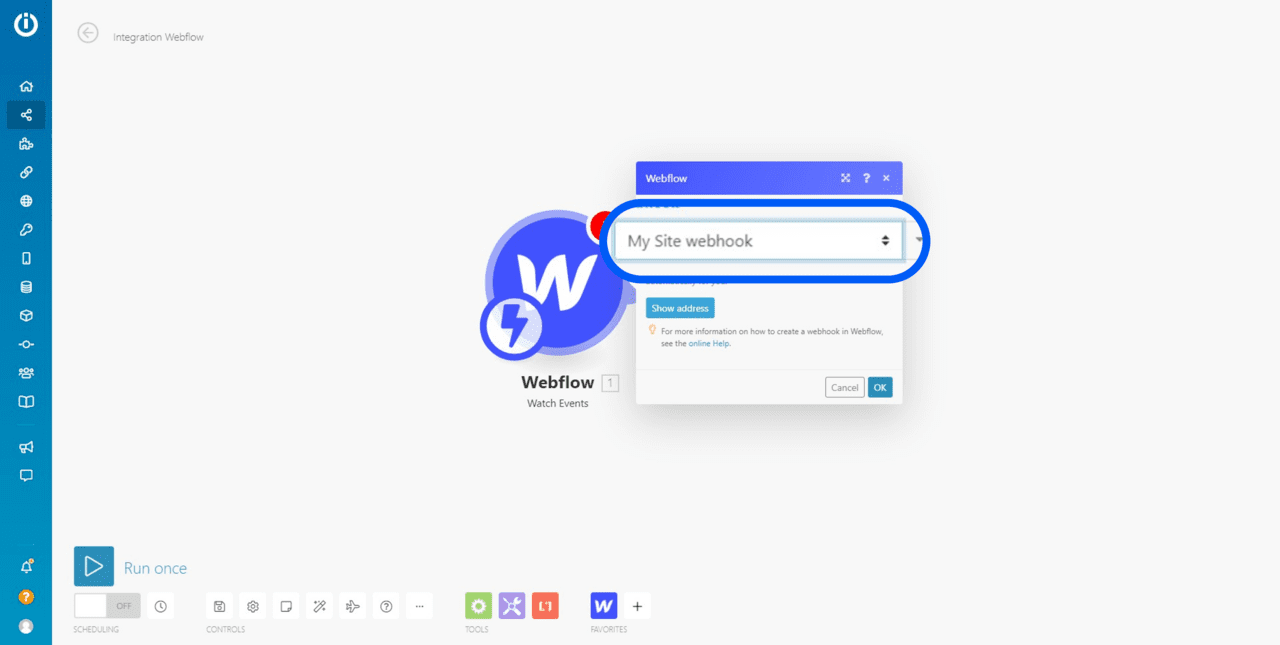
3 - Choose Your “Webhook”
If you have multiple projects in Webflow, you may have several webhooks set up. Select the one you want to link to your business. If you don’t have one, here’s how to connect a Webflow webhook with Make (Integromat).
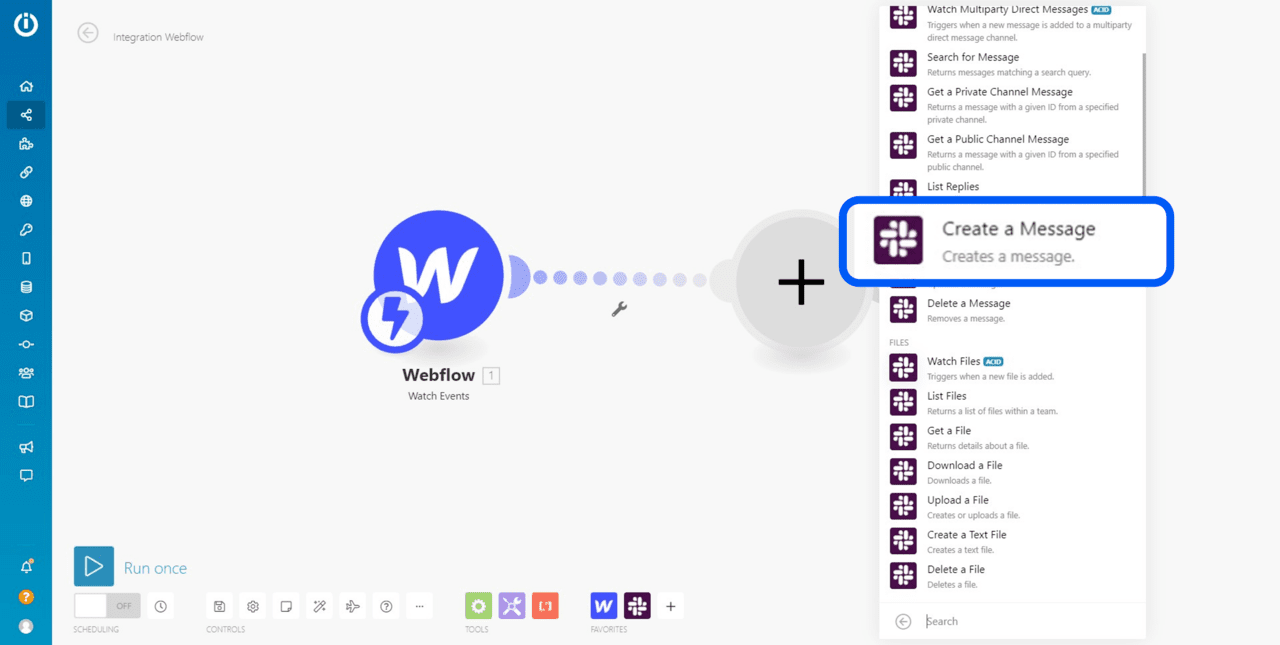
4 - Add a New Module
The advantage of Make (Integromat) is that it offers a plethora of pre-integrated tools that can be easily connected through modules. You just need to add the Slack module.

5 - Select an Action
The Slack module offers numerous actions to communicate with your teams, retrieve messages, upload files, react to posts, create channels, and more. For this example, we will choose the “Create a Message” action to send a message to your teams upon receiving a form submission.
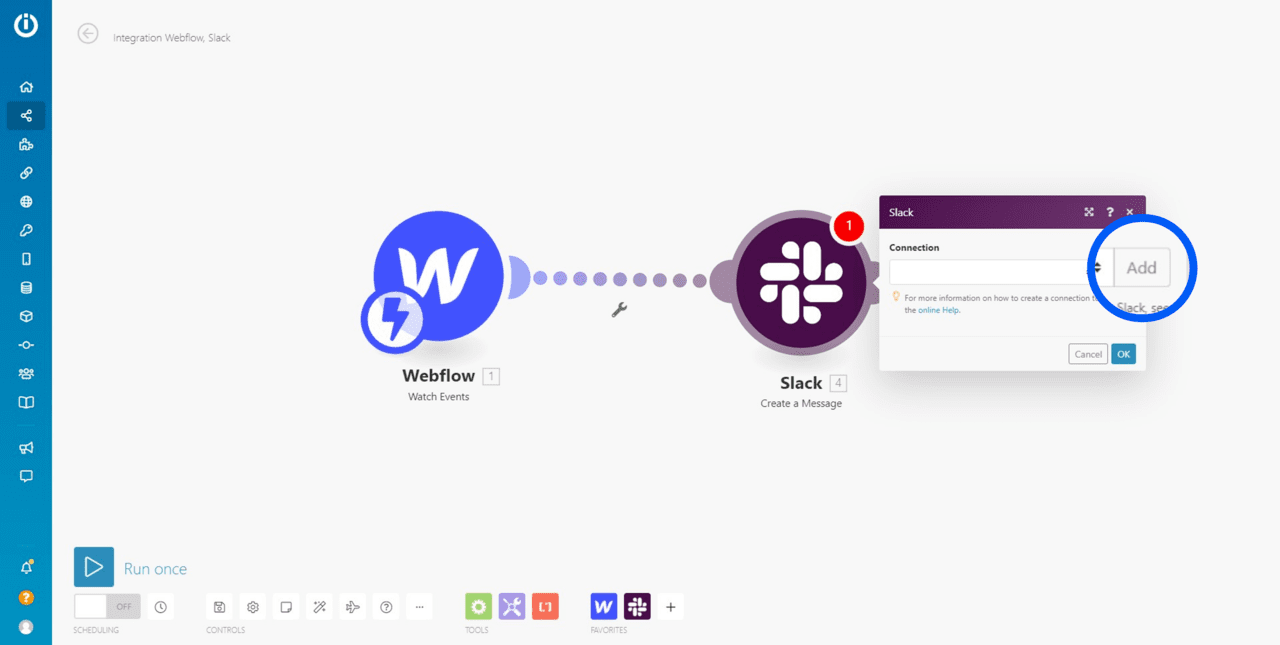
6 - Add a New Slack Connection
Add a Slack account to your Integromat profile by clicking “Add”.
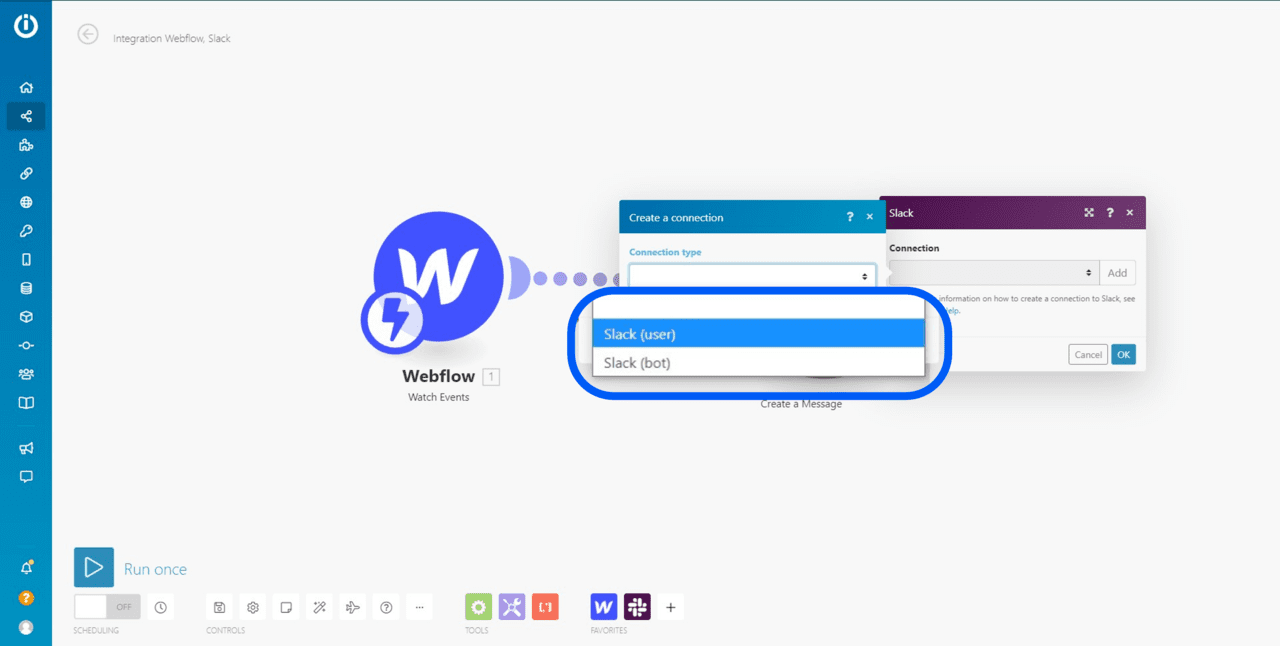
7 - Choose the Type of Connection
Your action can involve either a user or a bot. Indeed, Slack allows you to configure certain actions via its integrated bot. You can thus automate these actions and interact with the bot using Integromat. We will choose a “user” connection here.
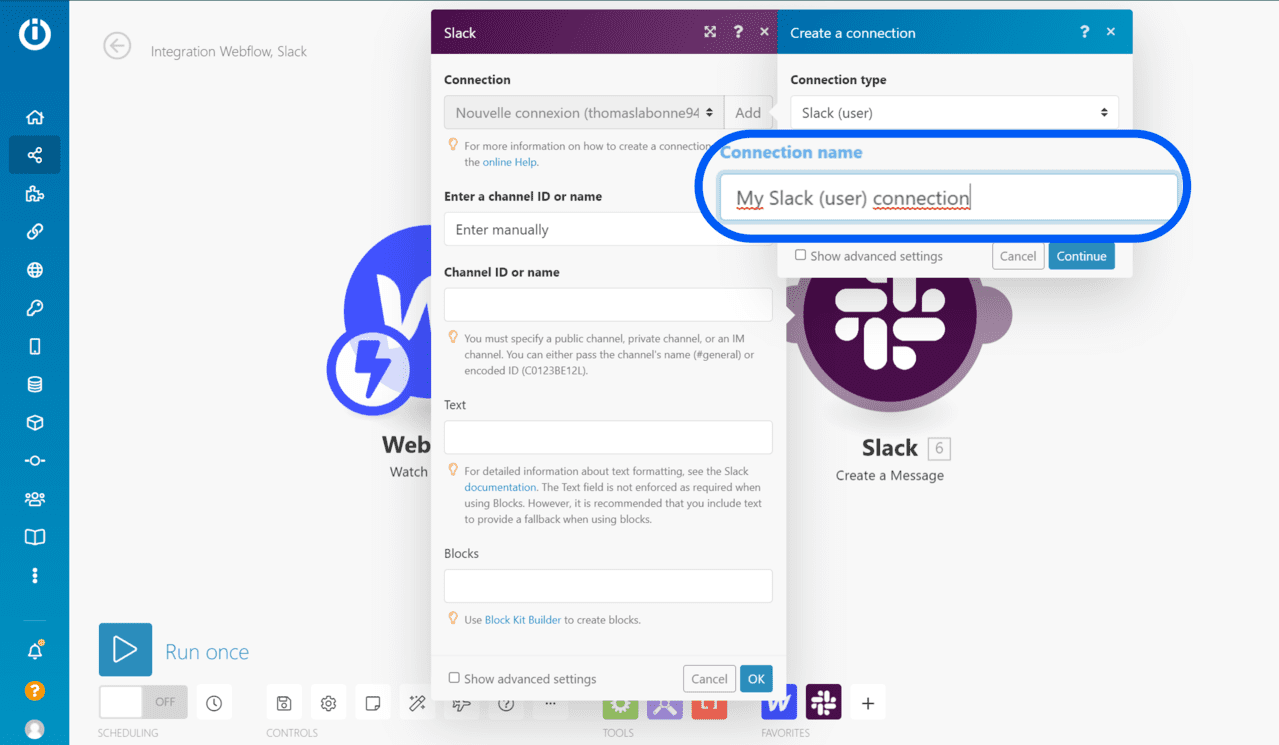
8 - Rename Your Connection
As always, it’s essential to identify the account you will connect to in case there are others in the future. Once renamed, click “Continue”.
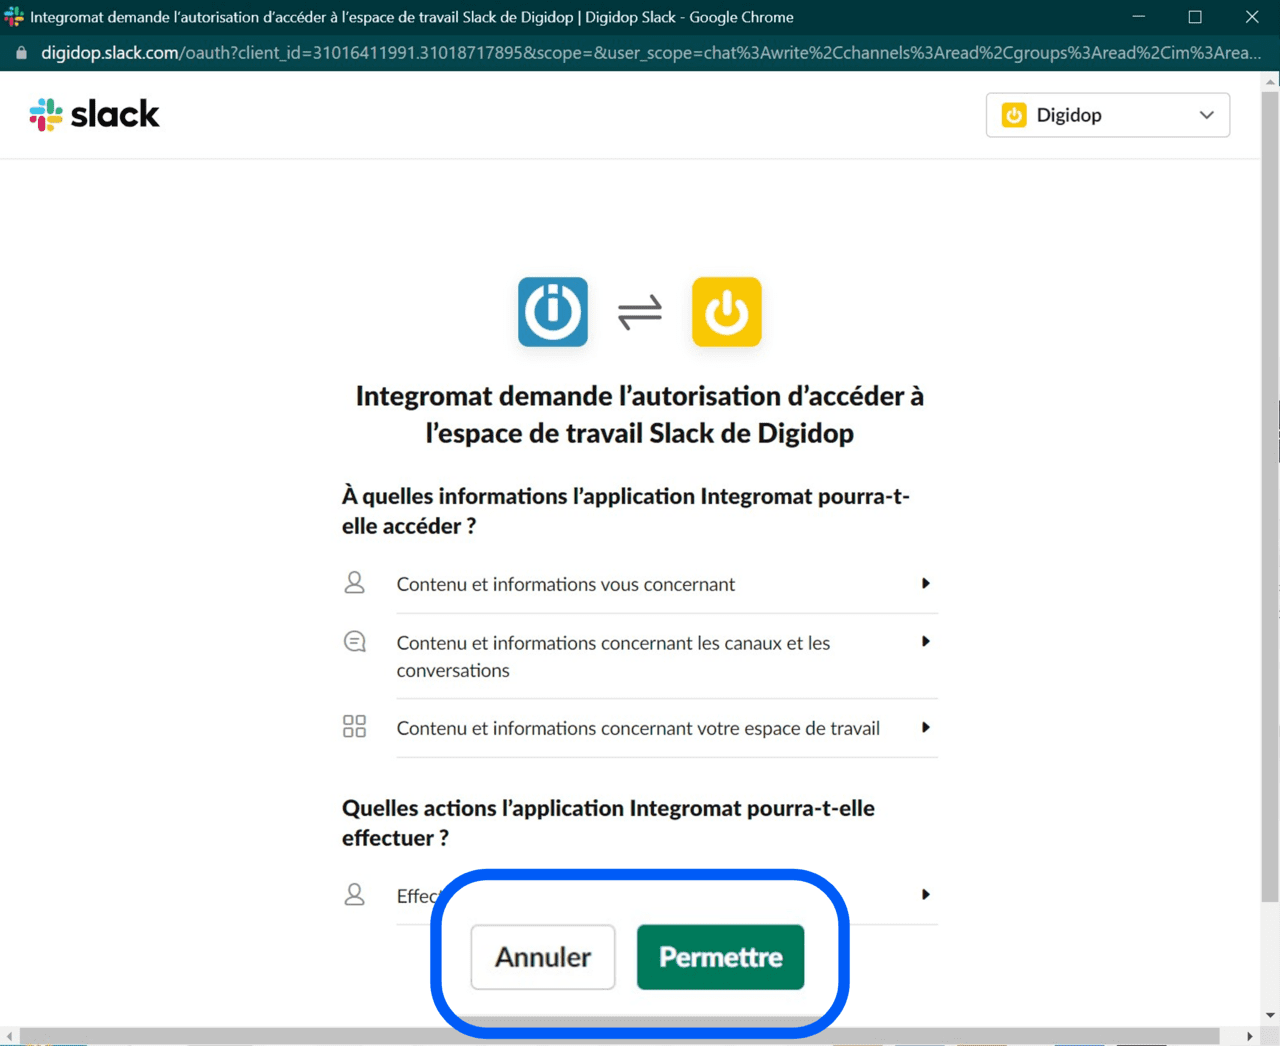
9 - Grant Permissions
Make (Integromat) needs your permission to access your Slack account. These permissions are directly related to the actions Integromat will subsequently perform with your account.
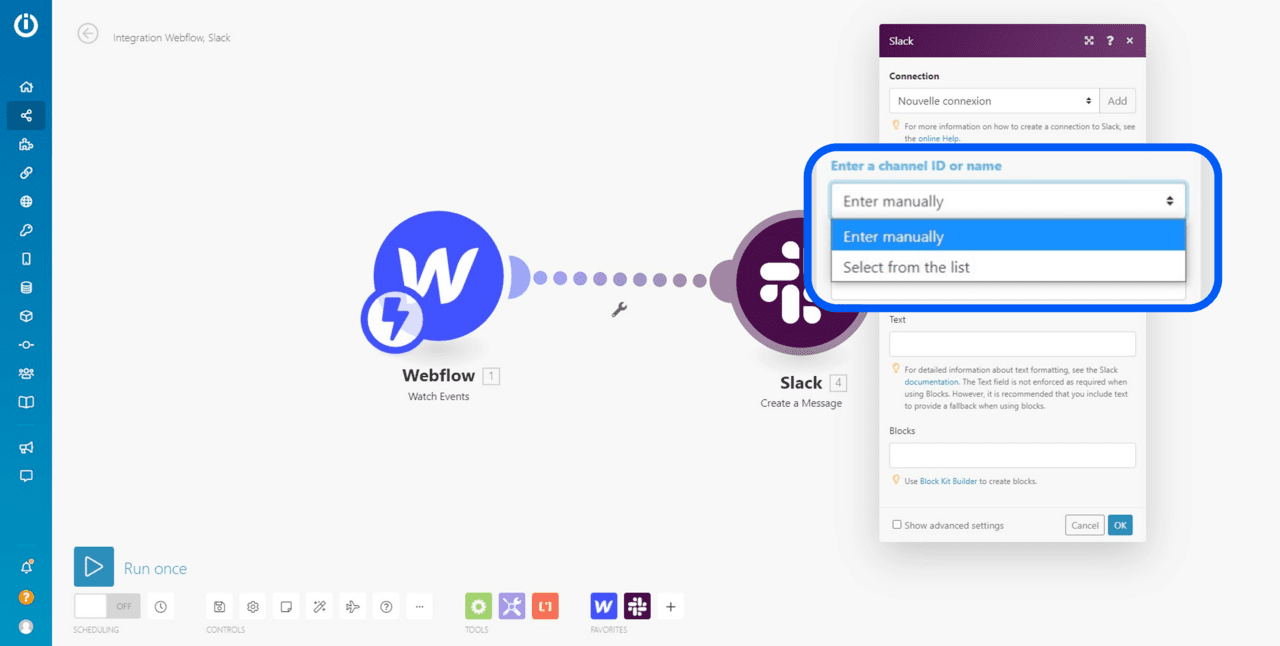
10 - Choose the Connection Method
Here, you select how to connect to a channel or an individual. You have two options:
- “Enter manually” to directly type in the ID of the target channel.
- “Select from a list” to more easily choose groups or individuals from a dropdown list.
We will choose the “Select from a list” option.
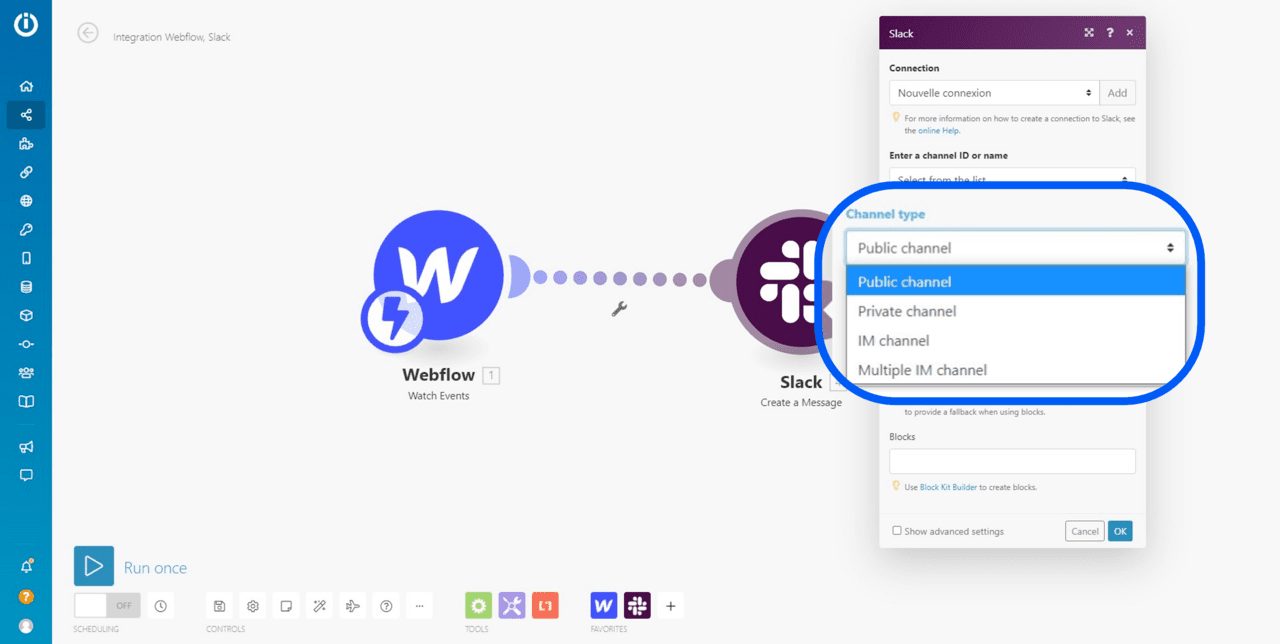
11 - Choose the Type of “Channel”
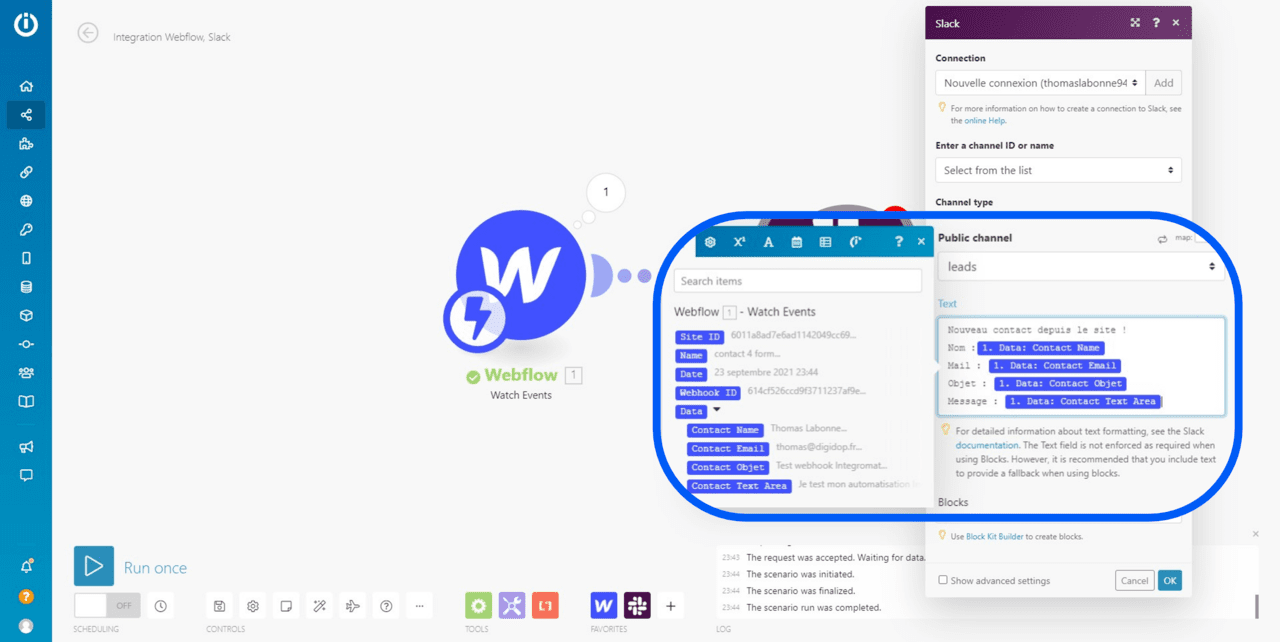
You can choose from several types of channels to address: public or private channels, direct private messages or group messages. We will select a public channel here.
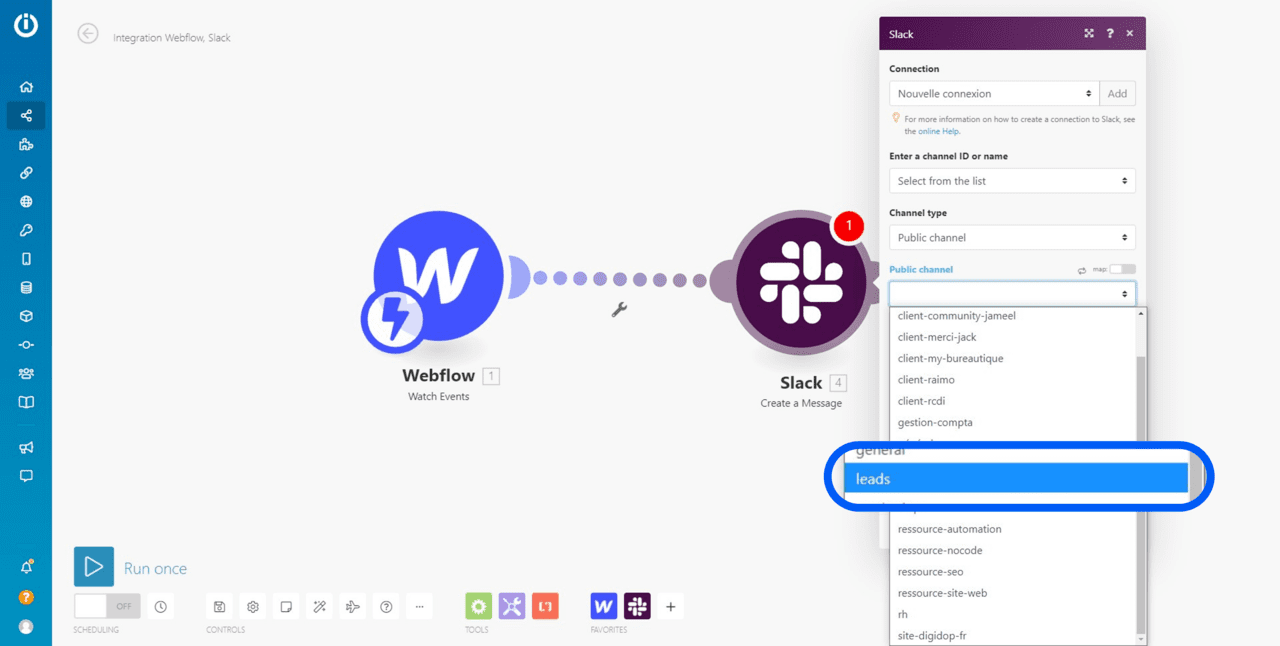
12 - Select the “Channel”
Choose the channel where you will post your automated messages. We have selected the channel where all leads from our website are directed.
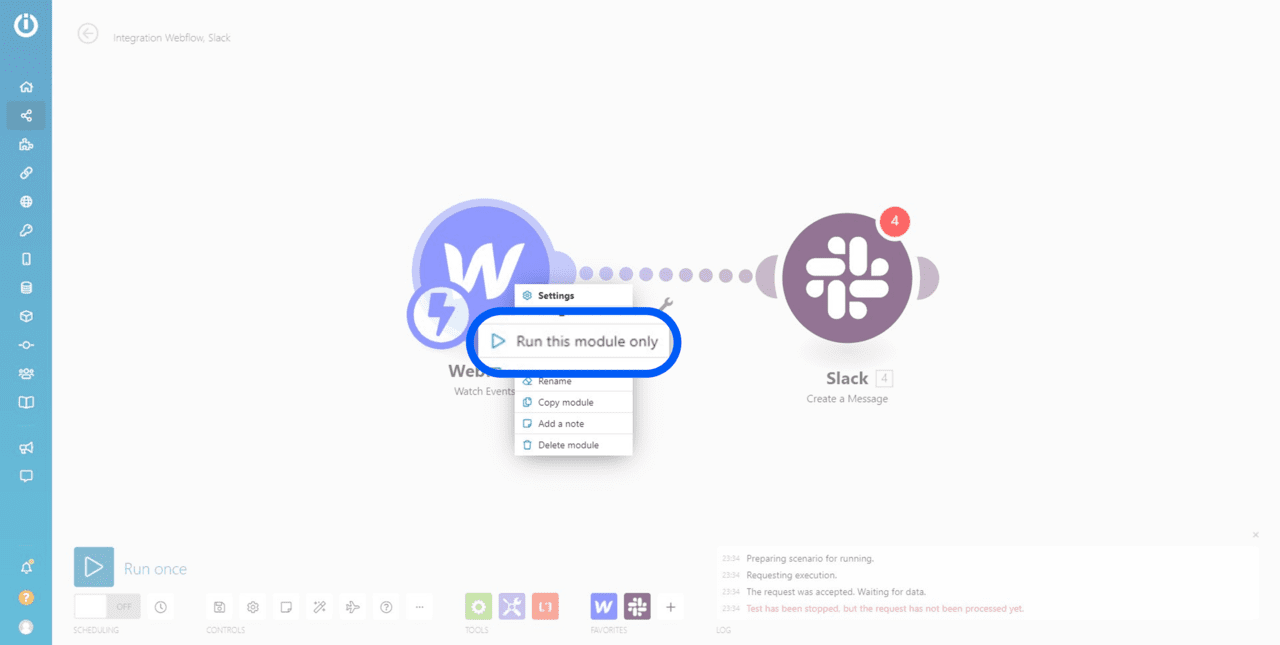
13 - Retrieve Data from the Webhook
Before drafting your Slack message, you need to inform the webhook about the type of data it will receive. Proceed to run only the Webflow module by right-clicking and selecting “Run this module only”.
14 - Submit a Test Form
For your webhook to receive data, you simply need to send it. Go to your website and fill out all the fields of your form.

15 - Configure Your Message in Slack
You can now draft the standard message that will be sent to your teams on Slack. Be sure to include the various data fields.
Bonus: Add an Emoji to Your Slack Messages
Here's a little tip for you: you can add compatible emojis between Make (Integromat) and Slack! 😉
.webp)


.jpg)
