
Automate your Webflow site with all your no-code tools using the new automation tool Make (Integromat). This alternative to Zapier allows you to connect your Webflow site to numerous web applications, for example, to:
- Connect your Webflow CMS to an Airtable database
- Connect your Webflow blog to Brevo (Sendinblue) or Mailchimp
- Automate your web forms
- Connect Webflow to your social networks like Instagram, Twitter, etc.
- Link Webflow to your customer reviews on Trustpilot, Google reviews, etc.
- Connect your Webflow e-commerce site to Stripe
- etc.
Here’s how to transform your site into a true web platform by connecting your Webflow site to Make (Integromat) in 4 steps.
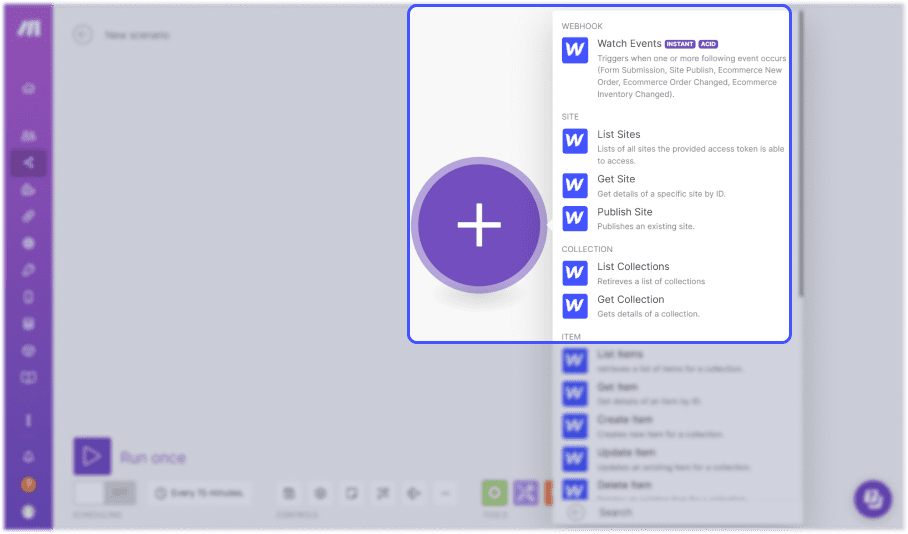
Step 1. Add a Webflow Trigger
Add your first trigger module to create your initial connection. Here, we will choose a “watch event” trigger. This will allow us to establish our first connection to Webflow.
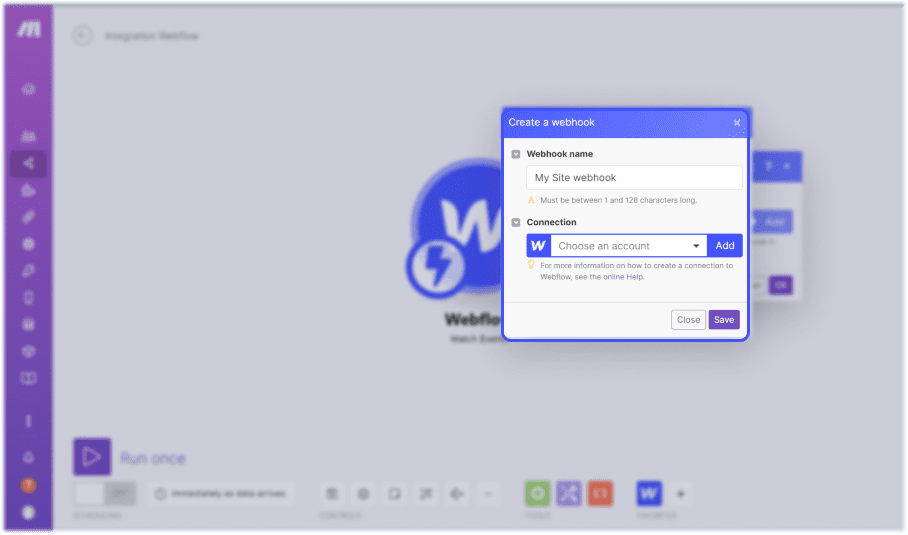
Step 2. Create Your First Webflow Connection in Make
In the “Connection” field, click on “Add” to add a new Webflow account. Rename your connection in the “Connection name” field, then click on “save”. A new Webflow window will open for you to log into your account.
Step 3. Select the Webflow Projects to Connect to Make
Once signed into your Webflow account from the pop-up, select the Webflow projects you want to connect to Make. Then click on “authorize application” to allow Make access to the Webflow API for your projects.

Step 4. Configure the Webflow Webhook
Next, Make will ask you to configure your Webflow webhook by specifying two things:
- Site ID: corresponds to the Webflow project that will be connected to this webhook
- Trigger type: specifies the type of trigger you want to use for this Webflow webhook. For instance, the automation can be triggered by every new web form filled on your site; each time your site is published; or during a purchase or modification of an e-commerce purchase.
Finally, click on “Save” to record your webhook, then click on “Ok” to complete the connection.

.webp)


.jpg)
