
In this tutorial, we will explore how to design product pages for your e-commerce site using Webflow. After following these steps, each time you add a new product to your online store, it will appear on a new page similar to your other products.
To get started, head directly to your project Webflow ! In this tutorial, we have already added a few products in Ecommerce - Products.
A quick disclaimer: To simplify understanding and execution of this tutorial, we have not used the Client First methodology by Finsweet. This tutorial is specifically aimed at beginners but can benefit everyone!
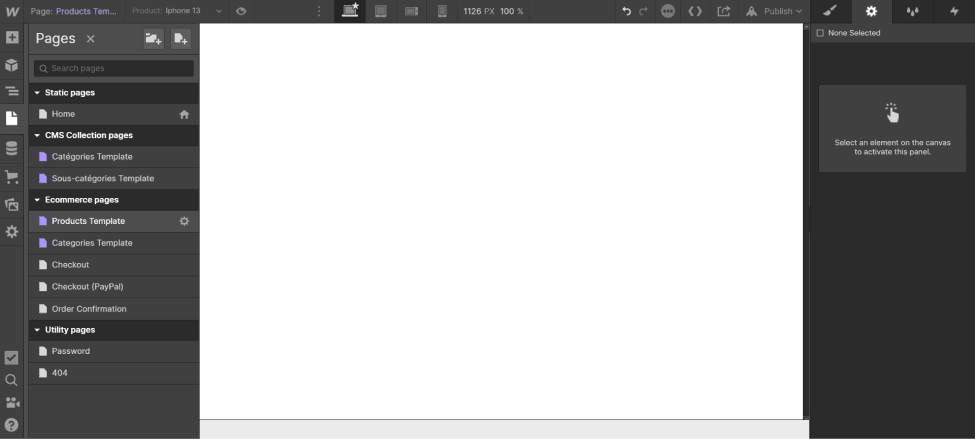
1 - Go to the “Products Template” page
From your project developer interface, navigate to the “Page” tab (or press P) and in “Ecommerce Pages,” select “Products Template.” This will take you to the page that will define the design for all your other product pages.
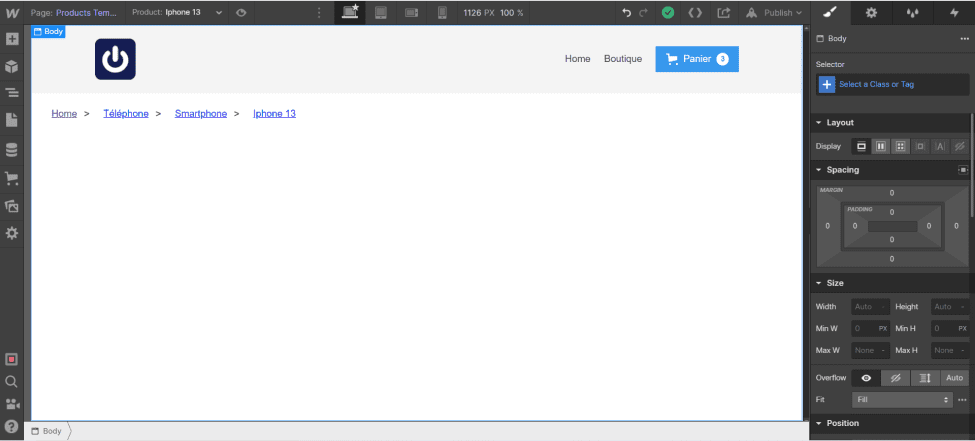
2 - Set up the basics of your site
In this article, we will not focus on this step, but (if you land on a blank page), start by adding your navbar and your Breadcrumb (very important for e-commerce site SEO). You may also choose to add your footer at this point.
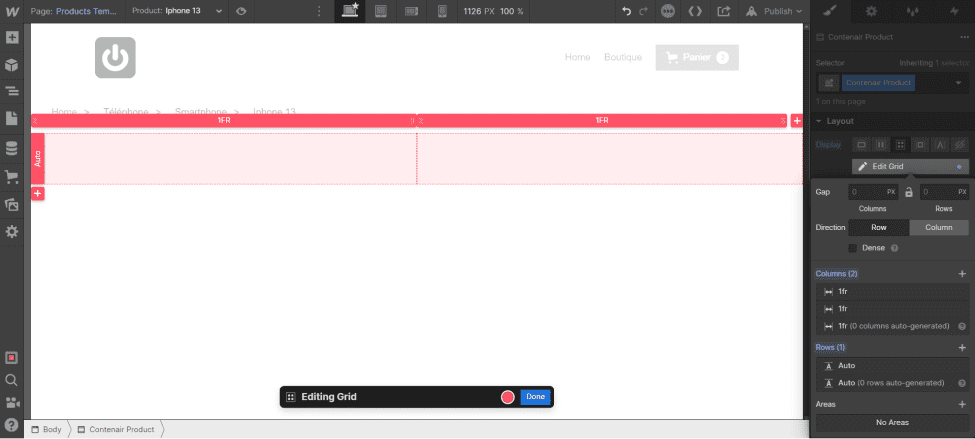
3 - Add a section and set display to “Grid”
Below your Breadcrumb, you can add the “Section” element. Click on “Add Elements” (or press A) and drag it below the Breadcrumb. Then go to Style (S) > Layout > Display > Grid. You can delete one row (Rows) to keep just 1 row and 2 columns. Create a class for this section named, for example, “Product Container.”
4 - Insert images of your products
To do this, you can drag and drop a “Div Block” into the first column. Create a class for this block that you will call, for example, “Product Image.”
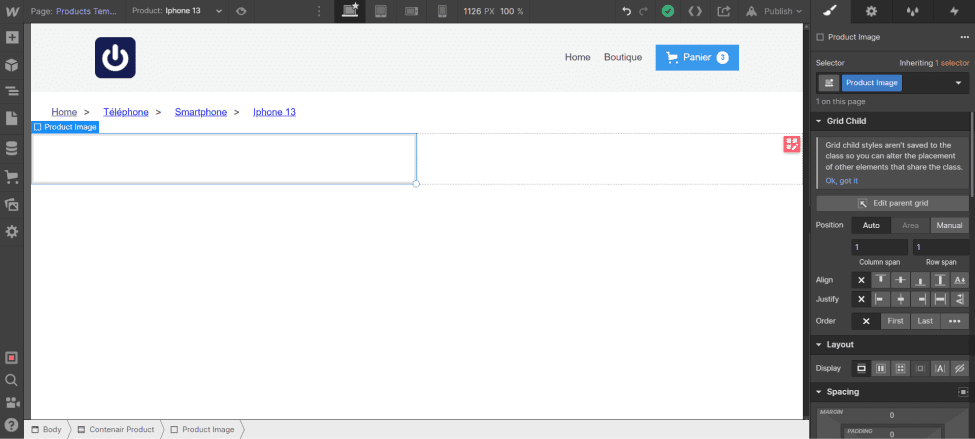
Then, drag and drop an “image” element into the “div block.” Instead of selecting an image from a gallery, click on “Get image from” and in “Select Field,” choose “Main Image” (the purple boxes correspond to adding dynamic elements from either your CMS collections or the “Products” section in Webflow Ecommerce).
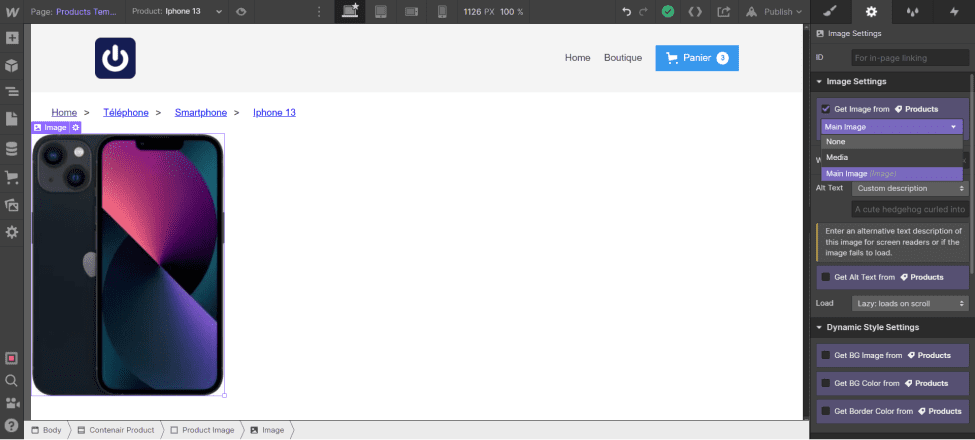
You now have the image of your products; however, the image size may not be appropriate. Don’t worry, we will fix this. First, we will center the image in the div block. To do this:
- Select the “Div Block” (In our example, “Product Image”)
- Go to style
- In Grid Child, select “Align” and “Center,” then check the “Center” boxes
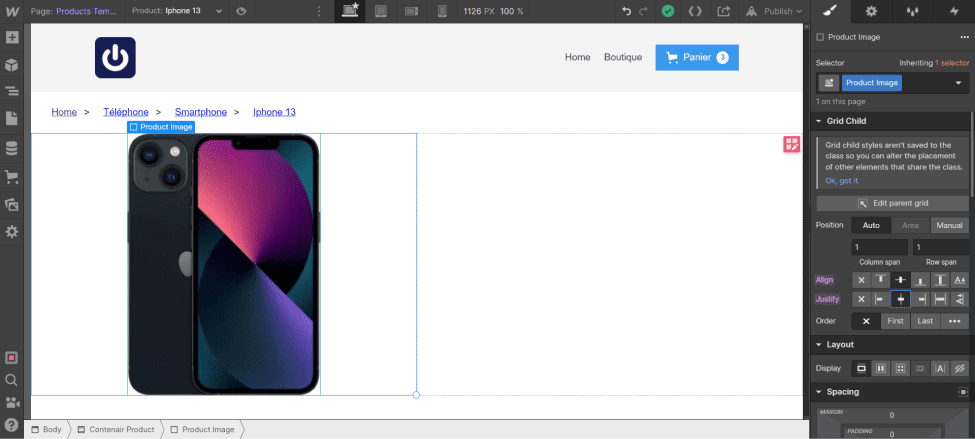
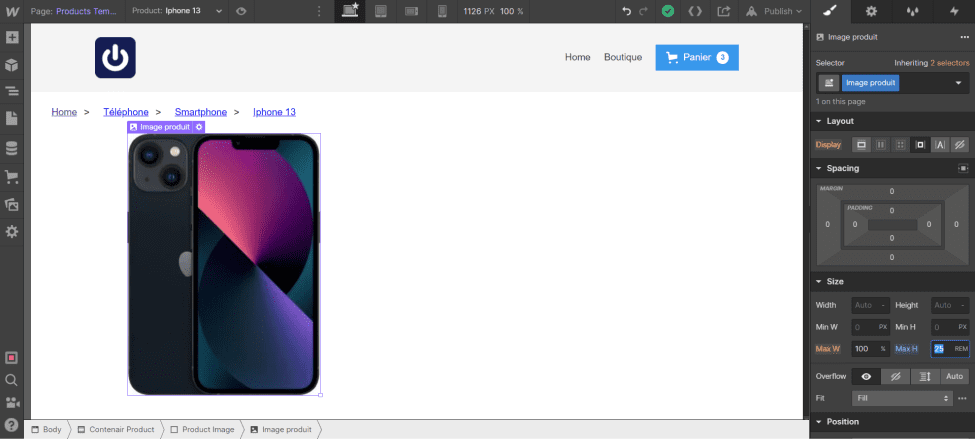
Next, we will set a size for the image. To do this:
- Select the image
- Create a class (we will call it “Product Image”)
- Leave Max W at 100%
- Set a value in REM for Max H (In our example, we want the image to have a Max H of 400 pixels, to convert to REM, we divide by 16, so we enter in Max H: 400/16rem)
You can preview your other products by clicking on the down arrow “Product” in the top horizontal bar and selecting your product (you can also scroll using the keyboard shortcut: Shift + Alt (or option) + Arrow (right or left).

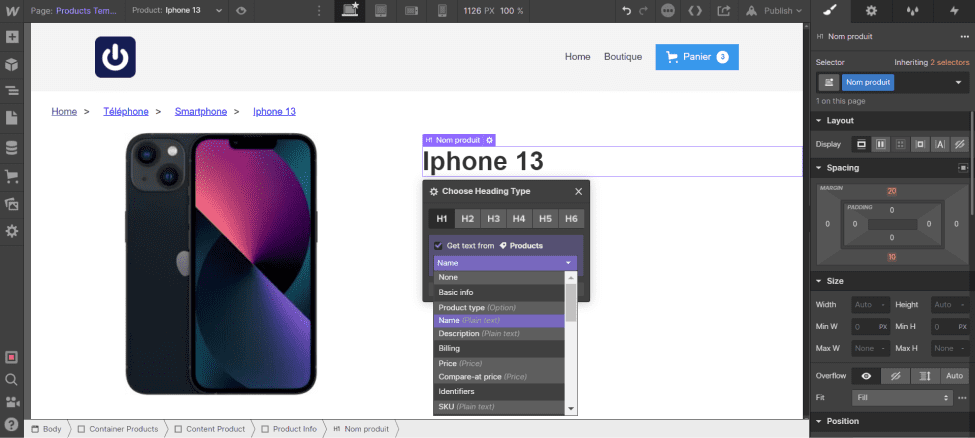
5 - Insert the product name
First, insert a “Div Block” in the left column (we will call it “Content Product”).
To add the name, it’s quite simple:
- Insert a Div Block in the right column
- Create a class and give it a name (In this example, we will choose “Product Info”)
- Insert a Heading in the block
- Keep the Heading as H1 (this is a good SEO practice for e-commerce)
- Click on the Heading, check “Get Text From” and select “Name”
Of course, this is just an example; the name of your product should be optimized for SEO (modification in Ecommerce - Products on Webflow). You can also adjust the typography and size of the H1 in the Style Guide or use the “Client First” methodology.
6 - Insert the product price
Again, nothing overwhelming; you just need to:
- Drag and drop a text block below the product name (H1), still within the “Product Info” div block
- Select the text, check “Get text from” and choose “Price”
- Modify the appearance/design as you like

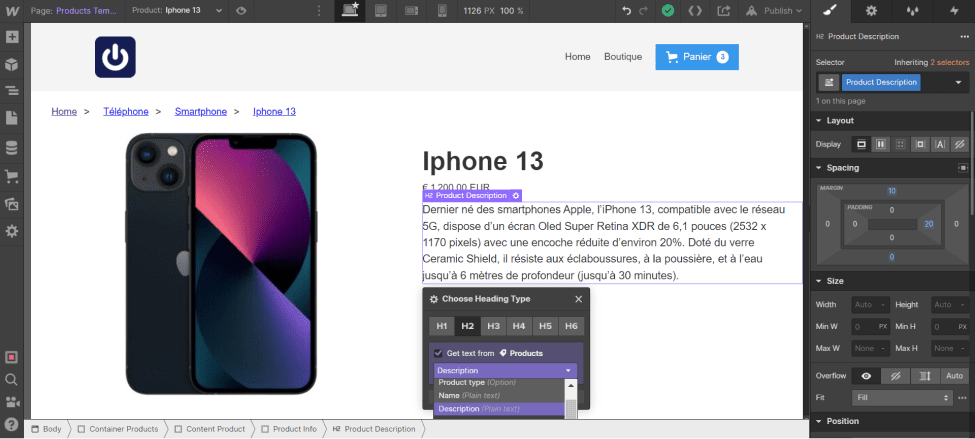
7 - Insert the product description
It is recommended for natural SEO to include a brief product description in H2; however, if you prefer to format it as a paragraph, the method remains the same:
- Insert a Heading block - H2 (or “Paragraph”)
- Select “Get text from,” then choose “Description” from “Basic Info”
- Customize as you wish
You can then add more product information in the same way, but by inserting paragraphs and selecting the appropriate dynamic text (you will need to add custom fields in the product settings beforehand).
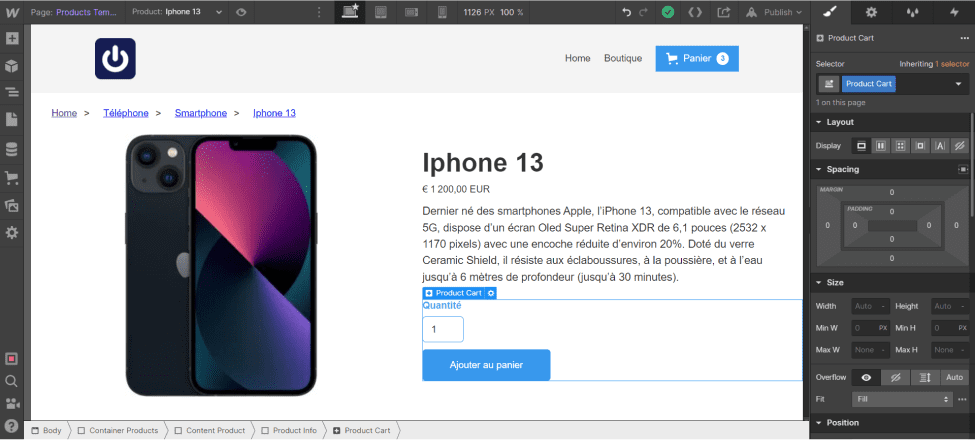
8 - Add an Ecommerce “Add to Cart” block
This element will allow your customers to add a product to their cart. To add it, simply drag and drop the “Add to Cart” element below the product description (in the right column). You can change the elements of the block one by one to customize them.
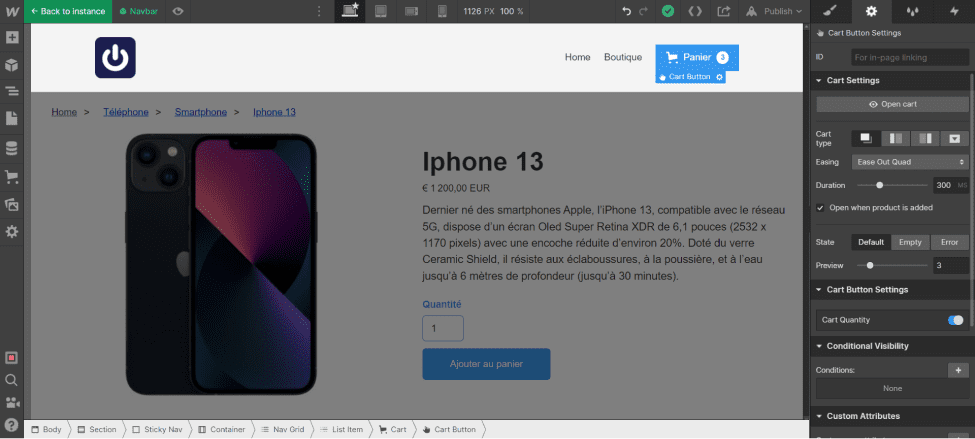
9 - Add the cart to the NavBar
To add the cart to the NavBar, simply drag and drop the “Cart” element into your NavBar.
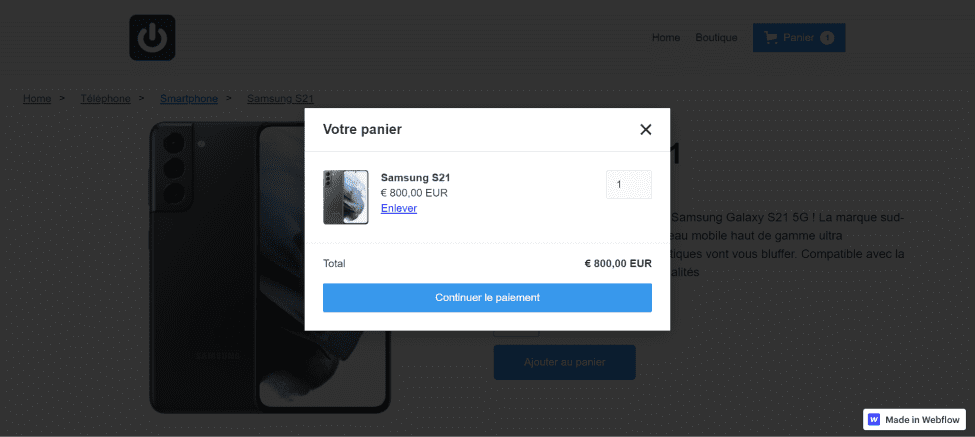
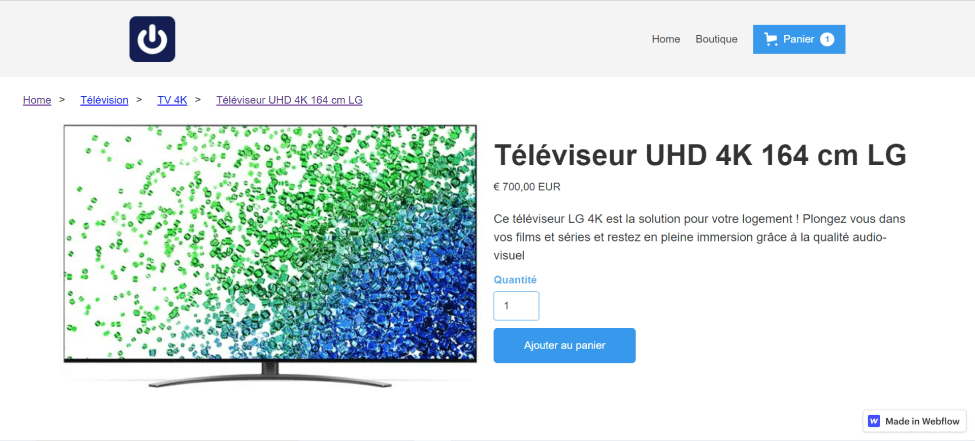
10 - The result
Here is our result for designing the “Product Template” page; of course, these steps are just the basics. You can take it much further with Webflow and fully customize these product pages to reflect your unique vision.

If you need assistance in building your e-commerce site, Digidop can completely customize your online store to make it unique and ensure it meets the best SEO practices.
.webp)


.jpg)
