.jpeg)
For those who are not yet familiar with Coda.io, it is the perfect no-code tool for managing all kinds of data. The tool is designed like Notion, allowing you to structure your data in files, pages, tables, cards, timelines, etc. You will also be able to easily organize your pages using blocks, headings, buttons, by integrating embeds, or by connecting your data together.
One thing we often use with Coda is the ability to share files, whether with our teams or our clients. For example, for tracking website creation or monitoring SEO performance.
In short, Coda is a very useful tool for managing data. Now, let’s look at how to benefit from it by connecting it with Webflow. To connect your Coda workspace with Webflow, you'll need to use an automation tool since there is currently no direct integration for Coda within Webflow.
In this example, we will see how to connect Webflow and Coda using Make (Integromat). We will explore how to send data, for instance, from a contact form, directly from Webflow into Coda.

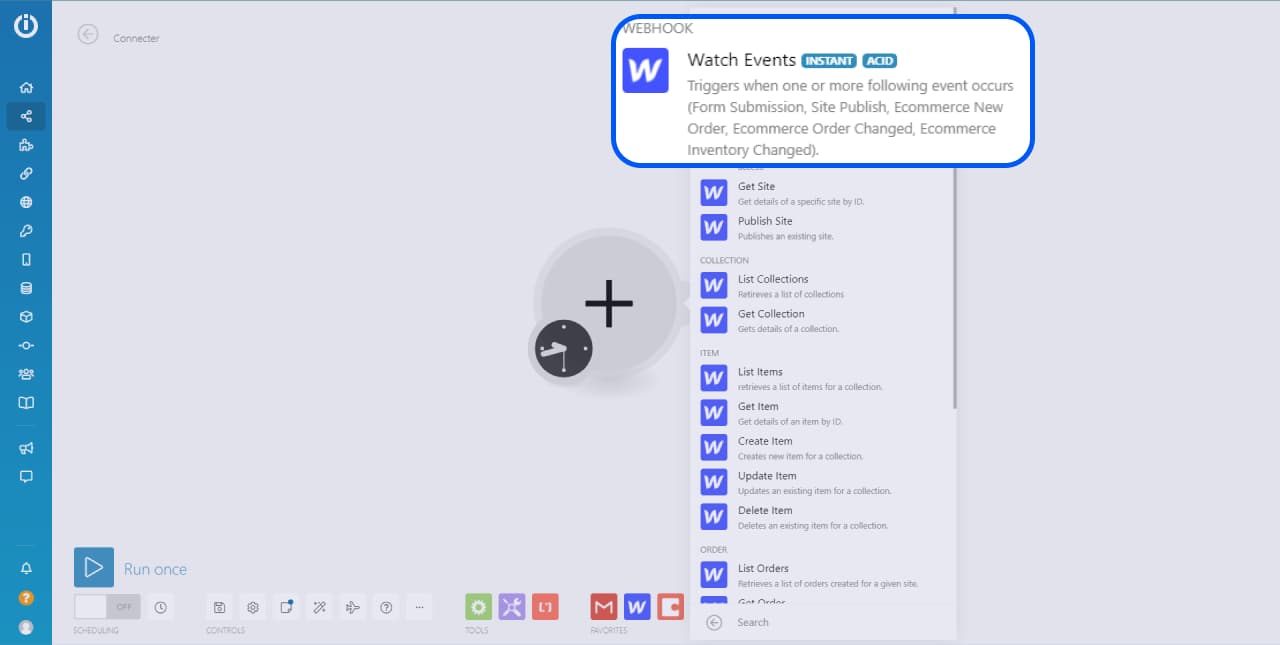
1 - Add a Webflow Trigger
Start by adding a new "Watch Event" trigger to connect your Webflow form to Make (Integromat). Here, we aim to receive data from a contact form to add to our Coda.
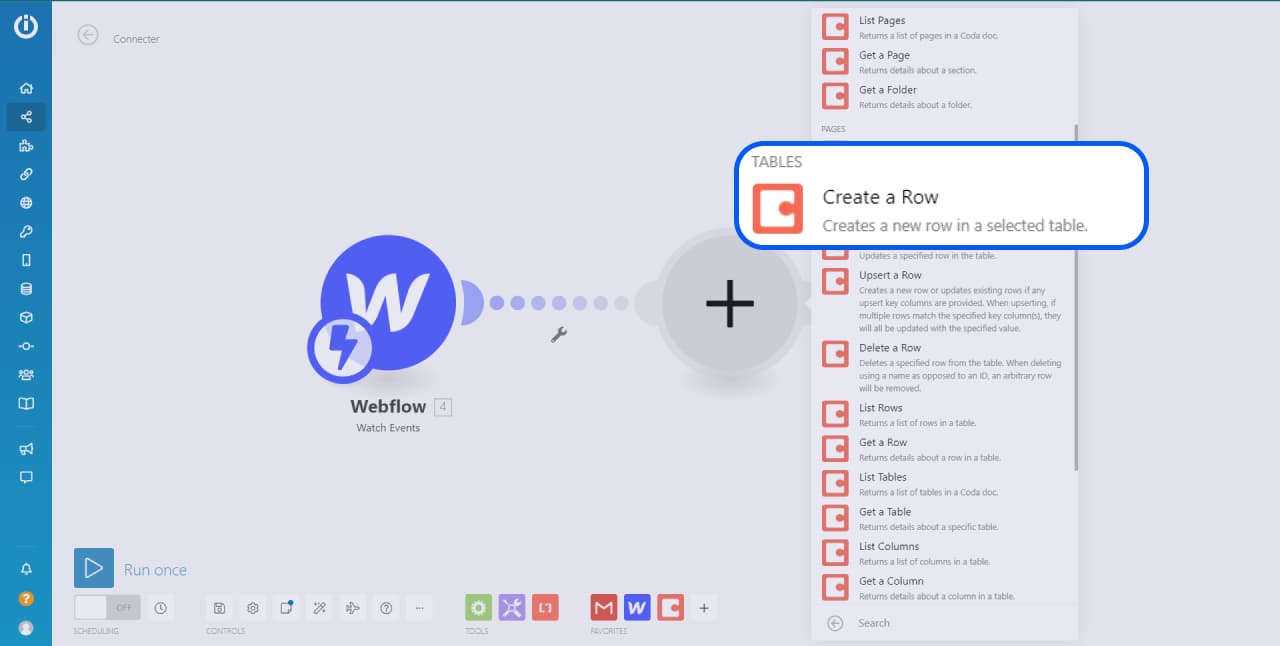
2 - Connect a Coda Module
Search for a new Coda module and connect it to Webflow. Among all the automation possibilities offered by Make (Integromat), you can:
- Create, list, and retrieve information about your documents
- Organize your pages
- Manage your tables by adding, updating, or deleting rows, etc.
- Obtain information about your formulas
- Trigger an API
In this example, we are looking to add a new row with the information of each new prospect who contacts us through Webflow. Therefore, we will add the "Create a Row" module located in the “Tables” tab.
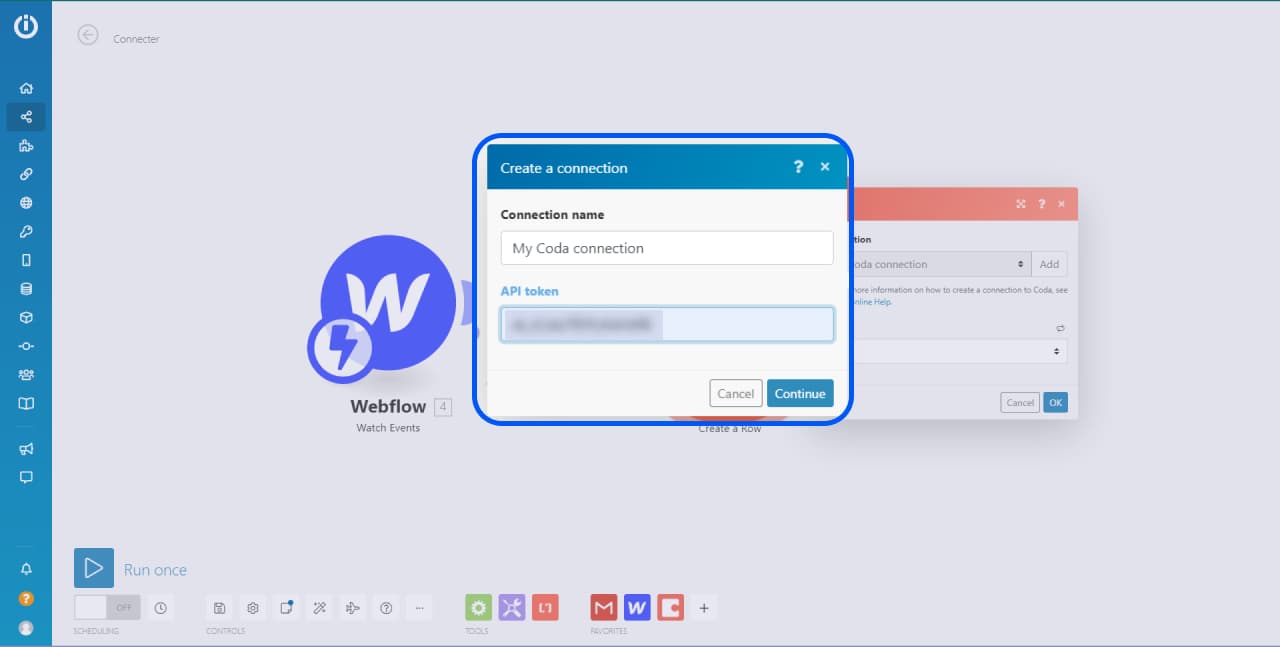
3 - New Coda Connection
The first time you connect Coda to Make (Integromat), you will need to add a new connection to your account. Click on “Add” and remember to rename your connection to distinguish it from other accounts.

4 - Add the API Key
The API key will allow Make (Integromat) to identify and access your Coda account. To do this, you need to retrieve your API key from Coda.
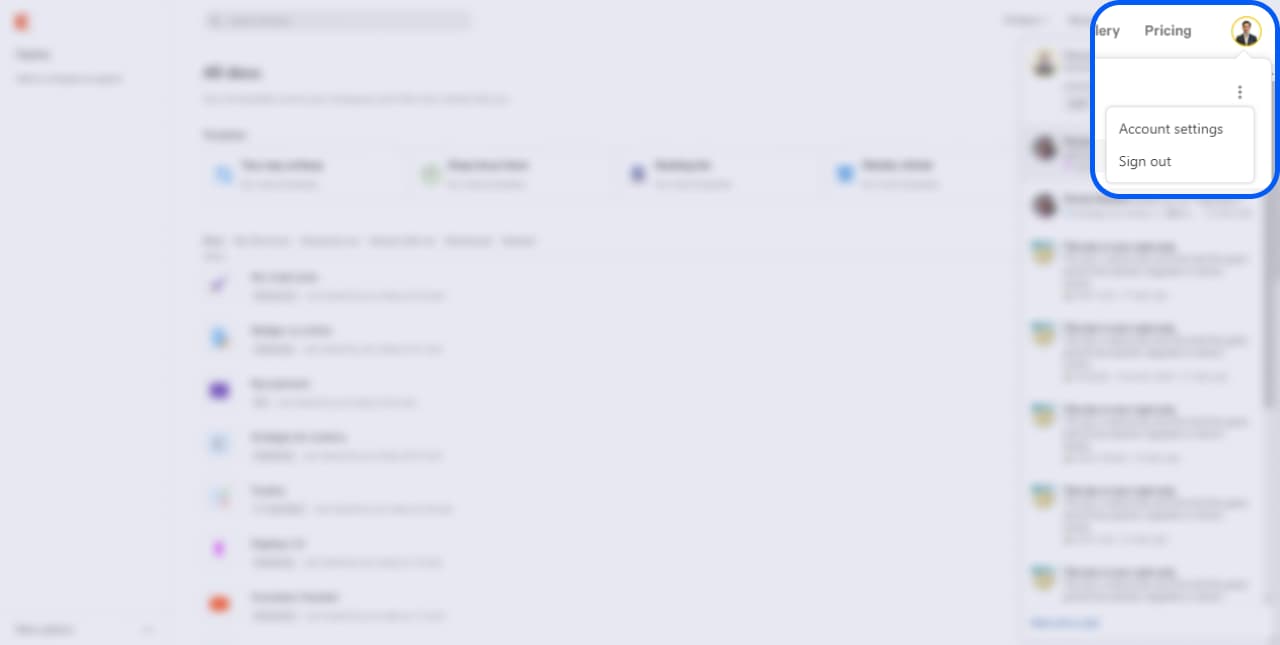
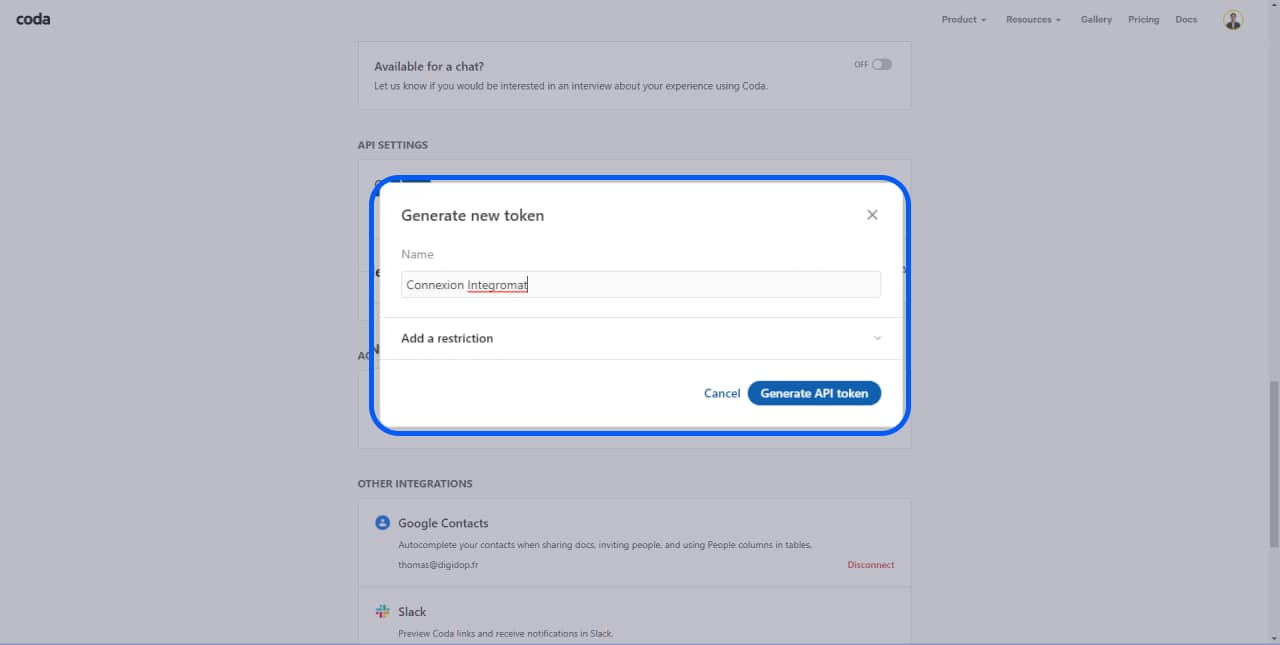
4.1 - Retrieve Your API Key from Coda
From your Coda workspace, go to your account settings.
You will find an “API Settings” section where you can click on “Coda API Token” to generate a new API key.
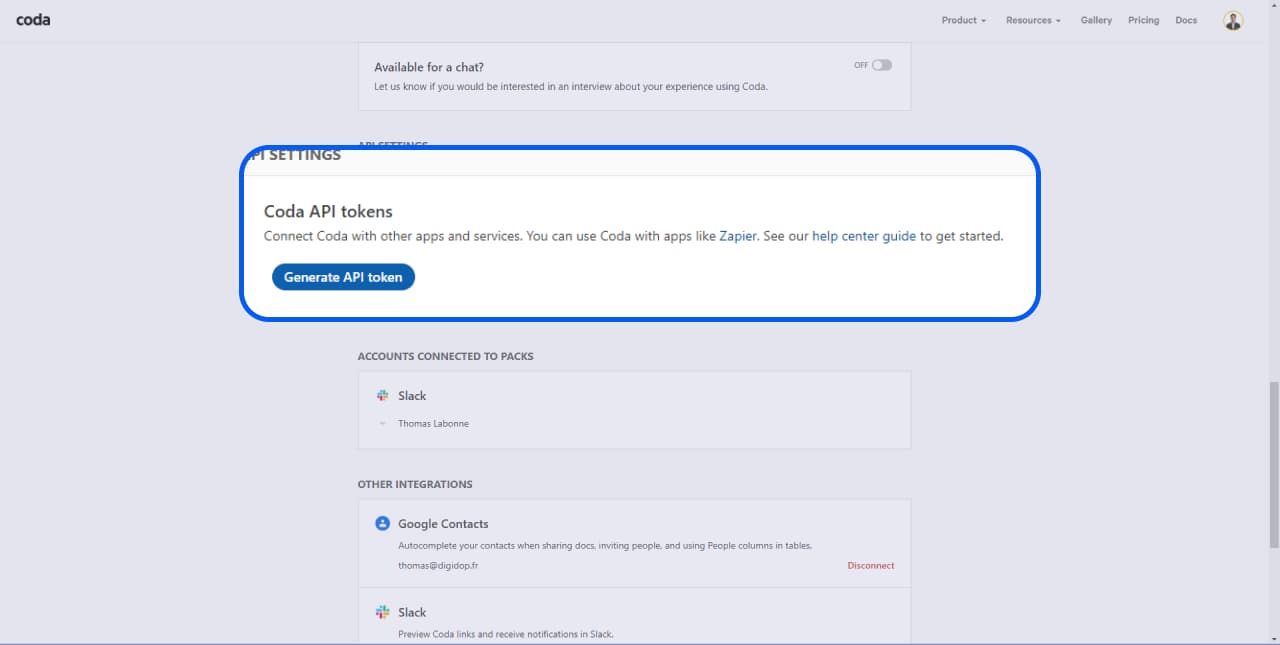
Rename your Coda API key, for example, “Integromat Connection.” The advantage of having multiple keys is that you can apply different levels of restrictions based on the tools used or delete those belonging to specific tools.
4.2 - Add the API Key to Make (Integromat)
Return to Make (Integromat) to add your Coda API key. Click on “Continue,” and voila, you are connected!
5 - Choose Your Document to Connect
Select the Coda document you want to connect to Webflow.

6 - Select a Table to Connect
Choose the Coda table in the document where you will add the data from the Webflow form.

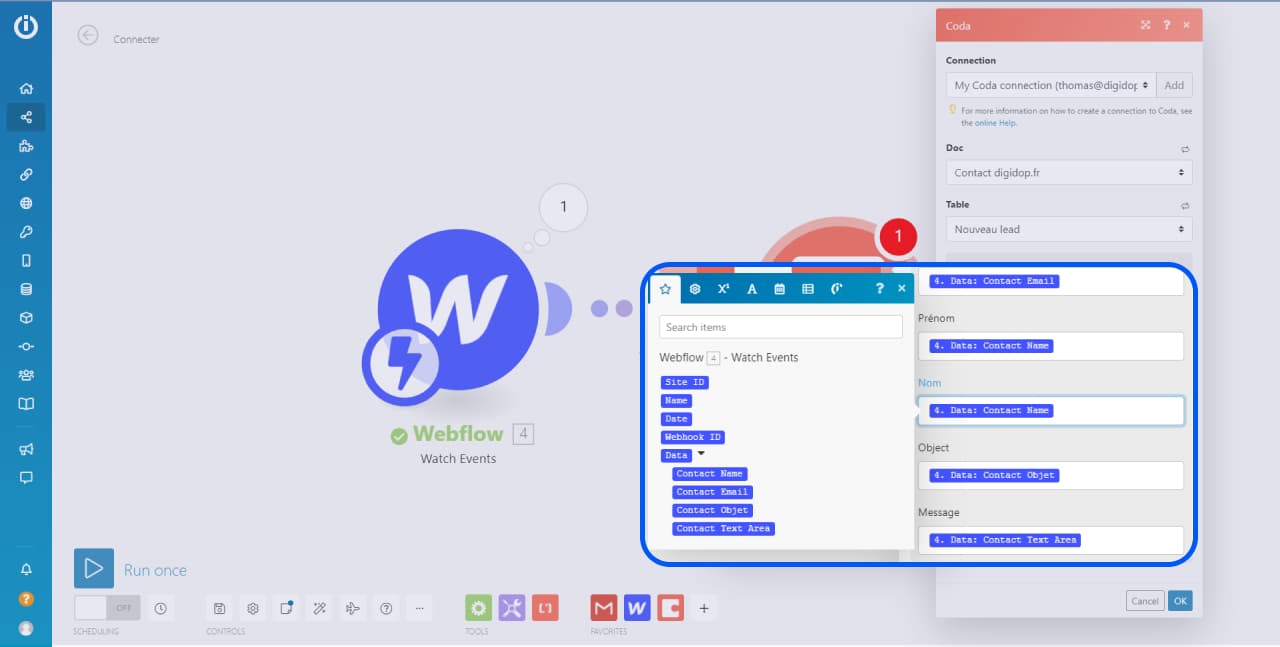
7 - Send Data to the Webflow Trigger
Run the Webflow webhook only, then fill out a form from your website to send the data. To run only the Webflow module, right-click on it, then click “Run this module only.” It will then be ready to receive data from the web form.
.jpeg)
8 - Match Webflow Data with Coda
Your webhook has now received the data. You can easily match it with your Coda table by associating the various data fields. There you go, your Webflow site is now connected to your Coda via Make (Integromat)!
.webp)


.jpg)
