Linking your Gmail address with your Webflow website is not just for receiving contact form notifications! The goal is to enhance your site's user experience by quickly and easily automating various emails.
For example, you will be able to organize the different notifications you receive from Webflow in Gmail, send automated emails, personalize responses to your prospects and clients, use email templates, send e-commerce order summaries, and more.
The idea is to relieve you from the repetitive task of confirming the receipt of an email and, on the other hand, to improve your response times as they will be instant and personalized! 🤩
Prerequisites
- You have a G Suite account: follow this tutorial, and you'll be connected in 5 minutes 😍 How to know if you have a G Suite account? It's simple: if your email domain is @gmail.com, then you do not have a professional address.
- You do not have a G Suite account: This will be more complex, but it is doable (🚨 be aware that Google's security measures might occasionally disconnect your account from Make (Integromat). To do this, you will need to create access to the Google API with OAuth on the Google Cloud Platform. To obtain your OAuth client and thus have your "Client ID" and "Client Secret" necessary for Make (Integromat) connection, follow this tutorial on connecting Make (Integromat) and Gmail with the OAuth Client.
In this tutorial, the idea is to send an automatic email to a prospect who contacts you through your Webflow contact form. We'll use the automation tool Make (Integromat) to automate your Webflow site.
1 - Add a Webflow module
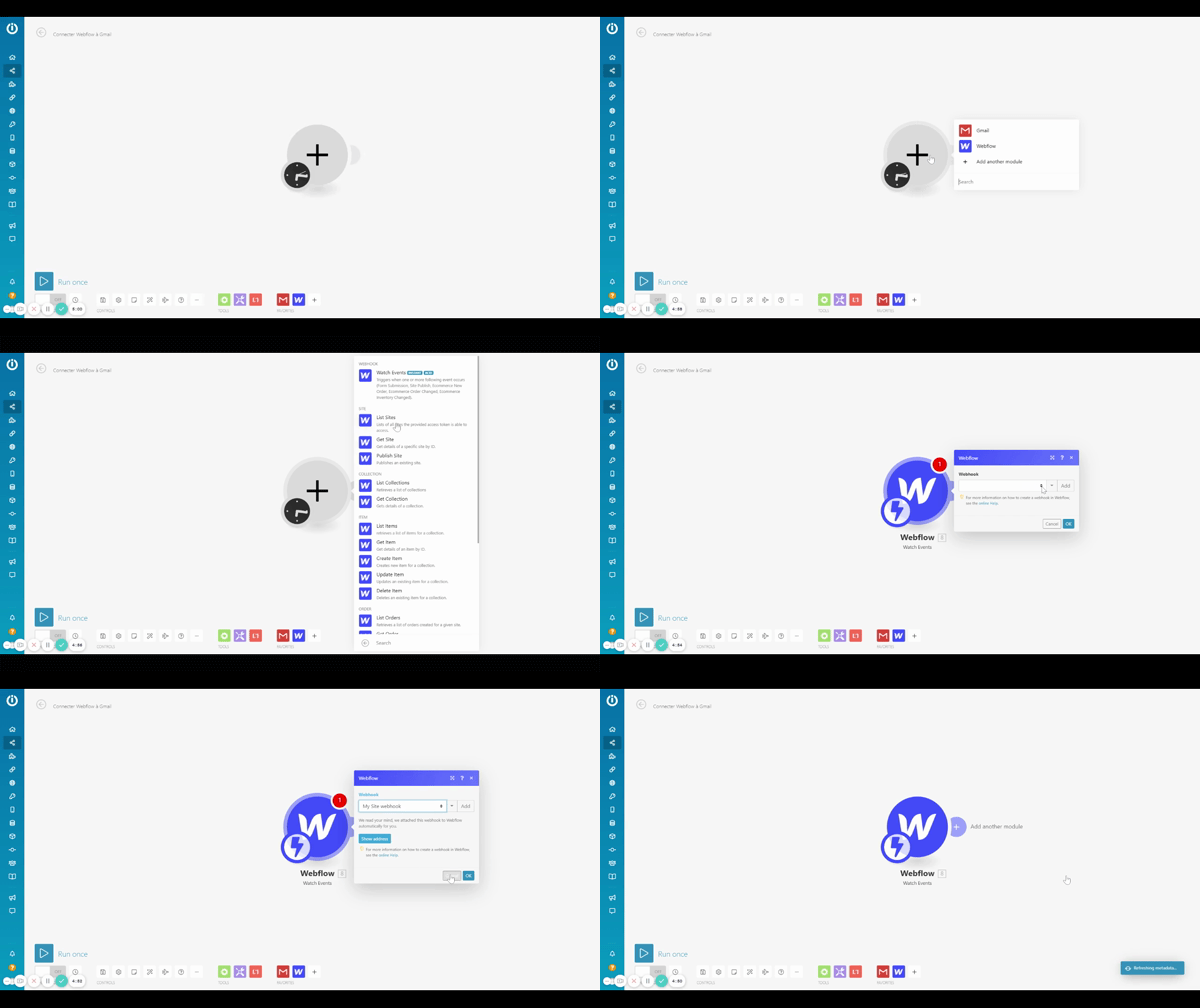
Start by connecting a new Webflow module to Make (Integromat). We will choose a "Watch Event" trigger, which is an instant trigger. The goal is to activate the workflow instantly upon receiving a new form submission.

2 - Activate the Webflow webhook
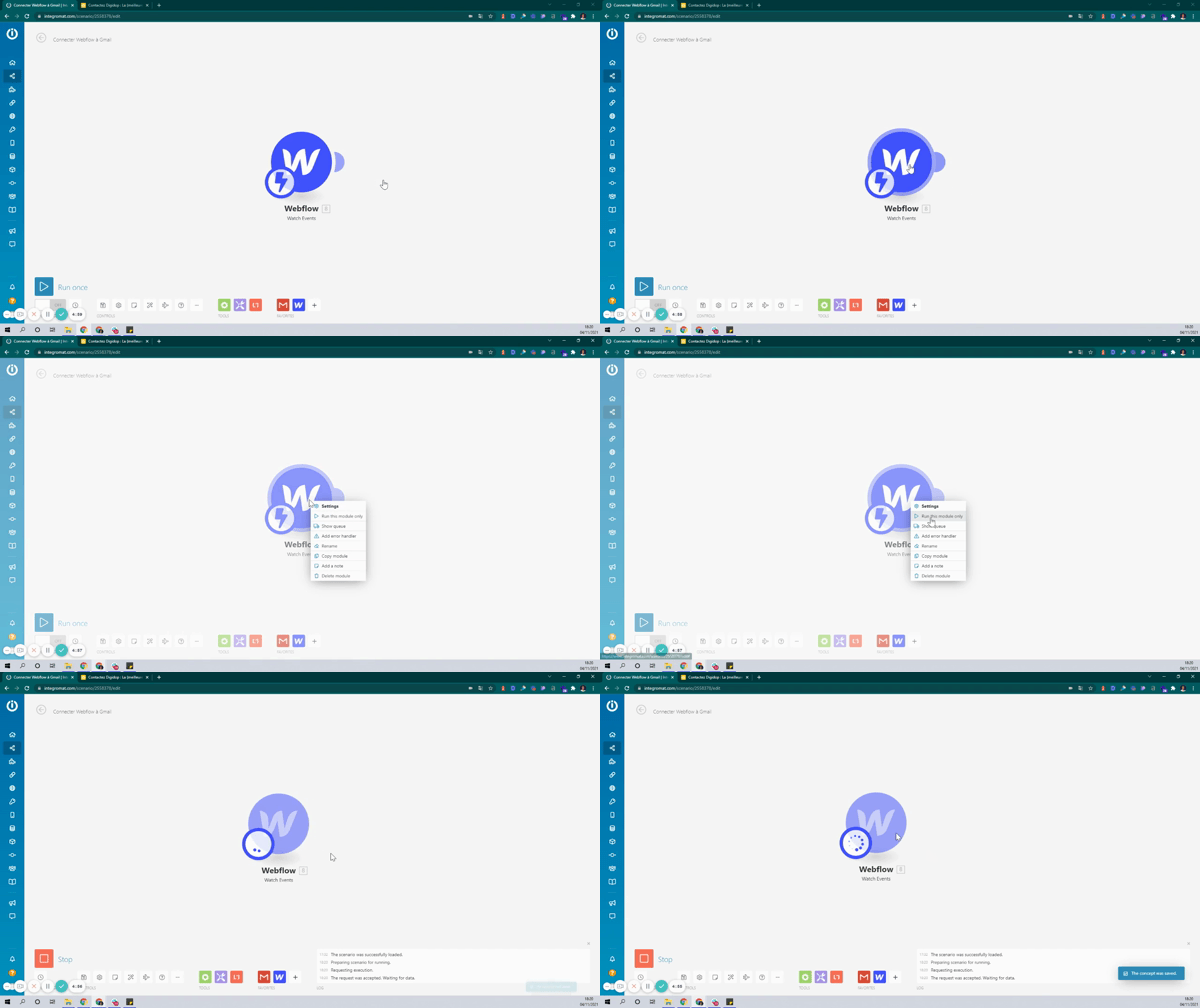
The objective is to start by sending the data to the webhook. To do this, right-click and then click on 'Run this module only' to run the webhook. Then go fill out your web contact form from your site.

3 - Add a Gmail module
Add a new Gmail module to create a new connection. Start by searching for the Gmail module in your Make (Integromat) interface and proceed as follows:
- Click on “Send an email” to select the action to send an email after receiving a Webflow form.
- Click on “add” to add your first Gmail connection to Make (Integromat).
- Rename your new connection.
- Click on “Continue.”
.gif)
4 - Connect your new account
A new window should open where you can select your Gmail account or enter your credentials:
- Select or enter your Gmail address.
- Enter your password.
- Authorize the Make (Integromat) application to access your Gmail account.
.gif)
5 - Configure the Gmail module
Once the connection is made, you can configure the different fields of the Gmail module in Make (Integromat).
- To: add the Webflow tag containing the contact's email address.
- Subject: add the subject of your email. You can, for example, personalize it by adding tags such as “company,” “name,” or “first name.”
- Content: write the content of your email and personalize it, for example, by adding the tags “name,” “first name,” and “company.”
Tips 💡 you can use HTML to further customize your emails, for example, by creating paragraphs, formatting sentences (bold, italic), adding links with anchors, etc.
- Attachments: add one or more files that will be sent as attachments if needed.
.gif)
Tips 💡 check the box “Show advanced settings” to access the advanced features of the Gmail module. You can add people to CC in the email if needed.

.jpeg)
.webp)


.jpg)

