Today, we will see how to create a wireframe for your website using Figma. First, let's define what a wireframe is.
A wireframe is used to highlight the essential aspects of your future website before designing and developing it. It is a strategic outline of your future web pages aimed at meeting the needs of your business. This strategic setup is intended to optimize your conversions once the site is developed. The wireframe will also lay the foundations of your site, allowing you to build its architecture (linking, CTAs, best SEO practices, etc.).
A wireframe can be created by hand, but it is much more practical to use specialized tools. Specifically, we will see how to create a wireframe using Figma. Figma is a collaborative no-code tool that allows for graphic creation, particularly for user interfaces (UI). This tool offers a freemium model (the paid version allows for specific plugins and an unlimited number of files). This no-code tool will also enable you to create prototypes and test the UX of your future site. And you don't need to be an experienced designer to get started with Figma.
Step 1: Go to Figma
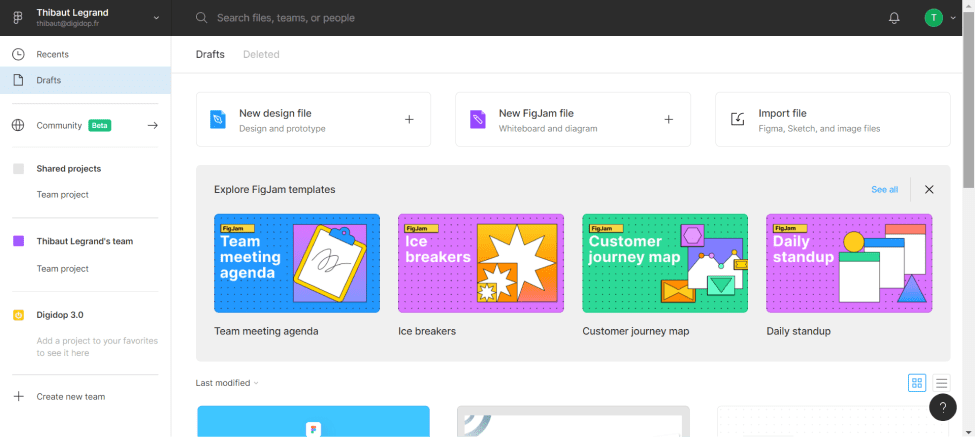
The first step, and the most important, is to visit Figma (create an account if you haven't already). Then, click on "New design file" to start your project.
Step 2: Create Your Various Pages
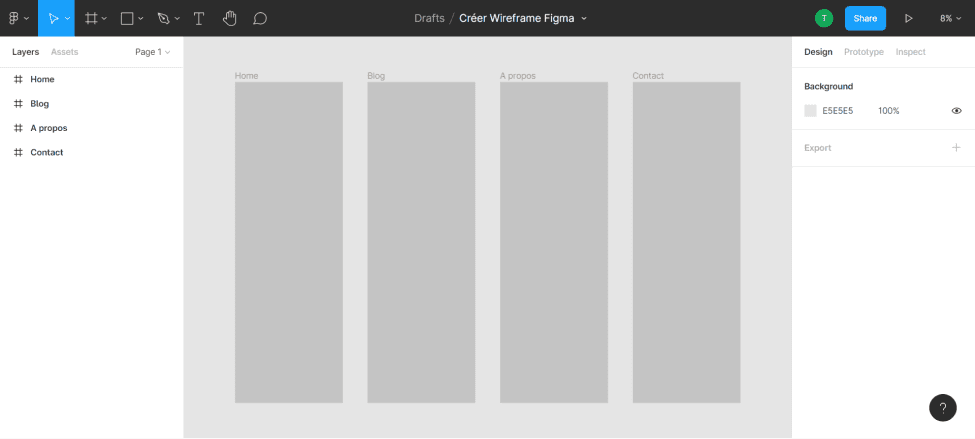
You will arrive in an empty workspace. You can rename your file by clicking on “Untitled.” Then, you will create your various pages using the rectangle shape tool. Click on the rectangle shape or press R, and draw a rectangle in the creation area. You can now set its width and height by clicking on your shape and defining the W (width) and H (height) parameters. Repeat this process for all your pages.
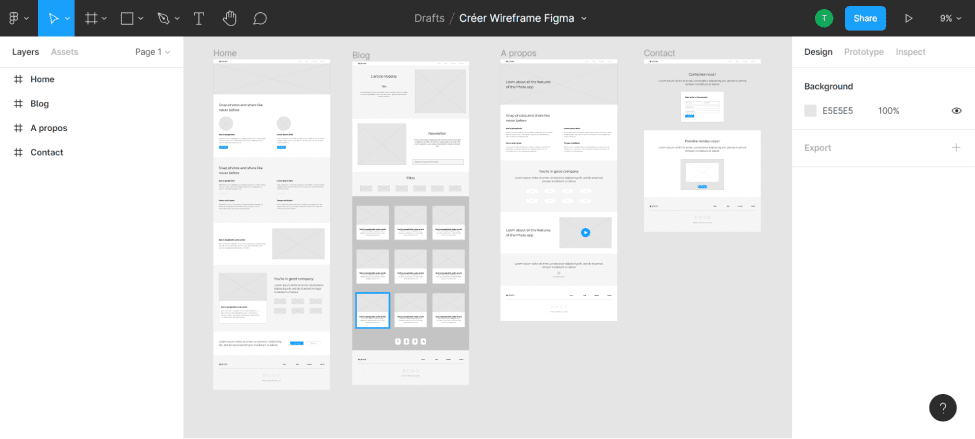
For our tutorial, we will use the example of a site with four pages (Home, Blog, About, Contact). We defined a width of 1680; the height can vary depending on the content. For now, we will start with four rectangles of equal size, although the length can change.
For each rectangle, you will create frames with the names of your pages. To do this, on the left sidebar, right-click one of your rectangles and select "Frame selection," or select your rectangle and press “Ctrl + Alt + G.” Then, rename your frames accordingly.
Step 3: Create Your Navigation Bar
Now that you have your pages, you can insert your navbar at the top (or on the side of your pages). To do this, create a rectangle the same width as your page and with a length of your choice. In our example, we will use dimensions of 60x1680.
By clicking on the rectangle, you can give it a color (in the “fill” section on the right). For our example, we decided to place a logo on the right and a page menu on the left. For the logo, we insert an icon into our file and resize it. We then add text for our four pages. In the design tab, you can modify the font, size, color, etc. Next, select all the elements of your navbar and frame the selection. We rename the frame to “navbar.”
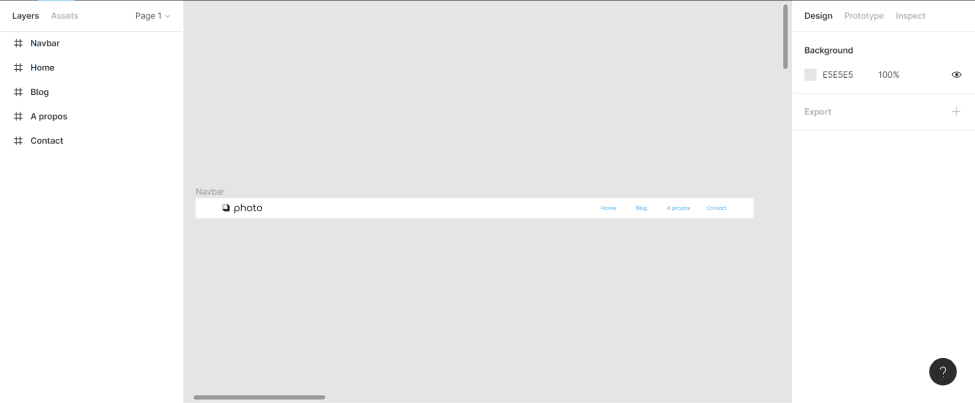
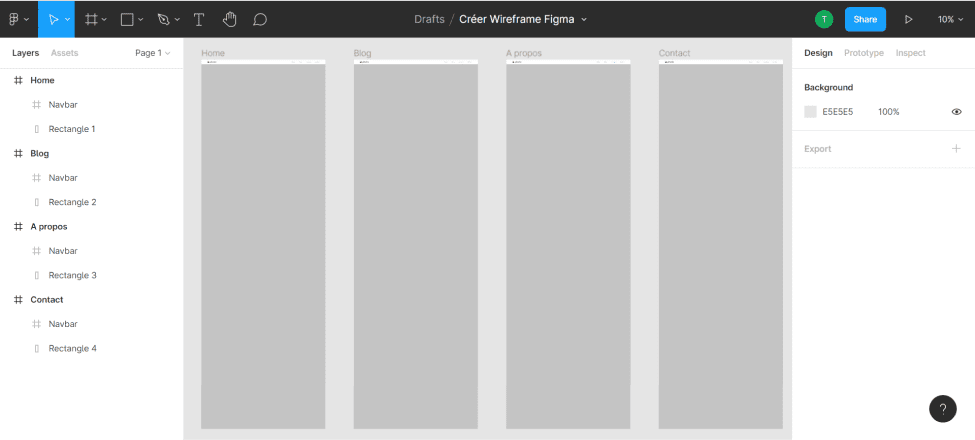
Next, position this frame on the different pages by duplicating it several times (here, four times) and placing it on each page. You can drag the “navbar” frame into the various page frames.
Step 4: Fill Your Pages
Following the same principle as the navbar, you can create shapes, texts, and insert images and icons to enrich your pages. Keep in mind that this is only a wireframe, so there is no need to refine the design. Simple shapes, basic images, and text will help you structure your pages. The goal is to achieve a coherent layout. However, remember to group your sections well and rename them for a clear overview.
Some Tips:
- Create sections using different rectangles
- Group and rename your frames/groups
- Keep the same shapes for the same types of content (images/videos)
- Vary the layout of the sections
- Maintain consistent colors for different shapes/content (CTAs, images, titles, etc.)
- Ensure your content is well spaced
- Don't forget your footer
- Keep it simple
Bonus: Figma Community
Figma offers a space where you can download/copy resources that creators have made available. Thus, you can search for and find wireframe templates to assist you in structuring your future site.

You can then design your website mockup and develop it on Webflow. Note that it is also possible to apply these steps for a mobile application (app). The design process in Figma is virtually identical.
If you need help with the design and development of your website, our Webflow agency, Digidop, is here for you!


.webp)


