An embed or integration code is a snippet of code that you can insert into your website. The goal is to incorporate external content, such as a video, a form, etc., into a webpage. An embed is an effective way to automate your website.

Here, we focus on embedding Airtable within Webflow. Airtable is a 2.0 database that allows you to manage your data in a very agile manner. Imagine an Excel spreadsheet where you can insert images into cells, automate links between multiple tables with one click, create views to display your data in a calendar, kanban, timeline, form, etc.
Among all the features offered by Airtable, you also have the option to share your tables via an embed. With Airtable, it’s possible to create web forms simply by setting up a new view. The advantage is that every time a new form is filled out, the data will be sent directly to your Airtable database. The link is direct, and you don’t need to go through automation tools like Integromat or Zapier.
Airtable offers two sharing modes for your databases:
- URL: which you can share on social media, via email, in Slack, Teams, etc.
- Embed: which you can directly insert into a webpage or your website.
The purpose of this article is to learn how to import an Airtable embed into Webflow. Let’s take the most common example, which is embedding a web form. You will likely need this for your hiring processes from your site, to set up a contact form, to conduct surveys, to register individuals for an event, or to collect all types of data from your site.
At Digidop, we use the Airtable embed in Webflow to allow visitors to apply for our job offers directly from our website. Here are 10 steps to link your Airtable form in Webflow.
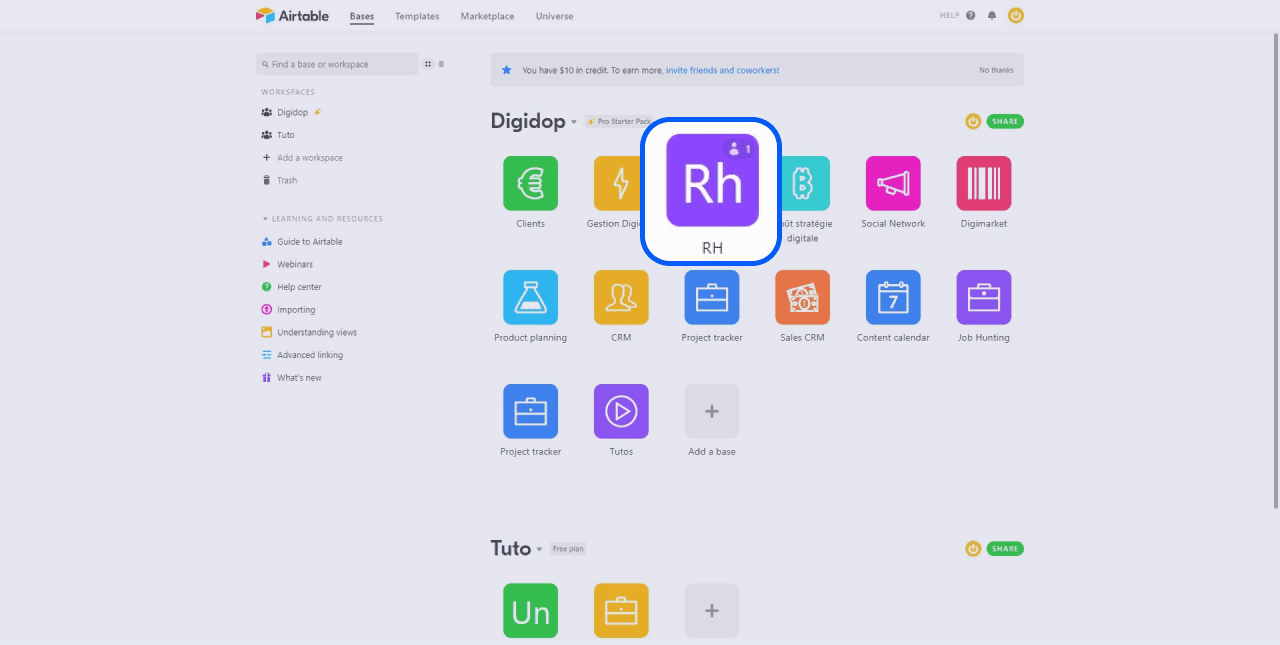
1 - Open an Airtable base
An Airtable base is equivalent to an Excel document. Open the base that you want to embed in Webflow from your Airtable dashboard.

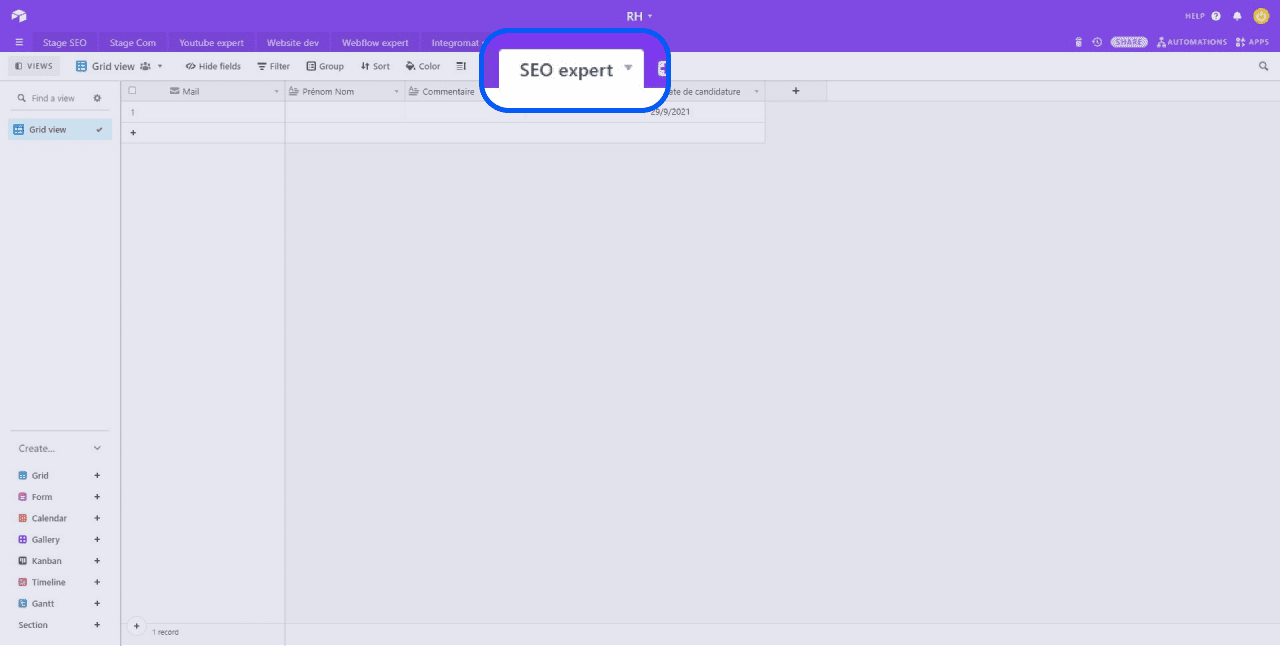
2 - Select a table
In Airtable, a table is equivalent to a sheet in Excel. You will find different tables, each with associated views of data. It is possible to share an entire table, but the goal here will be to focus on a specific table. We have already configured our table by adding the various headers that we will find in our form.

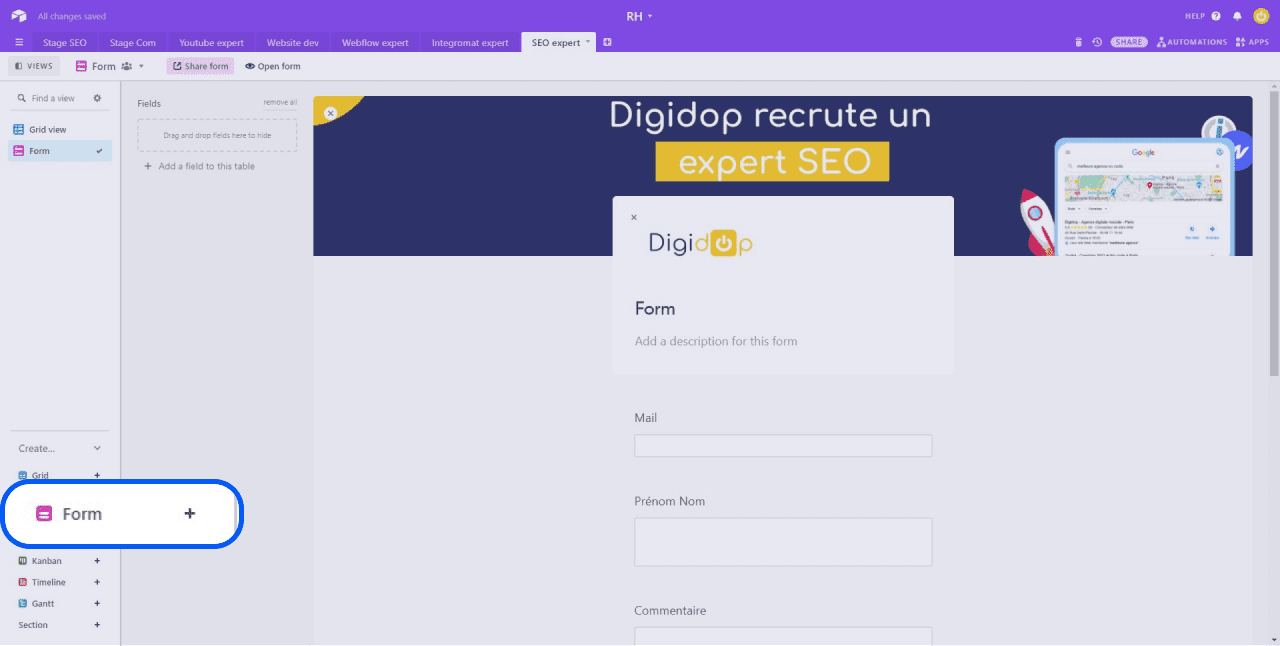
3 - Create a “Form” view
Transform the data in your grid into a form using Airtable's "Form" view. Airtable allows you to turn each column of a spreadsheet into a form field that you can then share. Airtable offers very simple and agile forms, where you can easily add new fields, hide fields, reorganize them, make them required, add a header, a logo, a description, etc.
These customizations may be more or less useful depending on the Webflow page in which you embed the content. This is also a way to create different forms for a single grid view for all your data.

4 - Customize the options
A large number of options, located at the end of the Airtable form, will allow you to customize it further. You can thus:
- Hide the Airtable logo
- Redirect to a URL at the end of the form
- Add a custom message after form submission
- Allow filling out a new form
- Open a new web form page
- Notify you at your email address
It’s up to you to customize your Airtable forms according to your needs.
.jpeg)
5 - Click on “Share form"
Click the "Share form" button to open the different sharing options for your Airtable form. You will have two sharing options:
- Share via URL : ideal for integrating into a call-to-action button on your Webflow site, sharing on social media, etc. You will have the option to apply certain restrictions.
- Share via embed : to integrate your form into your Webflow site or any other webpage.
%25252520(1).jpeg)
6 - Open the embed option
Click on "embed this form on your site" to access your Airtable form embed.
.jpeg)
7 - Copy the Airtable embed code
A new page opens with a preview of your form embed on desktop and mobile. You also have the option to limit the size of your embed with the "Authorize height" button. Copy your Airtable embed.
%25252520(1).jpeg)
8 - Add an embed element in Webflow
From your Webflow interface, go to the page where you want to integrate your form. Add a new element by clicking the "add" button at the top left of your screen. Add the element "Embed </>" to your site.
.jpeg)
9 - Copy the embed code
A pop-up opens where you can copy your Airtable embed code. Then click "save & close" to save it.
.jpeg)
10 - Save and publish your website
Check the preview of your form, then publish your site to test it. And there you go, you have connected your Airtable web form to your Webflow site! All the data from your forms will now be sent directly to your spreadsheet.
.jpeg)
If you want to further customize these forms or your automations, there are other methods available. For example, you can directly develop your web form in Webflow to ensure it perfectly matches your branding. You can then connect your Webflow form with an automation tool like Make (Integromat) or Zapier. Ideal for creating workflows with other no-code tools!

.jpeg)
.webp)


.jpg)
