During the Webflow Conf' 2022, one of the major updates was the native addition of component libraries in Webflow.
We were already familiar with Made In Webflow for copying components from other projects or the Relume Library where we can insert various types of components (navbar, footer, hero, form, etc.) into our website projects. With this new feature, Webflow raises the bar even higher. We can now, directly from the Webflow Designer, insert components created and provided by and for the community! A powerful demonstration of the power of the Webflow community.
Here’s a summary of the steps to use community components from the Webflow Designer.
Inserting Libraries into a Project
Step 1: Create a Project in Webflow
First and foremost, it is recommended to have an existing project before attempting to add libraries to it.
Libraries are specific to each project.
I can add certain libraries to one project and different ones to another, and so on.
If you do not yet have a project, we recommend cloning the Client-First project to develop landings, web applications, or websites optimized for SEO and web accessibility.
Discover the Client-First method by Finsweet.
Step 2: Open the Library Marketplace
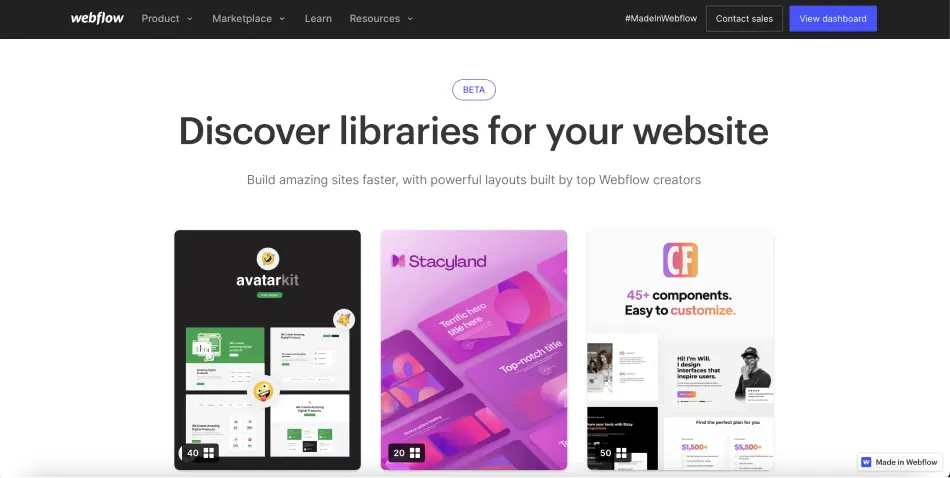
Once your project is created, you will need to navigate to the new space created by Webflow (the new version), accessible from each user’s Dashboard or another page in the tool. From the dropdown menu, click on "Marketplace", then select "Libraries".
Here’s the direct link to Webflow component libraries.

Step 3: Choose a Library to Install
Once you are in this space, you will see that there are already more than ten existing libraries available (Finsweet's Accessible components, Flow Ninja's Flow Library, Relume's Relume Library Lite, Flowbase's FlowUI Component Library, etc.).
Select the one that interests you (you can see the number of components in the library at the bottom left of the cards) by clicking on it.
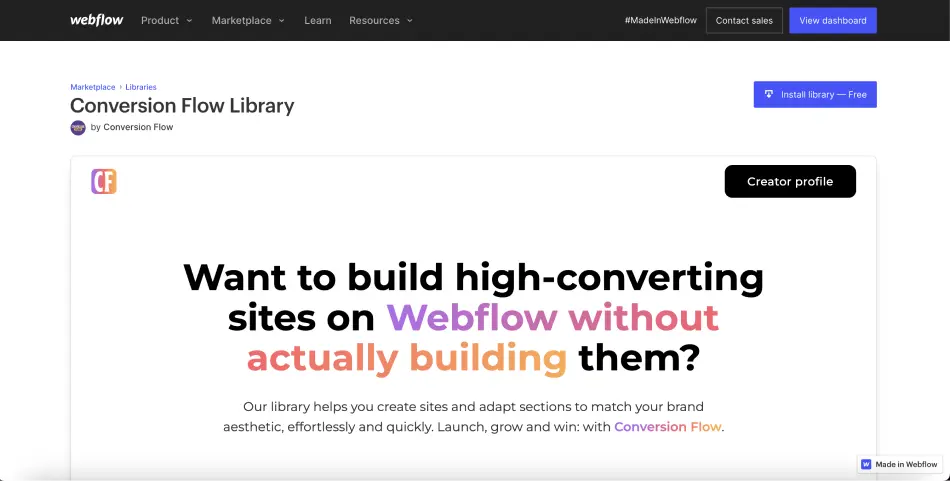
For example, let’s consider the Conversion Flow Library from Conversion Flow.

Step 4: Install the Component Library
After clicking on the library you wish to add to your project, similar to the Made In Webflow projects, you will see a description and a link to view the live project.
To install the components from this library, simply click on the "Install library — Free" button. Currently, all libraries are free (available for all types of users), but in the future (similar to templates), you may need to pay.
Step 5: Choose a Webflow Project
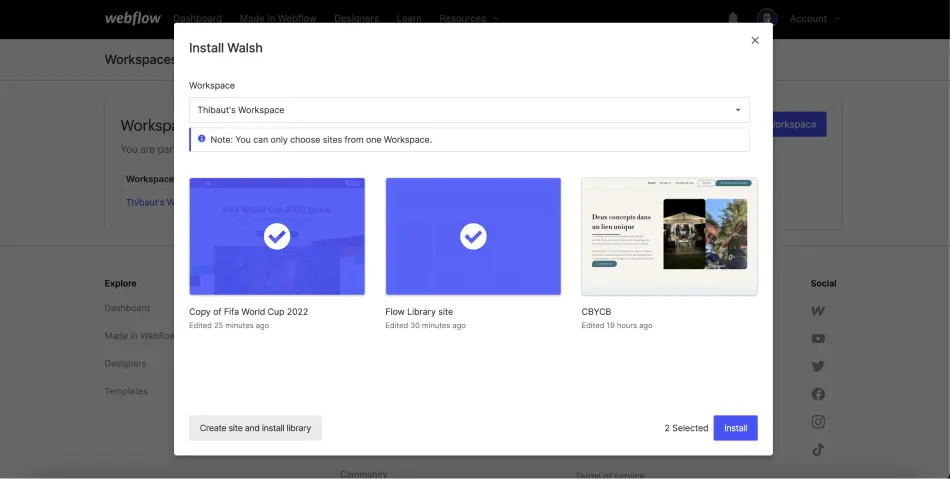
When you click on the installation button, a pop-up will appear asking which project you want to install the library on. You can select as many projects as you wish within a specific workspace.
If you want to start with a blank project, you can click on "Create site and install library".
Otherwise, select your projects and click on "Install".

Step 6: Use Components
If you install a library on multiple projects, a validation message will quickly appear; otherwise, you will be redirected directly to the selected project.
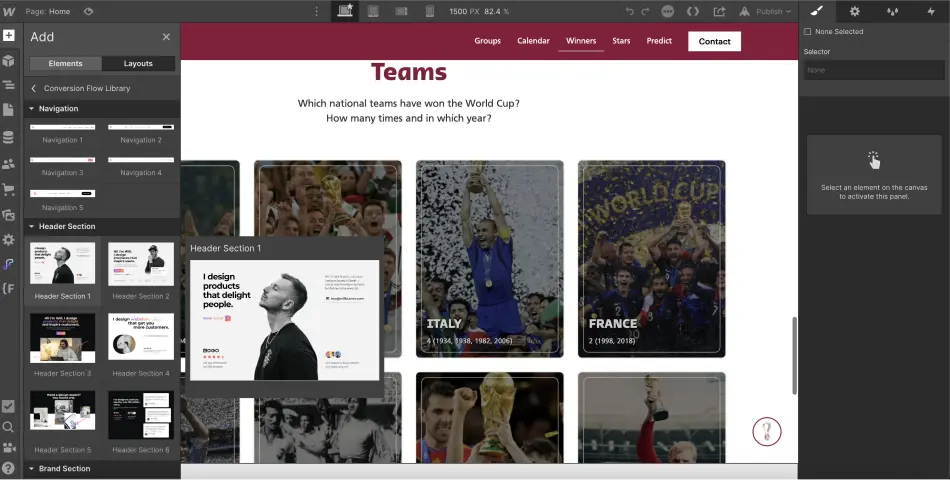
To use the components, you will need to go to the Designer of your project, and then:
- Click on the "Add Element" button (or use the keyboard shortcut A)
- Select the "Layout" tab instead of "Elements"
- Choose a library
- Drag and drop (yes it's No Code!) a component onto your page
- Customize the component / elements to fit your design
It's that simple!

Note that the components you use may not follow the same class naming conventions or structure that you do. Be sure to customize these components to maintain a clean and optimized project (no need to develop from scratch anymore).
To have an optimized Webflow site, you can read the Client-First documentation in French.
Contributing to New Webflow Library Additions
Component libraries are a significant advantage in Webflow, a true time-saver in development. This concept of sharing to help the community is fundamental. You should know that you can also try your luck in proposing your component library in this marketplace to gain visibility.
To do this, you can fill out the form to join the waitlist for component library creators.
That wraps up this short tutorial on how to utilize community resources for your projects and develop more quickly. If you wish to discover the other features of Webflow, I invite you to read our article on the announcements from the first day of Webflow Conf' 2022!


.webp)


