Calendly is a scheduling tool connected to your calendars that simplifies appointment booking for users navigating your site. It is user-friendly, intuitive, and offers a multitude of features to customize your calendar according to your needs.
In this article, we will introduce you to the tool and explore the various steps to integrate it into your Webflow website.
Features and Benefits of Calendly:
Adding Calendly to your website provides a simple and fast solution for connecting with prospects, clients, or candidates, who can view your availability in real-time and choose a time slot that works for them without the hassle of email exchanges or phone calls.
You can:
- Set your availability hours
- Customize appointment types
- Configure different calendars with distinct themes and additional options (for example, questions).
- Manage confirmations and reminders, and much more.
Additionally, if a schedule change is necessary, both parties receive a notification.
Seamless User Experience
Allow your users to schedule an appointment with you or your team seamlessly without leaving the page.
Custom Scheduling Aligned with Your Brand:
Customize the colors and appearance of your scheduling page to ensure it aligns with your branding.
Quick Execution
Customize and add Calendly to your website in just a few minutes.
Creating an account or logging into Calendly
You can create a free Calendly account or opt for a paid subscription to access additional features.
Once your account is created, you can create events, set your availability hours, and tailor your calendar to meet your needs.
How to Generate Your Calendly Embed Code?
Here are the steps to follow on the Calendly site:
- Click on >my account
- You will find the different events, for example, a 20-minute phone appointment
- Click on > share
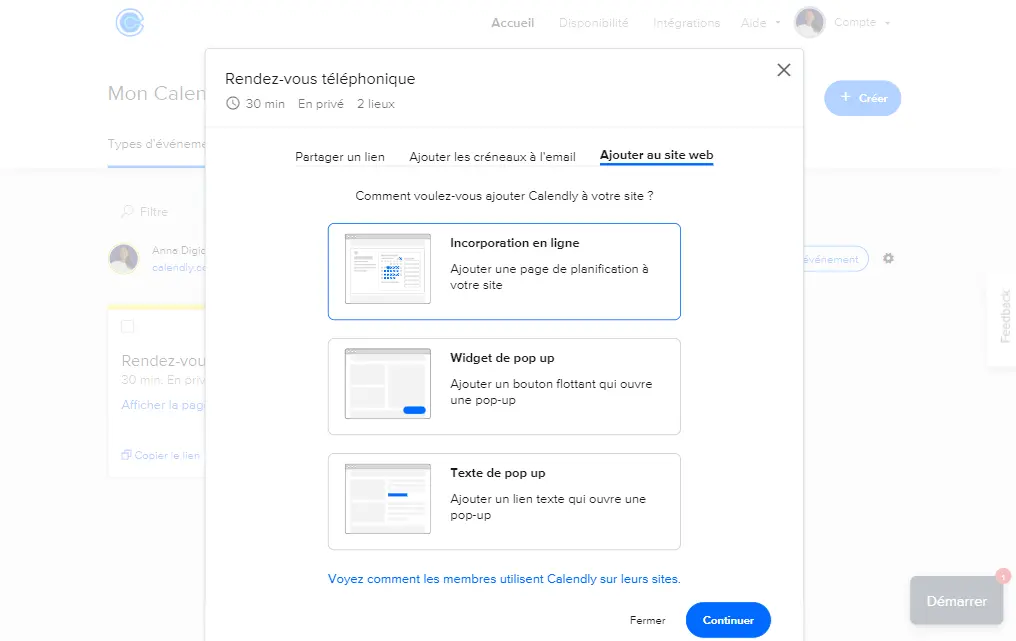
- Three options are presented. Select > Add to website
- Click on > Online Embed (add a scheduling page to your site)
- Click on continue

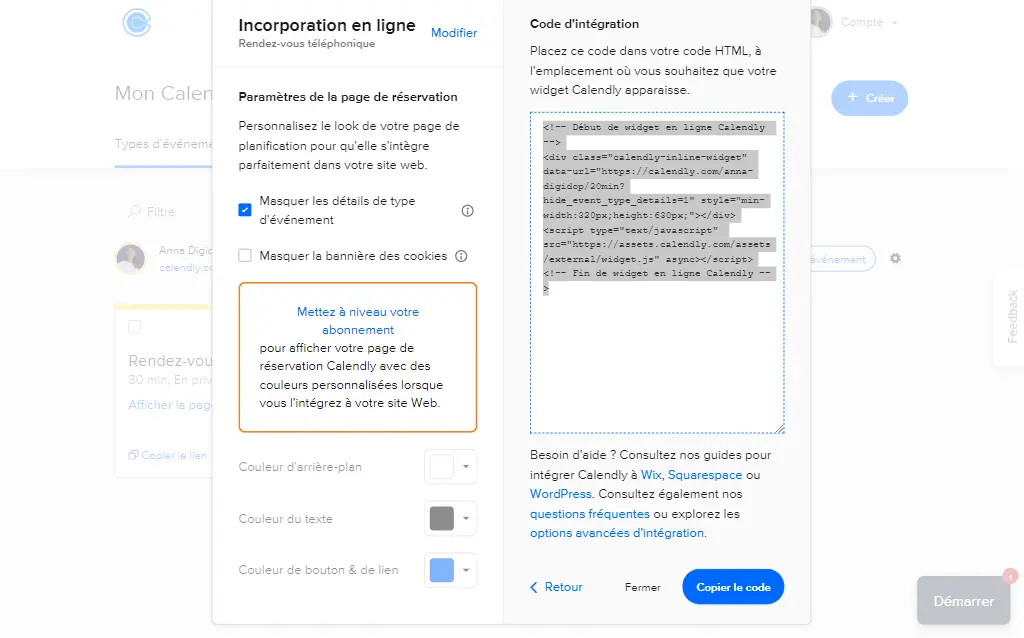
- the embed code has been generated
- Copy the Calendly embed code or "Ctrl+C"
If you only wish to add the calendar, proceed as follows:
- Online Embed
- Settings
- Check > hide event type details
- A new script is generated

Integrating Calendly with Webflow: A Quick and Easy Guide
Now that you have generated the Calendly embed code, you can integrate it on the desired page of your Webflow site.
Here are the steps to follow:
- Open your site in the Webflow editor
- Create a DIV Block which you can name, for example: calendly-embed
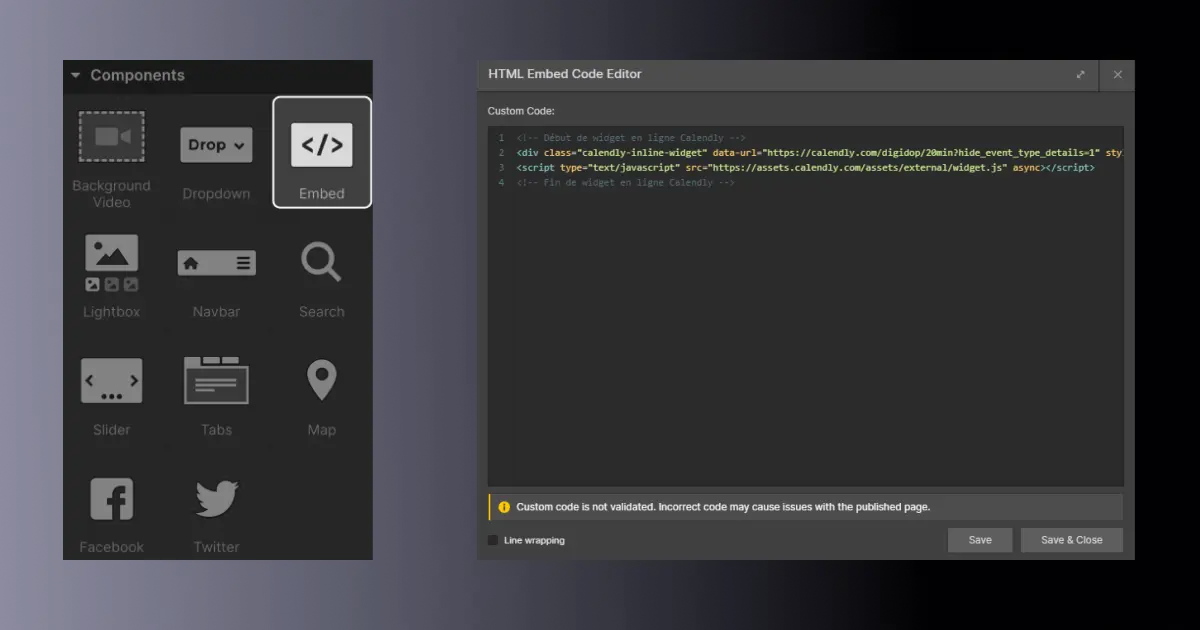
- Add an embed element or with the command "Ctrl+K" > Embed
- Click on the Embed element to access its settings panel
- Click on the Code tab
- HTML Embed Code Editor opens
- Paste the Calendly embed code or "Ctrl + V"

- Customize the display settings of the Calendly calendar if necessary
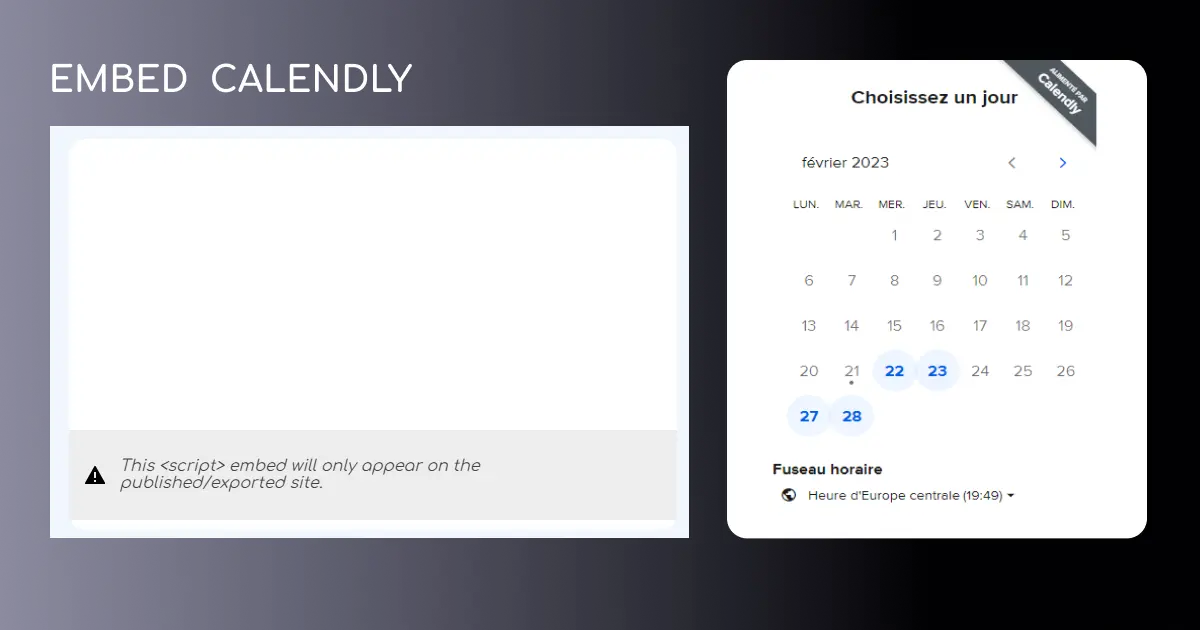
- Save your changes and publish your website to see the Calendly calendar in action and test it!

Customize the Appearance of Your Calendar
You can modify the appearance of your calendar on the Calendly site by customizing the colors, messages, and texts, as well as the availability hours, appointment types, and confirmations. You can also make your calendar responsive on Webflow and add CSS specifications by applying styles from the settings (for example, giving it a specific width and height).
Adding a Calendly calendar to your Webflow website is an excellent way to facilitate appointment booking for your clients and prospects. Don't wait any longer to test this Webflow feature and allow website visitors to schedule with you or your team.
If you want to follow a video tutorial, you can check out Florian's on our YouTube channel:
And to go further, check out Thibaut's article:


.jpg)
