The HTML code of an SVG file can be quite handy in many situations. For instance, in Webflow, it can be advantageous to insert the HTML code of an SVG file in an embed rather than using an SVG image, especially to influence the color of the icon.
In today’s tutorial, we will show you how to retrieve the HTML code from any SVG file in just a few steps.
Option 1: Using Figma and a Code Editor
Step 1: Download Your SVG File
The first step is simply to download your icon, which is an SVG image. For example, in Figma, you can export your file as a vector SVG. You can also download your SVG file directly from an SVG icon library.
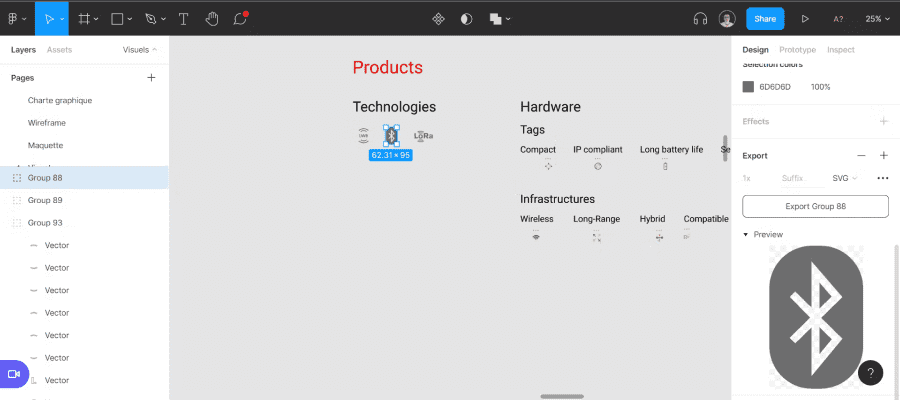
Step 2: Go to the Online IDE Website
Once you have downloaded your SVG icon onto your device, you can visit the Online IDE website. Online IDE is a web-based code editor, functioning as an integrated development environment. In other words, it is software that allows you to code or edit code. Online IDE is just one of many tools available, so feel free to use any IDE you prefer. The advantage of Online IDE is that you can access it for free and directly online (without needing to download any software).
Step 3: Open Your SVG File on the Site
When you are on Online IDE, you have a feature that allows you to open a file in the software from your file manager. To do this, simply click on the first icon (representing a folder/file) in the top left corner (“open file from disk”).
You will now locate your SVG file and double-click on it.
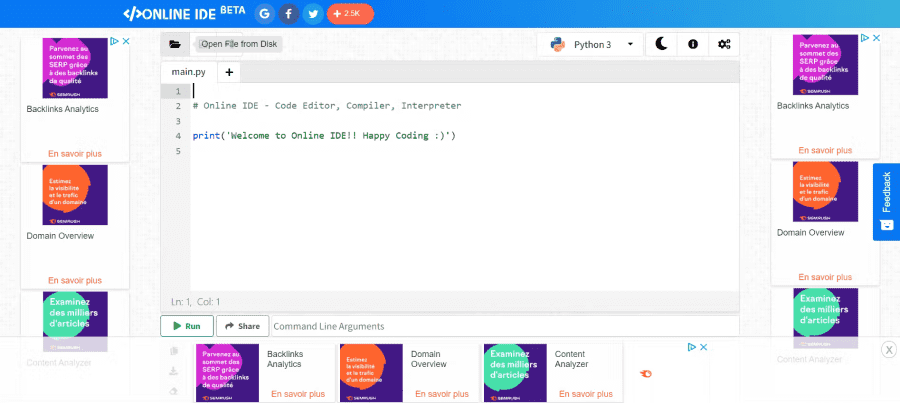
Step 4: Copy the HTML Code from the SVG File
Once you have inserted your SVG file into the software, a new page is created (named after your file). You will notice that the HTML code from your SVG file is now visible in the code editor. You can retrieve this code by selecting everything in the editor (Ctrl + A or Cmd + A) and copying it (Ctrl + C or Cmd + C).
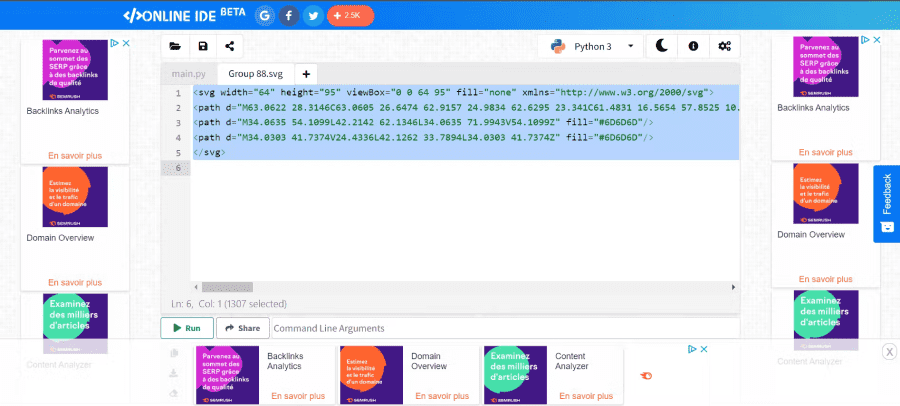
Step 5: Paste the HTML Code from the SVG File
You have now retrieved the HTML code from your SVG file, and you can use it as you wish. To take it a step further, we will show you how to implement it into Webflow.
To do this, open your Webflow project, insert the “embed” element where you wish, and paste the previously copied SVG code into the Webflow code editor. You can then click on “Save & close.” You will then see your icon in your project. For more info 👉 Insert an SVG Icon with Code

The issue is that our icon may not be the correct size or might not have the desired color. To modify this, we will work within the code.
Step 6: Modify the Code as Needed
When implementing an icon via its HTML SVG code, you can modify the code so that it meets your requirements.
To match the color to that of your text, you should remove all instances of “fill” that correspond to a color, except for the first one. For the first “fill,” you need to set it to “fill=currentcolor.”
You can also adjust the size of your icon by modifying the width and height attributes.
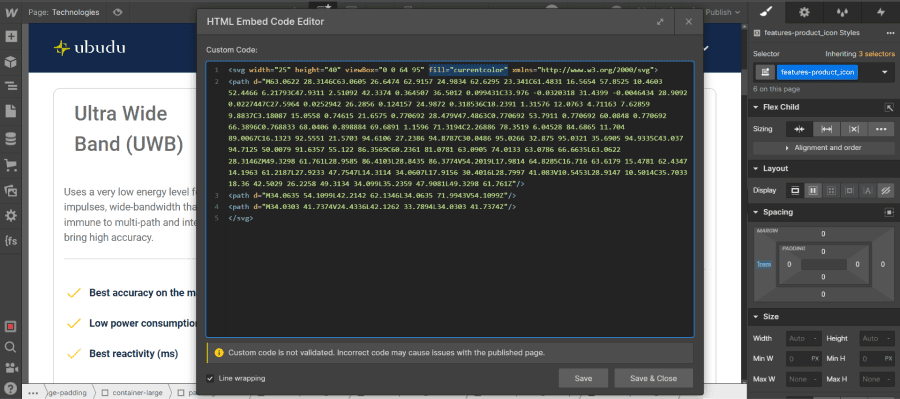
In short, it’s important to know that you can customize the code so that your icon integrates seamlessly into your design, offering more flexibility than a static image.
Option 2: In 2 Clicks from Figma
Step 1: Insert Your SVG File into Figma
Just like the first step of Option 1, you need to insert an SVG file into your Figma project.
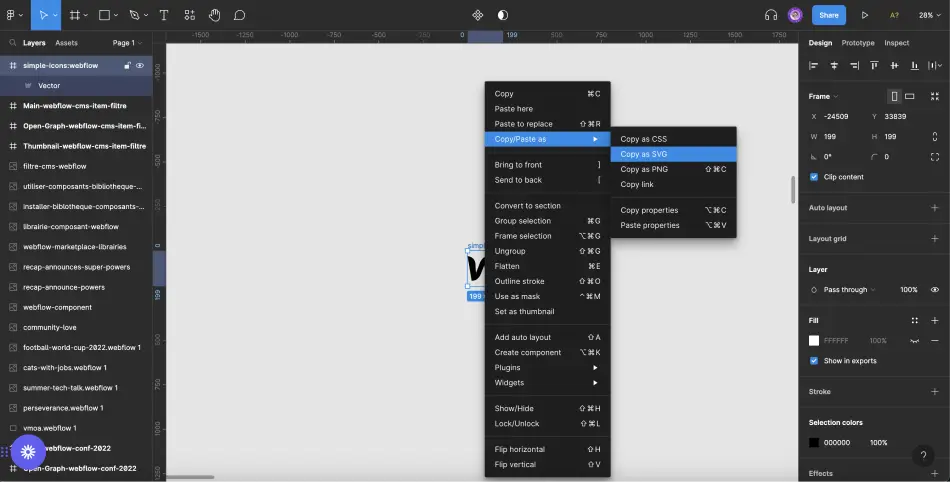
Step 2: Copy as SVG in Figma
Figma gives us the option to copy elements in several ways. In our case, what interests us is to copy as SVG. To do this, you need to right-click on your SVG element, then in the “Copy/Paste as” submenu, click on “Copy as SVG.”
Step 3: Paste Where You Prefer
Next, you simply need to paste what you just copied into a code editor (for example, directly into a Webflow embed element). From this point, you can replicate Steps 5 and 6 from Option 1 to use it in Webflow.
Tutorial 👉 Learn how to Design an Embed Code for Rich Text!
For more tips and tutorials, check out our no-code & low-code blog.


.webp)


.jpg)
