In Webflow, it is possible to insert links or buttons with multiple redirect options. You can link your URL to an external link, a page on your site, a phone number, an email, a section, or even insert a link to download a file.
These various options are very convenient, but to create more specific redirects, some additional tweaks are necessary. For instance, we have written an article on how to link to a section of another page on your website. In today's tutorial, we will focus on how to add a link that directs to a specific Tab in your project.
Step 1: Insert a Tab into Your Project
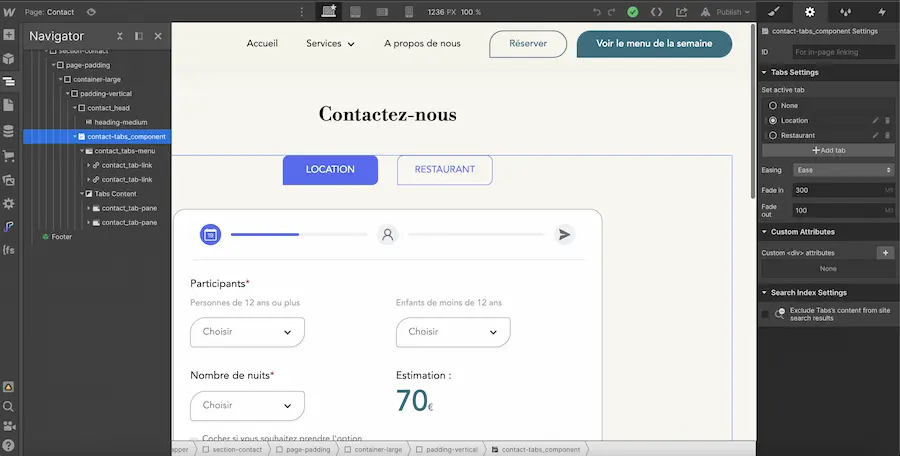
If you haven't done so already, you can add a Tab to one of the pages in your project and style it as you wish. We also recommend renaming the different Tabs.

Step 2: Assign an ID to Your Tab Links
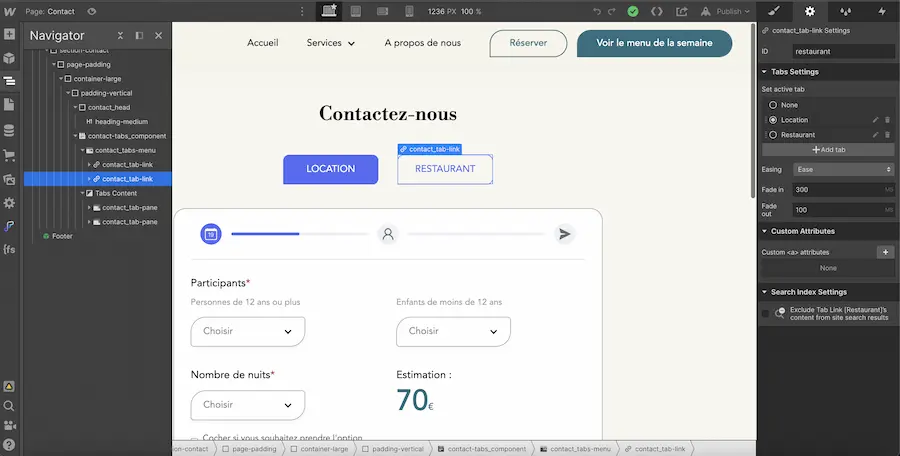
Next, you need to select each of your Tab links and give them a specific and unique ID. We suggest using the same name as that of the Tab.

Step 3: Insert the Code
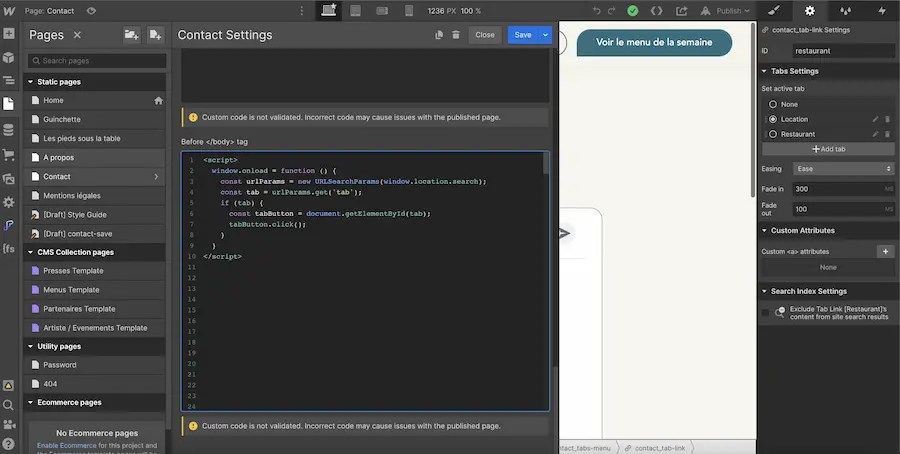
In this step, you will simply need to copy and paste the following code into the settings of the page that contains the tabs. It should be inserted in the section "Before <!-- fs-richtext-ignore --></body> tag".

Step 4: Add a URL to Your Button or Link
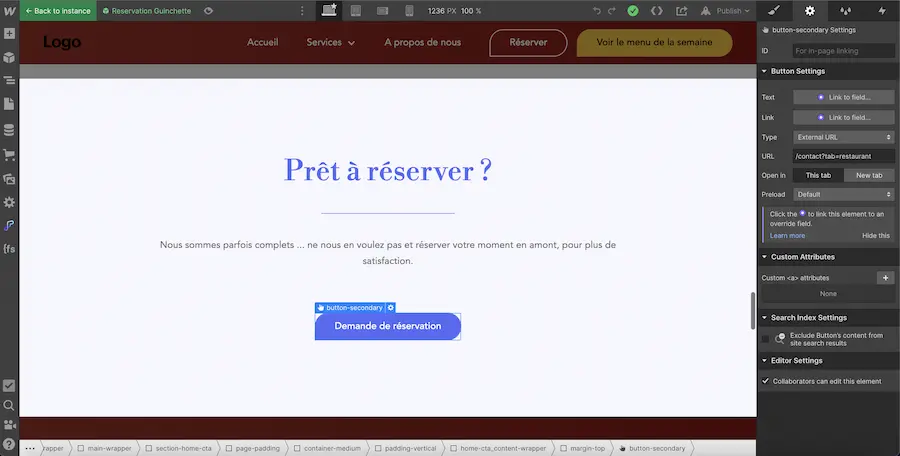
The final step before publishing your site is to go to the settings of your link. You will need to select the "External URL" option and then customize the following URL according to your project:
/slug-page-containing-the-tab?tab=tab-id
In our example, our Tab is located on the contact page (with slug: contact), and the id of the tab we wish to redirect to is restaurant. Thus, we add the following to "External URL": /contact?tab=restaurant

Now, you can direct your links to the desired tab! To stay updated on our latest articles, you can subscribe to our nocode newsletter!


.webp)


.jpg)
