The Webflow Conf' 2022 promised us this, and here it is at last; the variable font feature is now available in Beta version in the Designer.
Static Fonts vs Variable Fonts
What is a static font?
Static fonts come in multiple variants. Within the same font family, we can have different types of styles:
- Several types of weights with well-defined values (for example, Thin (100), Regular (400), Semibold (600), Bold (700) to name just a few)
- An italic / Condensed / etc. style or not
- etc.
It’s important to note that these styles can combine (for example, Roboto Italic Bold vs Roboto Italic).
The issue with static fonts lies in the number of files required for all existing variations (if I want Roboto Thin, Roboto Regular, Roboto Semibold, and Roboto Bold, I need four separate files).
This significant number of files can bloat your site, increase the load time of your pages (web performance), and thus impact your organic search rankings (SEO).
Furthermore, these fonts do not allow for fetching precise weight values. We are limited to the values of the files we import.
If we revisit our example using the Roboto font, we will have weight values of 100, 400, 600, and 700, but not 550 or 275, for instance.
What is a variable font?
Variable fonts allow you to bundle all style variants of a font family into a single file (one single font).
With this file, we can precisely change the weight value (from 0 to 1000). It is also possible to adjust the variations of the different styles contained in the font file.
Another advantage of a variable font is the transitions. With this type of font, we can create smooth animations between different font styles. For example, we can have a hover effect on a font and change the weight without a jarring transition.
The customizable adaptation of these fonts can also have benefits in terms of web accessibility by slightly modifying the font for better readability.
How to Use Variable Fonts on Webflow
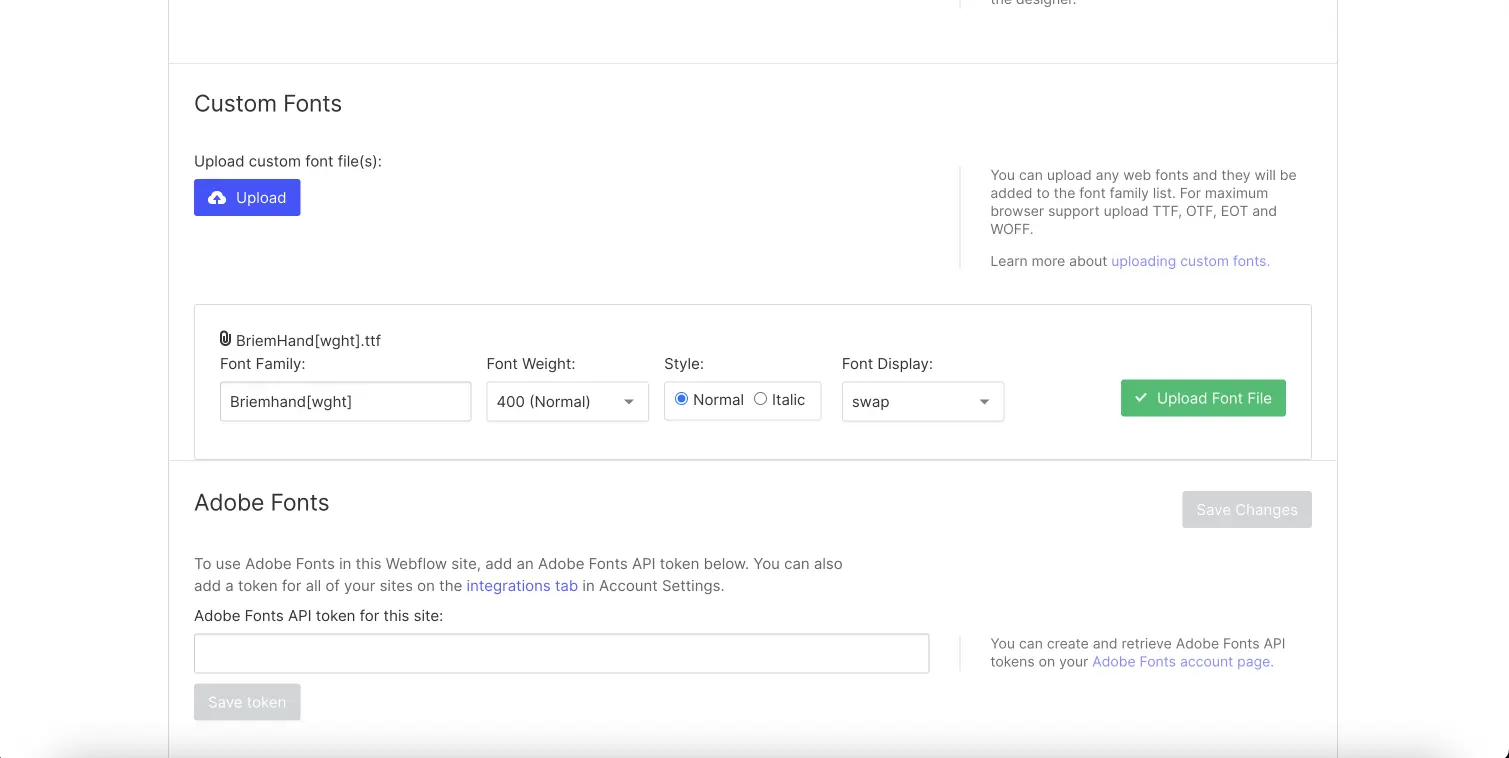
Step 1: Upload a Variable Font File
The first step of this tutorial will be to upload a custom font file to your Webflow project. However, you will need to import a variable font file. You can download variable fonts from several websites such as Google Fonts or Dafont.
Most variable fonts have the term "wght" in the file name.
Check out our tutorial on adding custom fonts in Webflow.

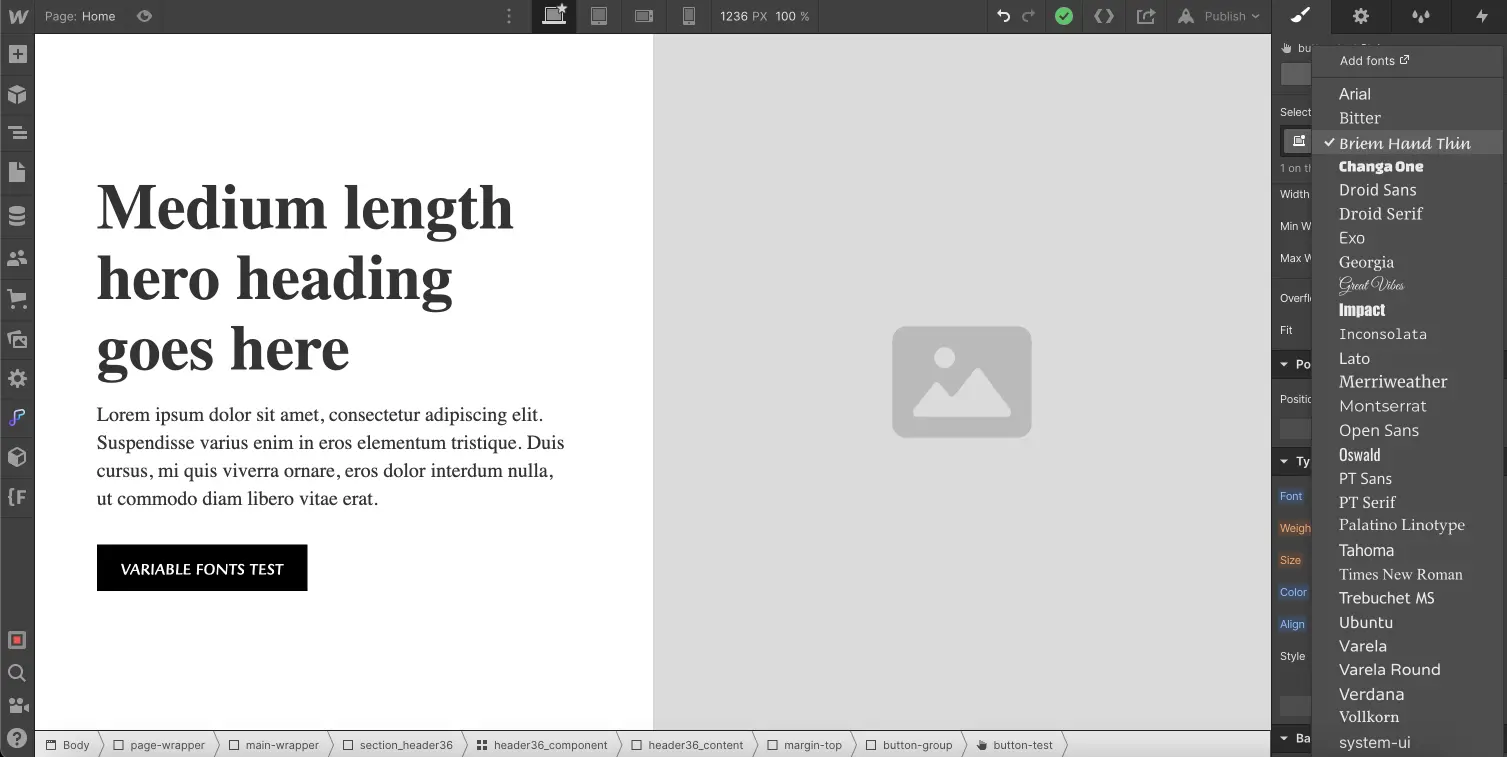
Step 2: Add the Font to One of Your Elements
You can now select one of the elements on your page and, in its styles, choose the variable font you uploaded.

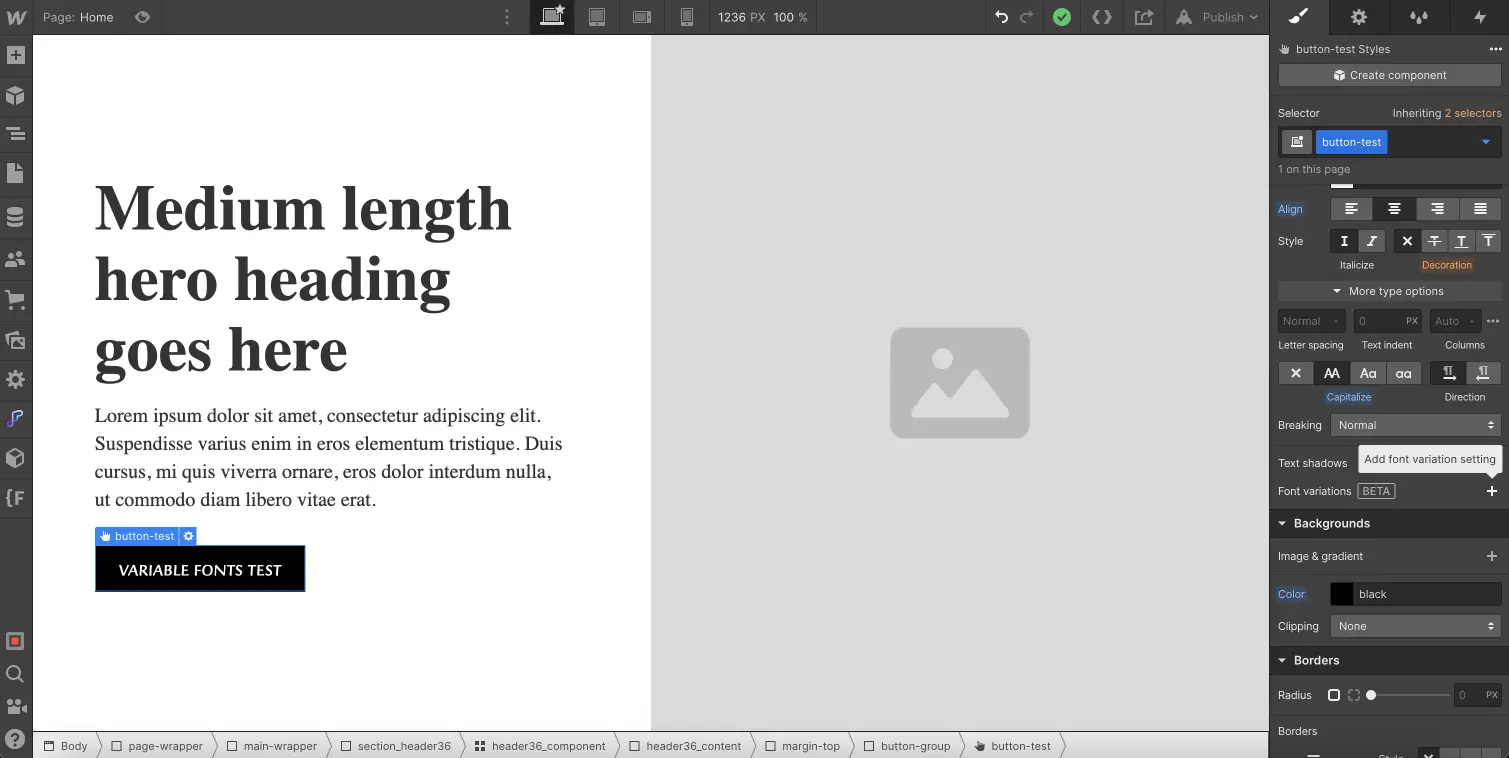
Step 3: Choose a Font Variation
All you need to do is:
- Open the "More type options" dropdown in the "Typography" section of the styles panel
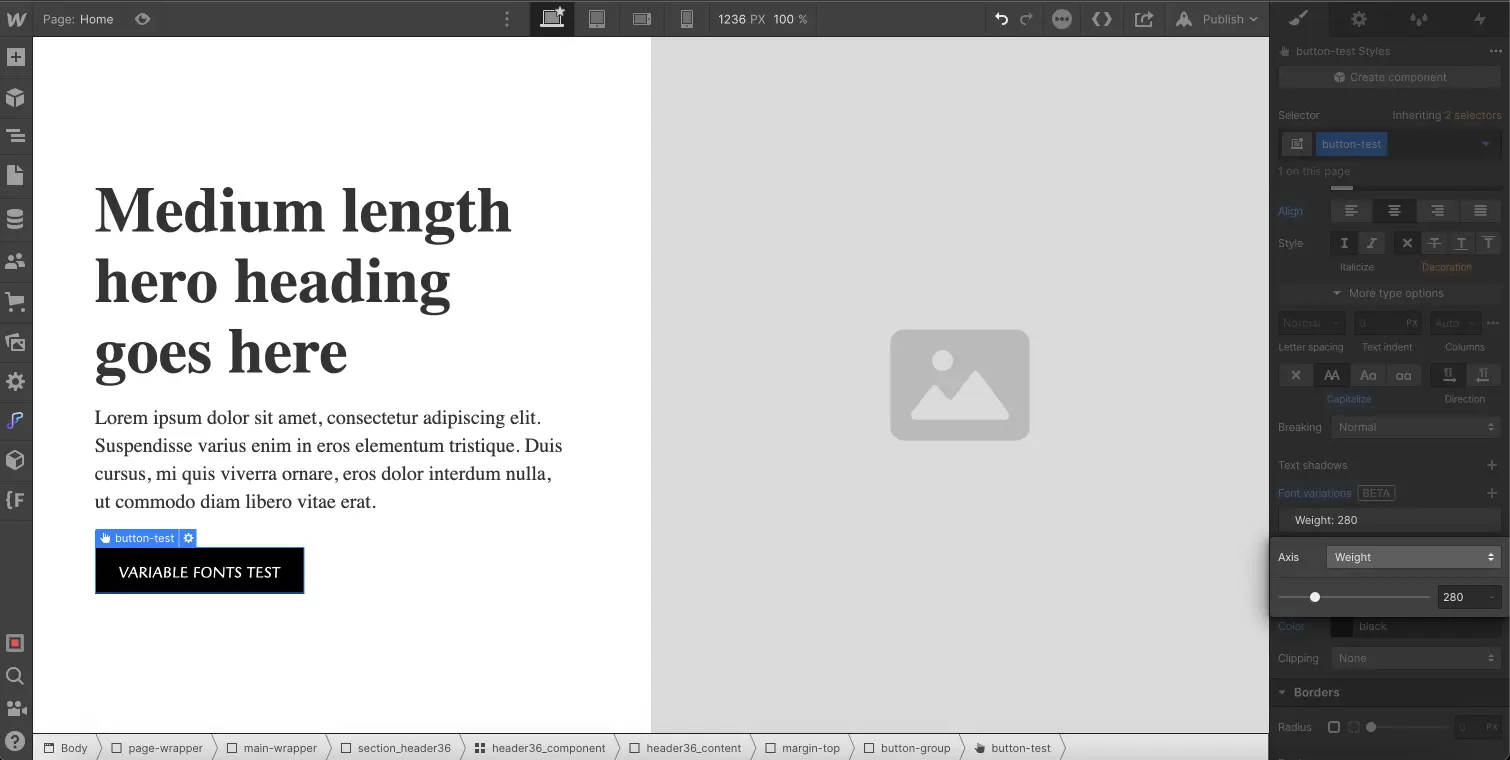
- Click the "+" icon next to "Font Variations"
- Customize your variation
And that’s it; you can achieve a very precise style for elements on your page with this new Beta feature.


You can also modify the font variation for "on hover" to create nice effects/animations on your website (you will need to apply a transition "all" to achieve a smooth effect).
Feel free to experiment with this new styling feature in Webflow, but to go further, you can explore our article on finding the right typography for your website.


.webp)


.jpg)

