Introduction
For advanced and specific projects, a custom calculator can add significant value.
Imagine being able to quickly estimate the cost of a project, and then dynamically display that estimate on a page based on the information provided by the user. That's precisely what we will explore in today’s article.
Given that the development of a calculator is inherently tailored to the unique needs and specifics of each project, we won't follow a one-size-fits-all template that you can copy-paste into your project.
Instead, we will break down the general logic behind creating a calculator. Treat this as a guide that can be adapted to meet the specific needs of your project.
Get ready to discover how, with a bit of JavaScript code, you can add significant value to your Webflow projects. Let’s get started!
Project Description and Variable Definition
To begin, even before diving into the development on Webflow, let's define the project and the parameters to consider in our tailored calculator.
Project Description:
- In this example, we will develop a budget calculator that is quite simple for creating a website.
- The calculator will be present on a “My Project” page and will display a numerical estimate based on the information filled out by the user.
List of Variables:
- Number of pages: To estimate the size of the site and the resources needed for its creation. The larger the site, the higher the budget.
- Difficulty level (estimated as a percentage): To estimate the complexity of the project and the workload. The more complex the site, the higher the budget.
- Need for design: A binary choice to determine if the project requires design. If yes, the budget increases.
- Need for development: A binary choice to determine if the project requires development. If yes, the budget increases.
This is the starting point for our custom calculator; it is with these variables that we will create our solution.
Budget Calculation Details
Next, one last thing before moving on to Webflow: let's detail the calculation for the budget estimate. For this example, let's imagine the following pricing system:
Base Pricing
The base pricing is 500 euros per page, multiplied by a complexity index. This pricing applies if there is a need for design OR development.
Base Pricing = (500 * number of pages) * (1 + difficulty percentage)
For example, for 5 pages and a complexity level of 25%:
Base Pricing = (500 * 5) * (1 + 0.25) = 2500 * 1.25 = 3125€
Advanced Pricing
Advanced pricing corresponds to the base pricing multiplied by 1.75. This pricing applies if there is a need for both design and development.
Advanced Pricing = base pricing * 1.75
For example, for the same 5 pages and a complexity level of 25%:
Advanced Pricing = 3125 * 1.75 = 5468.75€
Note that the variables and calculations are specific to this example and could be adjusted based on the project's specific requirements. It is fictional pricing that we will implement with the calculator, but we can imagine any calculation system depending on the characteristics of your project, whether it is more advanced or not.
Now that we know the details of the setup, let’s move on to Webflow to establish the structure of the calculator (HTML + CSS).
Creating the Calculator Structure in Webflow
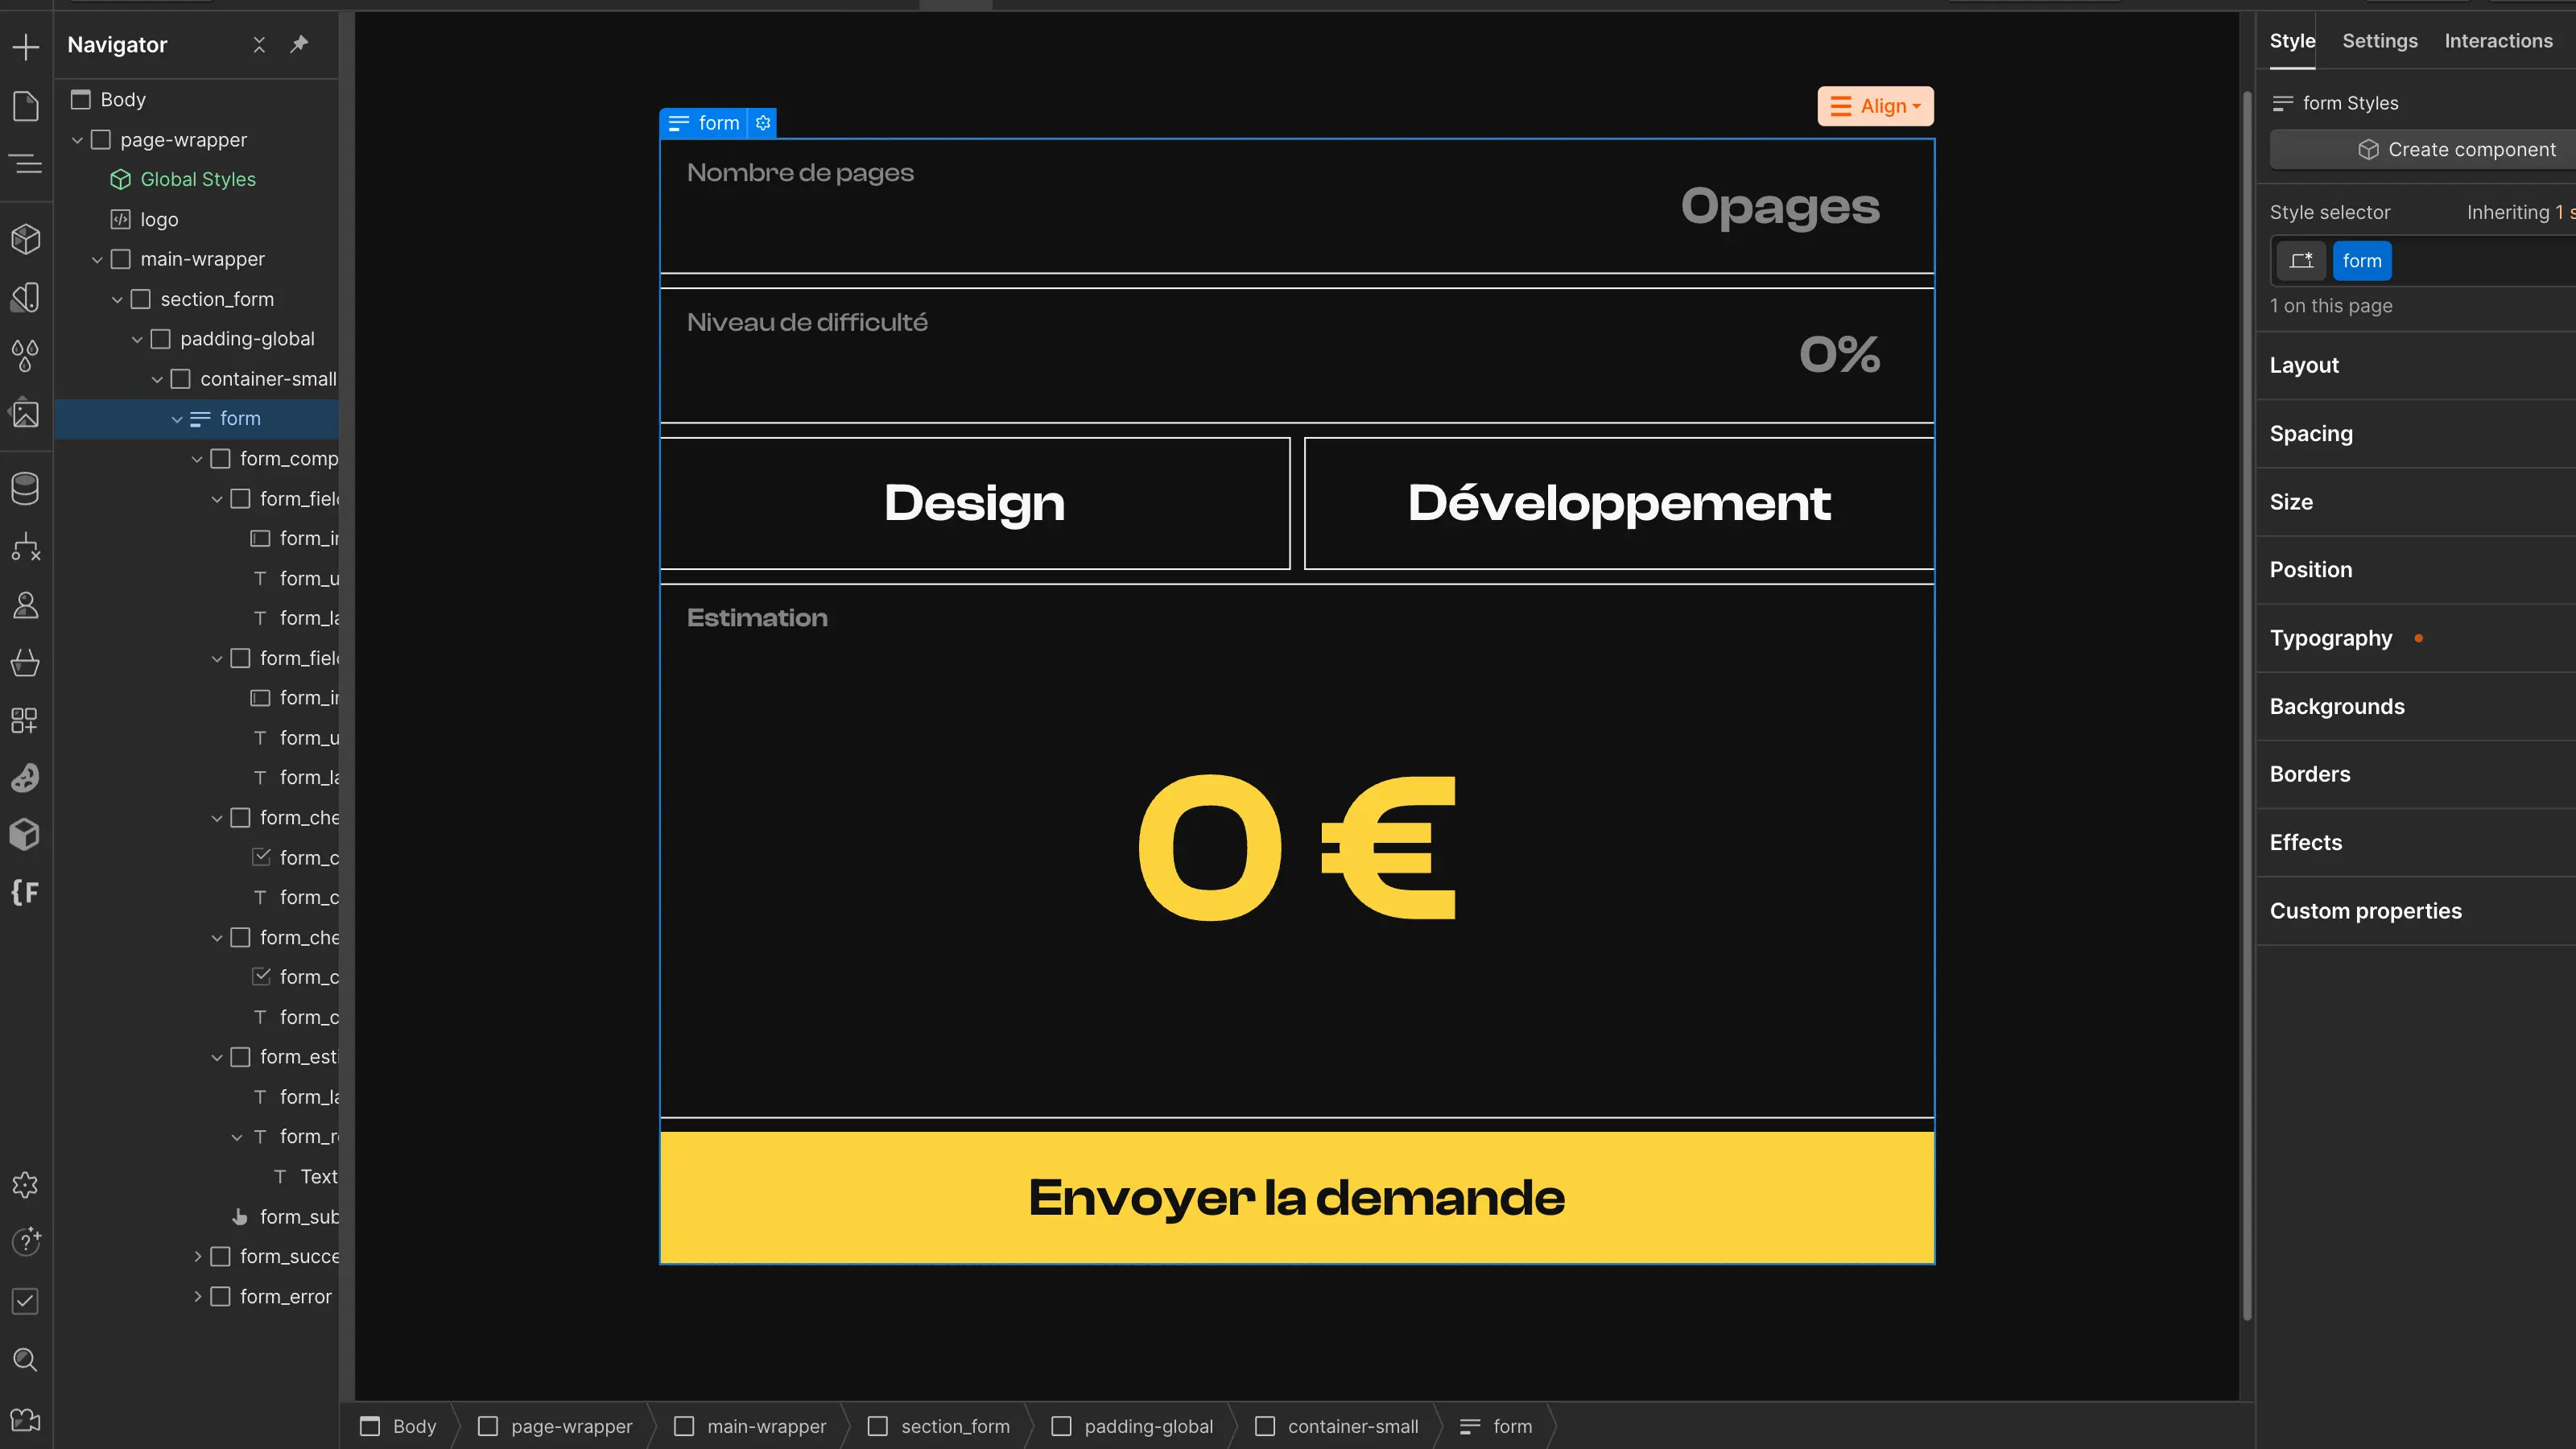
Now that we're in Webflow, the next step to make our calculator functional is to set up the entire structure: create the necessary form and inputs, and then make these inputs easy to target in the custom code (which we will discuss later). These inputs, modifiable by the user, will be crucial for estimating the budget.
What we need to make the calculator work:
- a form to add our fields;
- a number field for the number of pages,
- a number field for the difficulty level,
- a checkbox for the need for design,
- a checkbox for the need for development,
- a text field to dynamically display the estimate result.

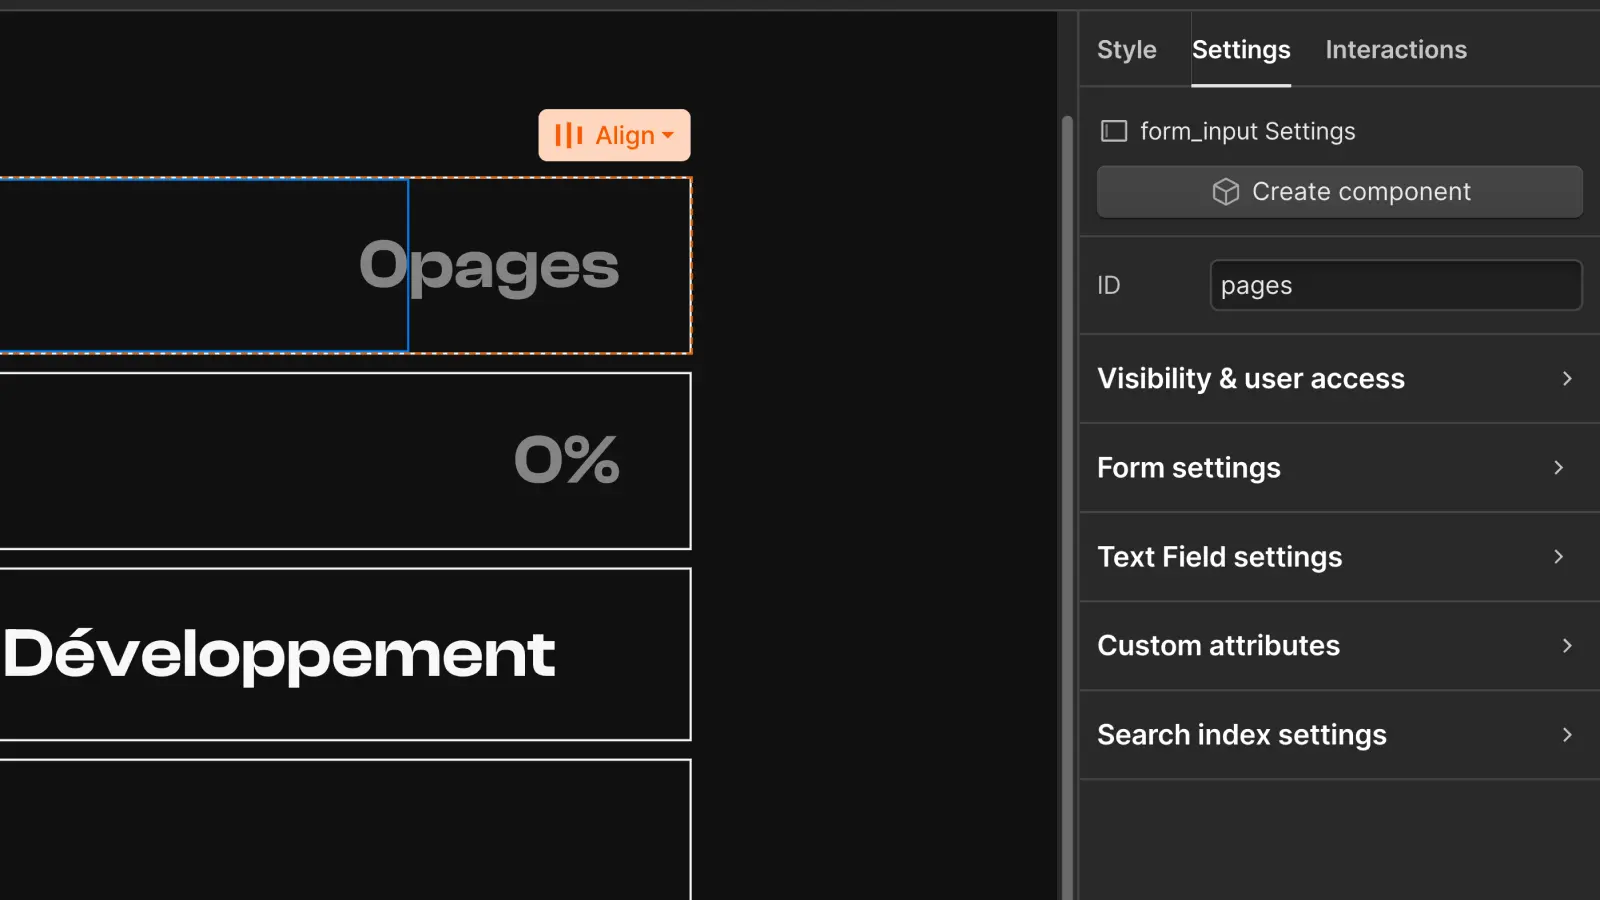
Once the various fields are created, we just need to assign an ID to each one. This will allow us to identify them in the code and retrieve their values.
So we add:
- an ID “pagesInput” to the field for the number of pages,
- an ID “difficultyInput” to the field for the difficulty level,
- an ID “designCheckbox” to the checkbox for the need for design,
- an ID “developmentCheckbox” to the checkbox for the need for development,
- an ID “priceElement” to the text element where we will display the result.

This step is crucial to establish a connection between the form elements and our JavaScript code. Be sure to name your IDs consistently for easier code understanding.
Following these initial steps, we are now ready to move on to the next phase: writing the JavaScript code that will bring our calculator to life.
Custom JavaScript Code
Now that we have created our form with the necessary fields in Webflow, let's move on to the custom JavaScript code. Don't worry if you're not an expert; we will break it down step by step.
The different steps to follow with the code:
- Retrieve the values from the input fields of the form.
- Perform calculations based on these values.
- Dynamically update the display of the result with each change to the fields.
#1 Retrieve Form Elements
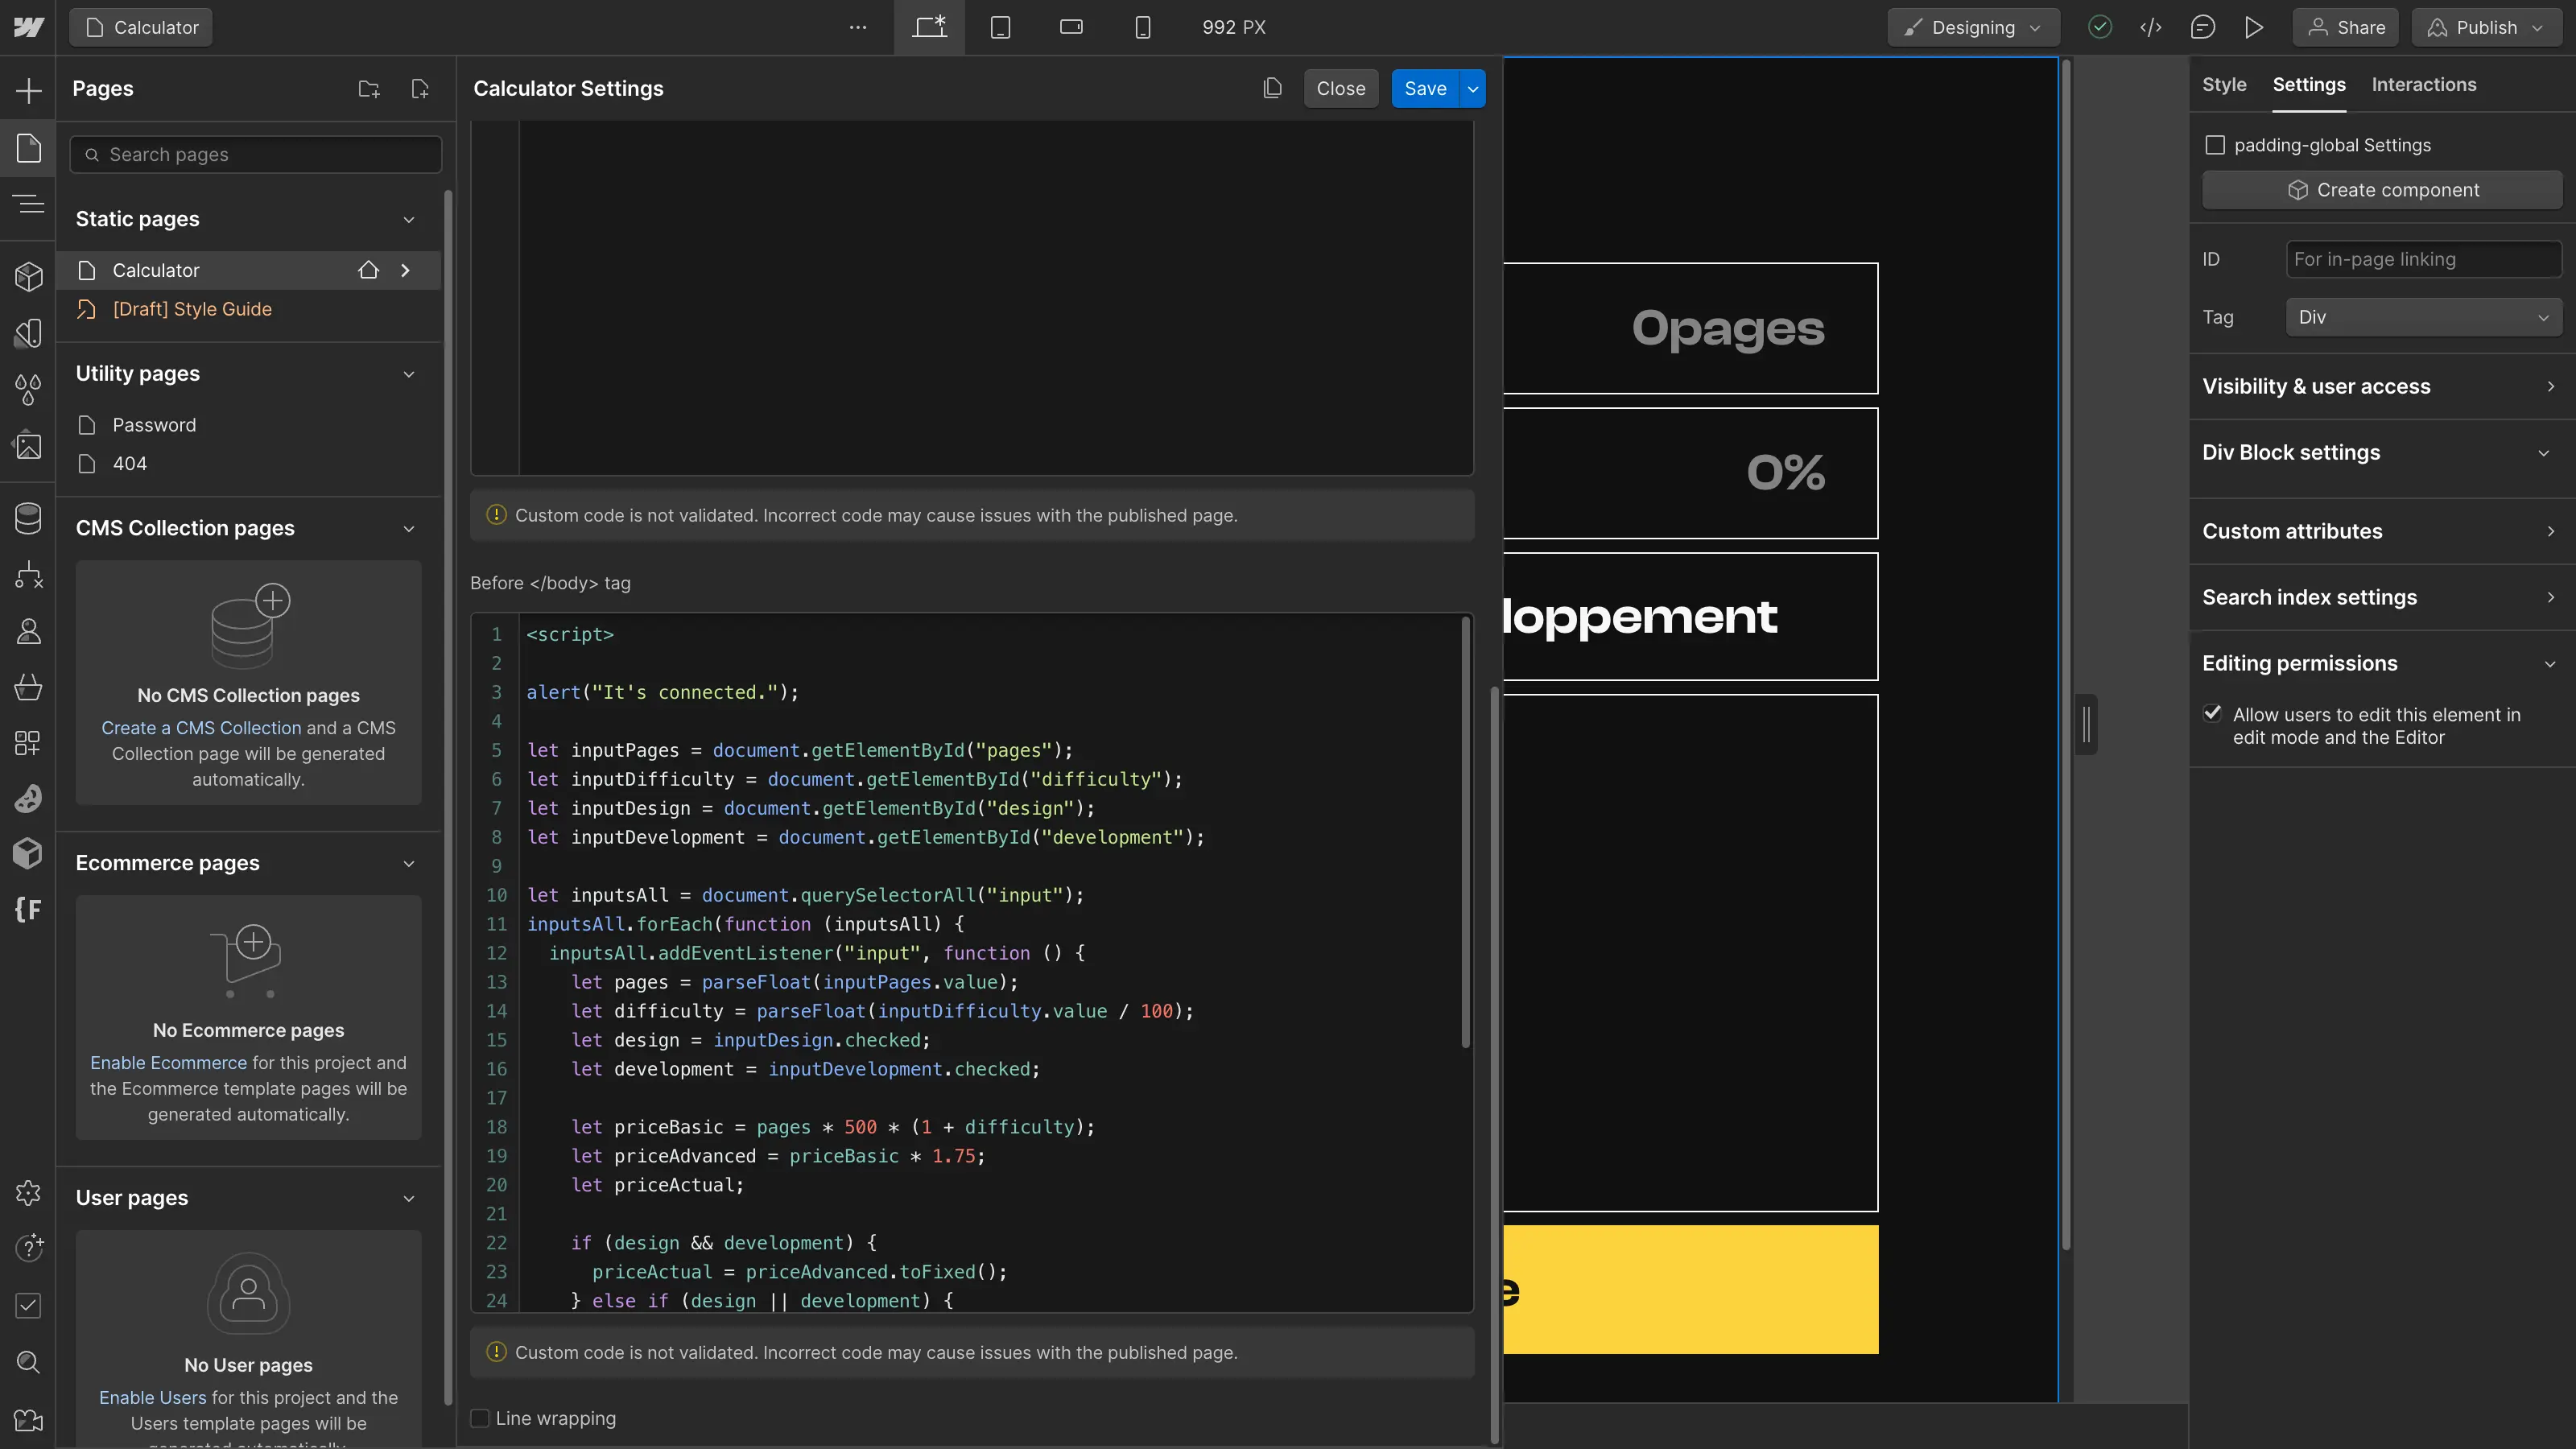
To start, we can retrieve the form elements in our code and store them in variables for later reuse.
In JavaScript, we can do this with the getElementById method to fetch specific elements based on their ID (which we defined earlier).
let pagesInput: creates a variable to associate with something (here, one of our form fields).
document.getElementById("pages"): retrieves the HTML element with the corresponding ID.
#2 Listen for Field Changes
Next, we will identify all the form fields in a variable, create a loop to iterate through those fields, and add an event listener to each of them.
To keep it simple, when the user modifies the value of any form field, the code inside that event listener will be executed.
querySelectorAll("input"): retrieves all elements matching the CSS selector in parentheses (here, all elements with an tag).
inputsAll.forEach(function ()): iterates through all elements stored in our inputsAll variable and executes the provided code for each of them.
addEventListener("input", function()) : listens for "input" events on each element, meaning changes to the fields, and executes the provided code when the event occurs.
With these few lines, the code we add in the event listener will be executed every time the specified event takes place. Thus, with each modification of a form field, we can perform our calculations and dynamically modify the result of our estimate.
#3 Extract Field Values
Inside our event listener, we will begin our calculations.
First, we will create new variables to extract the values provided by the user in our form fields and convert them into numbers (to facilitate our calculations later).
pagesInput.value: retrieves the value provided in the corresponding field.
parseFloat(): converts the initially string format value into a number to perform calculations later.
designCheckbox.checked: retrieves the status of the corresponding checkbox (the variable will return true if the checkbox is checked, and false if it is not).
#4 Budget Calculation
Now that our values are stored in variables, we can proceed to the calculations.
To start, we create new variables for the base price, advanced price, and the price that will actually be considered, then we will perform one calculation or another based on the choices made by the user:
- If design AND development are needed, we will consider the calculation of the advanced price.
- If either one OR the other is needed, we will consider the calculation of the base price.
- If neither is needed, the price will be zero.
if (condition) {}: executes the provided function if the condition is met.
else if (condition) {}: executes the provided function if the condition is met, in the case where the previous condition is not.
else {}: executes the provided function if the previous conditions are not met.
toFixed(): rounds a number to the nearest integer.
#5 Dynamically Display the Result
Finally, we will update the display of the result.
priceSpan.innerText: modifies the textual content of the element.
In summary, this JavaScript script listens for changes in the form fields, retrieves the values from these fields, performs calculations based on the retrieved values according to the specified conditions, and then updates the display of the result on the page.
The complete code:
And there you have it, with all this, our custom calculator is now functional!
Now that the code is ready, all that’s left to do is add it to the Footer Code of the custom code on Webflow.

Conclusion
As mentioned earlier, this is not code to simply copy and paste into your project. The development of a calculator is a solution tailored to the needs of each project.
However, the general logic behind creating our calculator and the various methods used can be replicated in many situations. So take this article as a guide that you can follow and adapt according to the specific needs you encounter.
Creating calculators may seem challenging, but with a good understanding of the necessary steps, you can add significant value to your projects.
We encourage you to experiment with your own solutions, explore additional JavaScript features, and educate yourself further on the subject!
To delve deeper into JavaScript topics, check out the following resources:


