Introduction
Localization is the new feature of Webflow that allows you to have a translated and localized website in different languages. In our previous articles, we have already discussed how to activate Localization, translate the content of your site, and even adapt its design for each language.
That's great, but it doesn't stop there. A site with localized content is good. A site with localized content that is visible on search engines in each language is even better.
Today, we will explore a crucial aspect of localizing your website: optimizing the search engine visibility of all language versions. Translating the content is just the visible part of the iceberg, but the underlying elements will have a significant impact on your SEO ranking.
In this article, we will guide you through the essential steps to optimize the SEO of your multilingual site in all its languages. Let’s go!
Translating Page Settings
In this first part, we will dive into translating page settings, titles, and meta descriptions, among others, to boost your visibility on search engines.
Think of your website as a library where each page is a book. The page titles are like the covers of these books, and the meta descriptions are their summaries on the back. In this multilingual context, it is essential to translate these elements so that any user, regardless of their language, can find you on search engines.
To localize your page settings, access them by clicking the gear icon of the page you wish to localize in the pages list (P).
In the General Tab
- Translate the slug (the URL) of the page and, optionally, the page name.
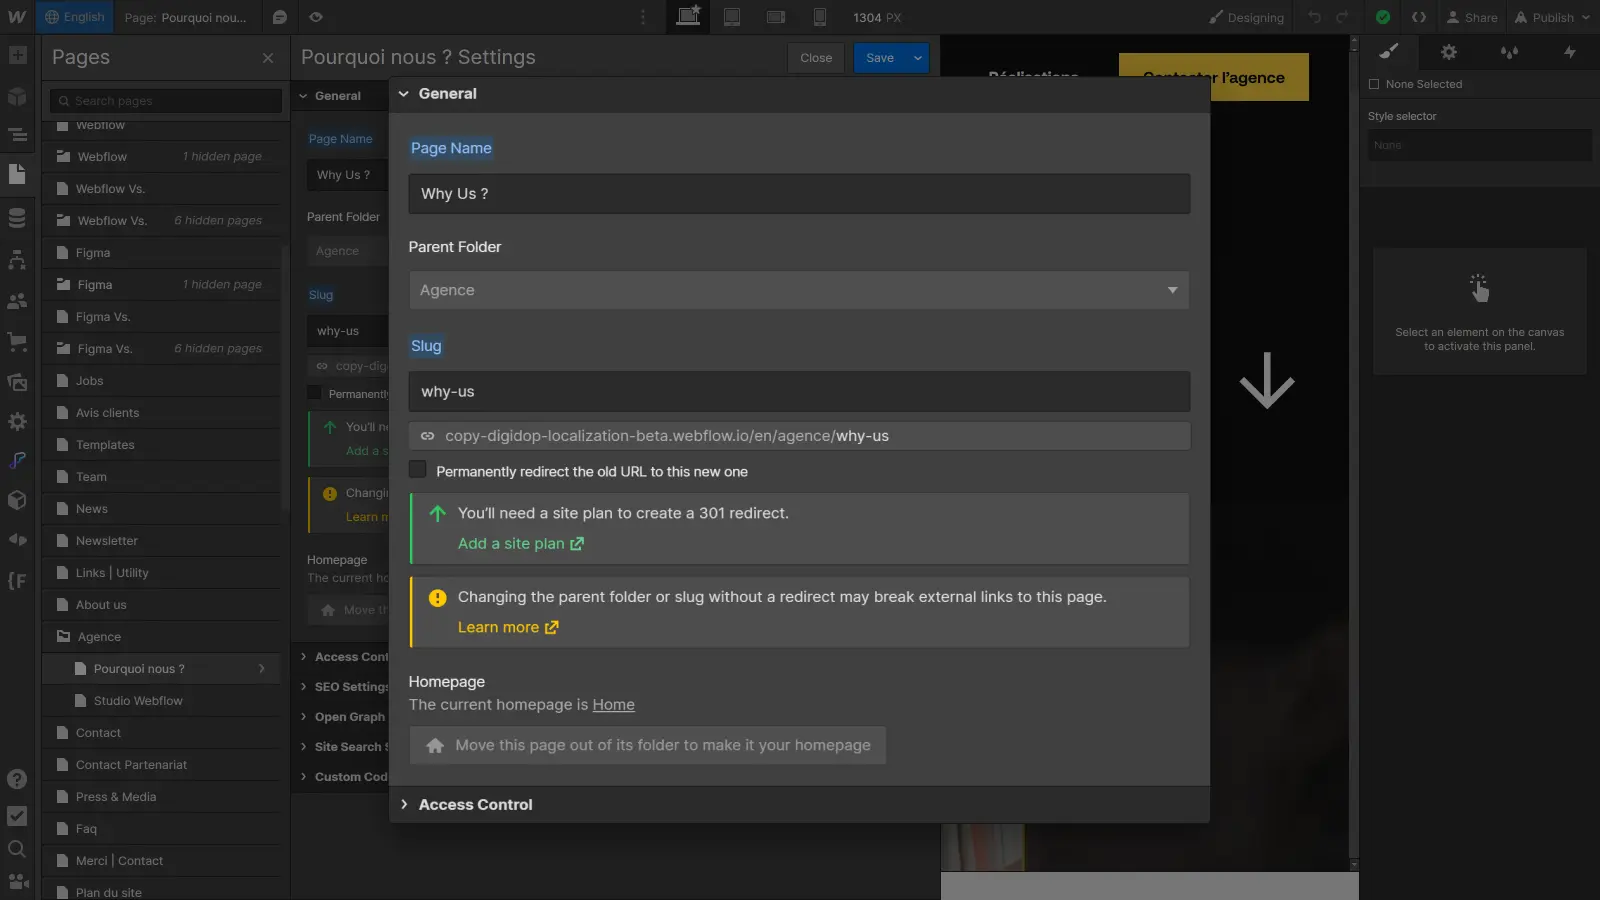
As with all other localizable settings, the label of each field will highlight in blue once localized.
In the SEO Settings Tab
- Translate the title and meta description.
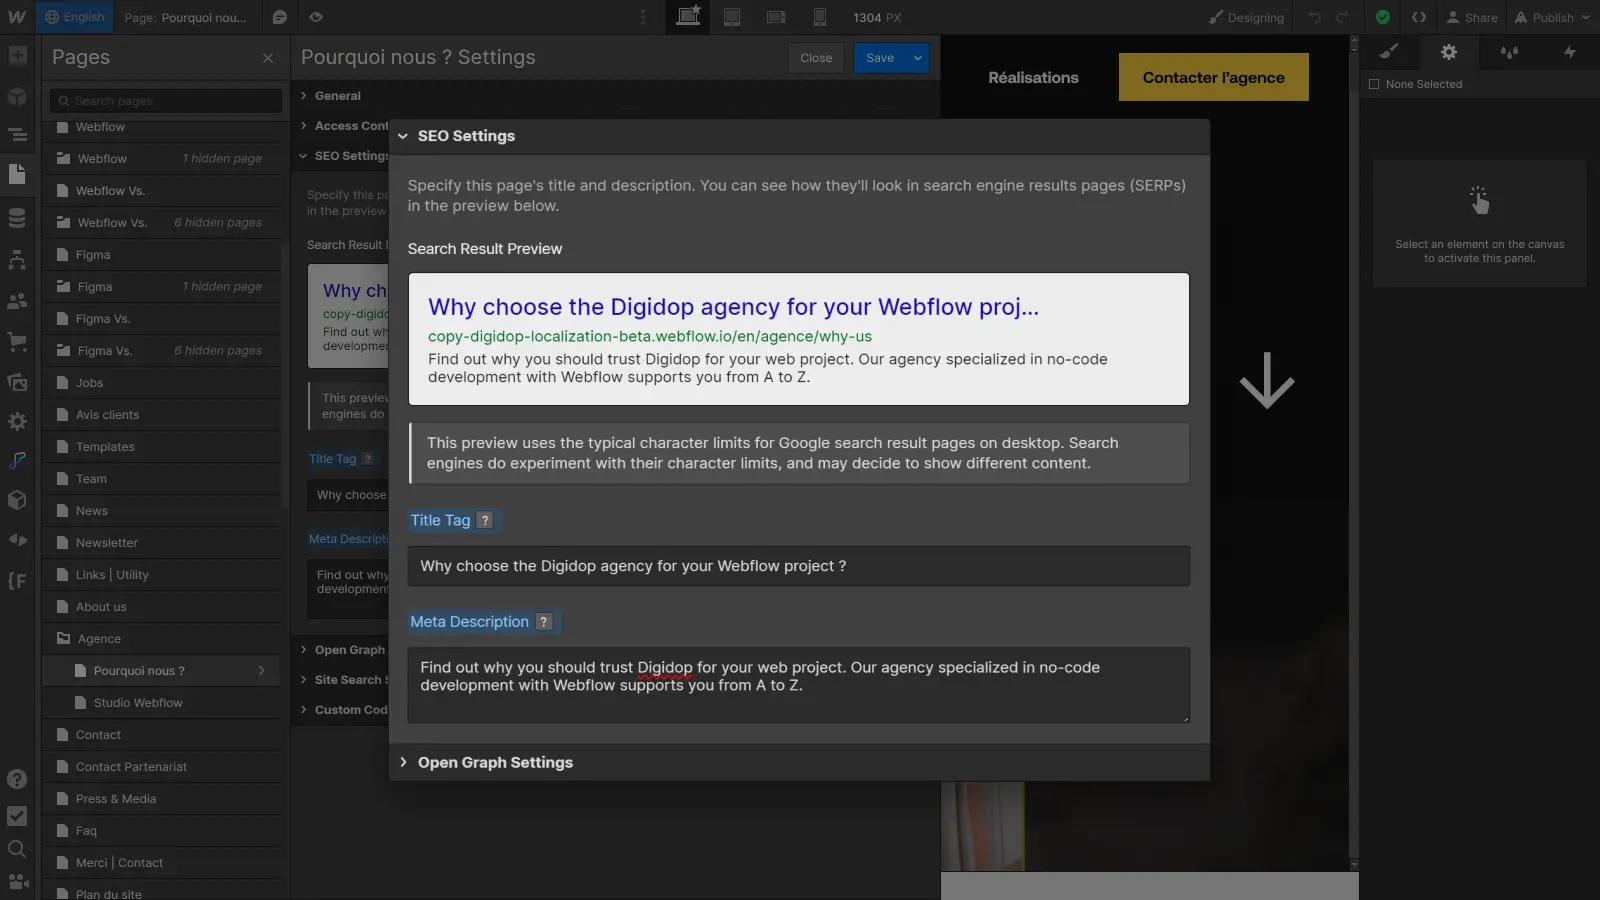
In the Open Graph Settings Tab
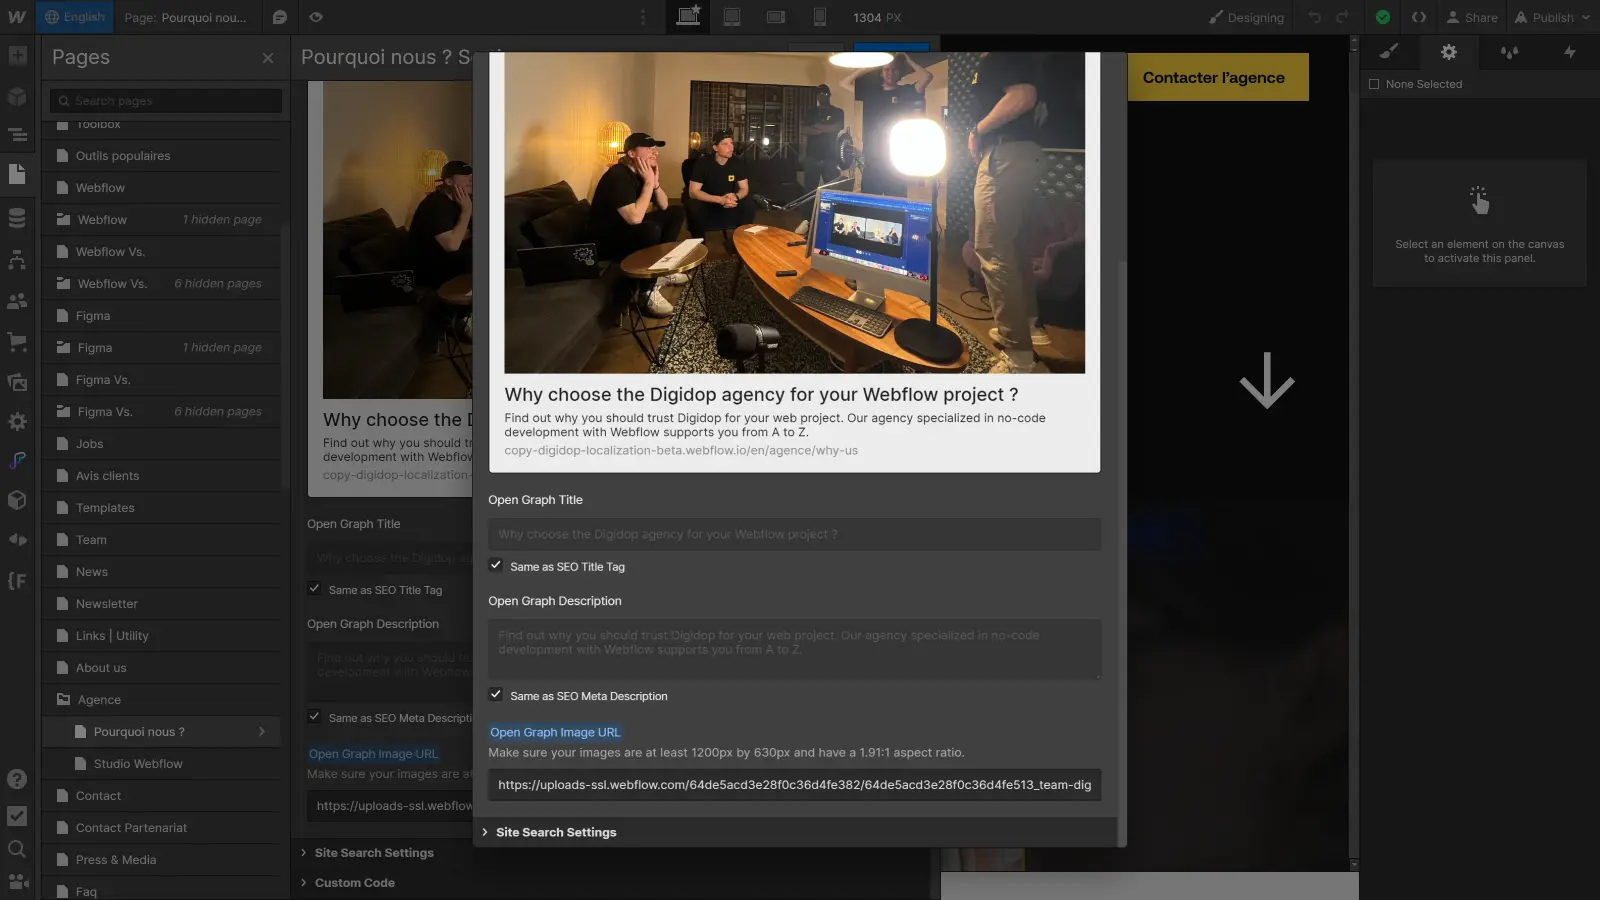
To replace the Open Graph image with a localized version:
- Save and close the page settings.
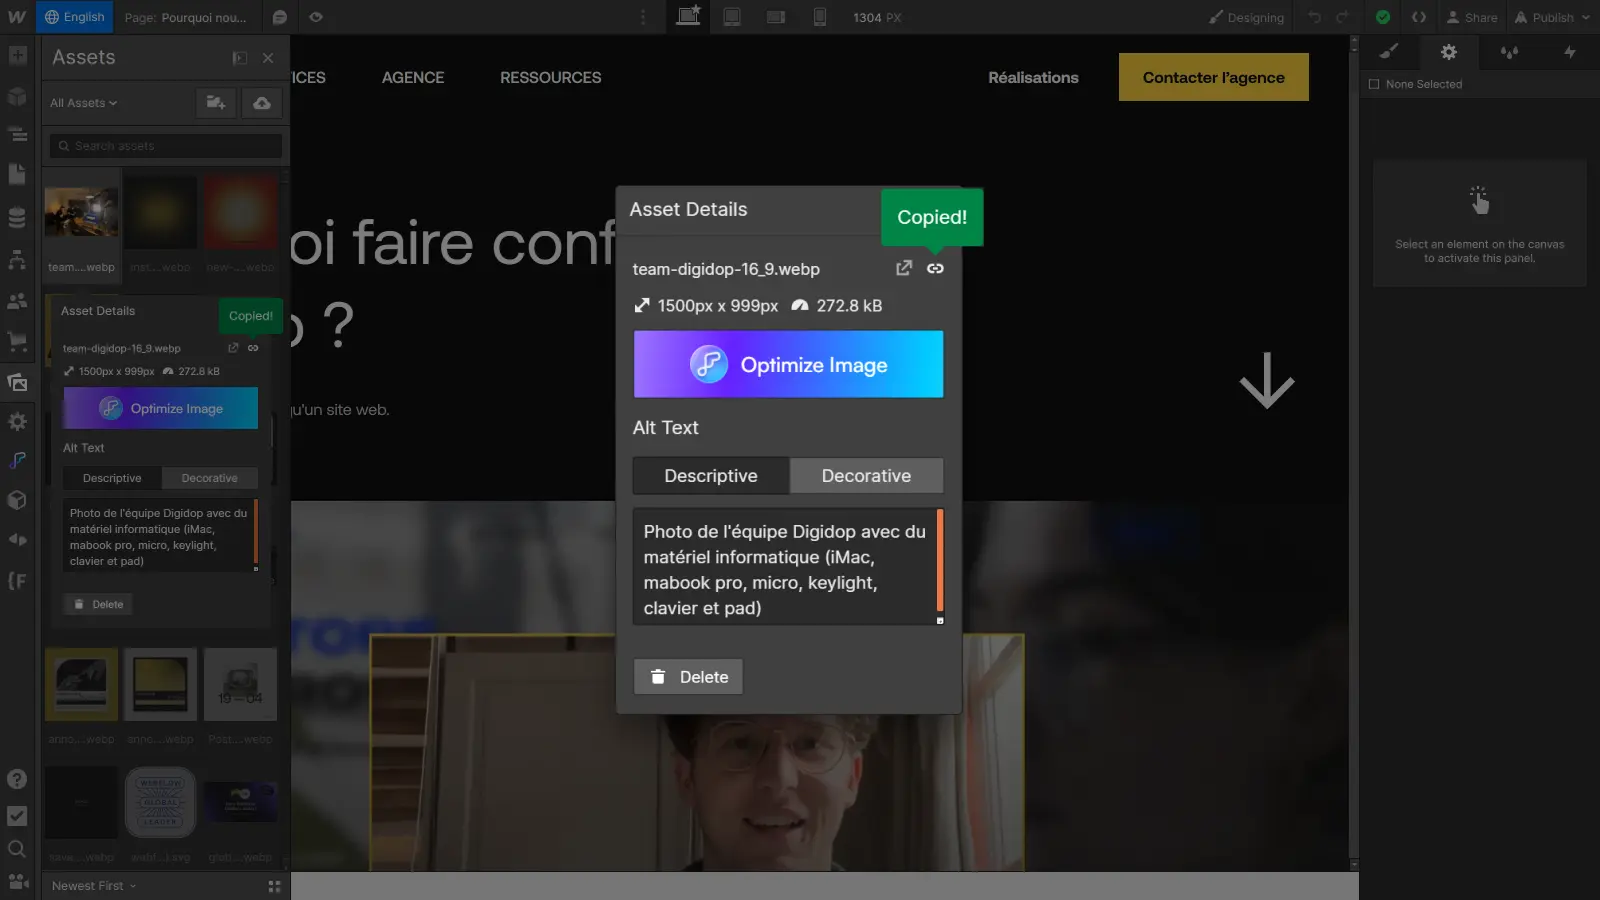
- Open the assets panel (J) and find the image you wish to substitute for the default Open Graph.
- Click on the gear icon above the image to open its settings.
- Click on the link icon to copy the image URL.
- Return to your page settings and paste the link in the Open Graph field.
- Finally, don't forget to save and close the page settings.
Your page settings are now localized and tailored to the target language. All you have to do is repeat the process for the other pages and languages.
When it comes to titles and meta descriptions, remember to use relevant and engaging terms. Search for appropriate keywords for each language and use the terms that users use to search for the information you provide on each page.
Translating Alt Attributes of Images
The Alt attribute of images is important to ensure that each language version of your site has an optimized user experience and SEO.
To make it specific to a given language, here's how to proceed:
- In the Designer, choose the language you want to customize.
- Select the image for which you want to modify the Alt attribute.
- In the settings panel on the right, translate the attribute to match the chosen language.
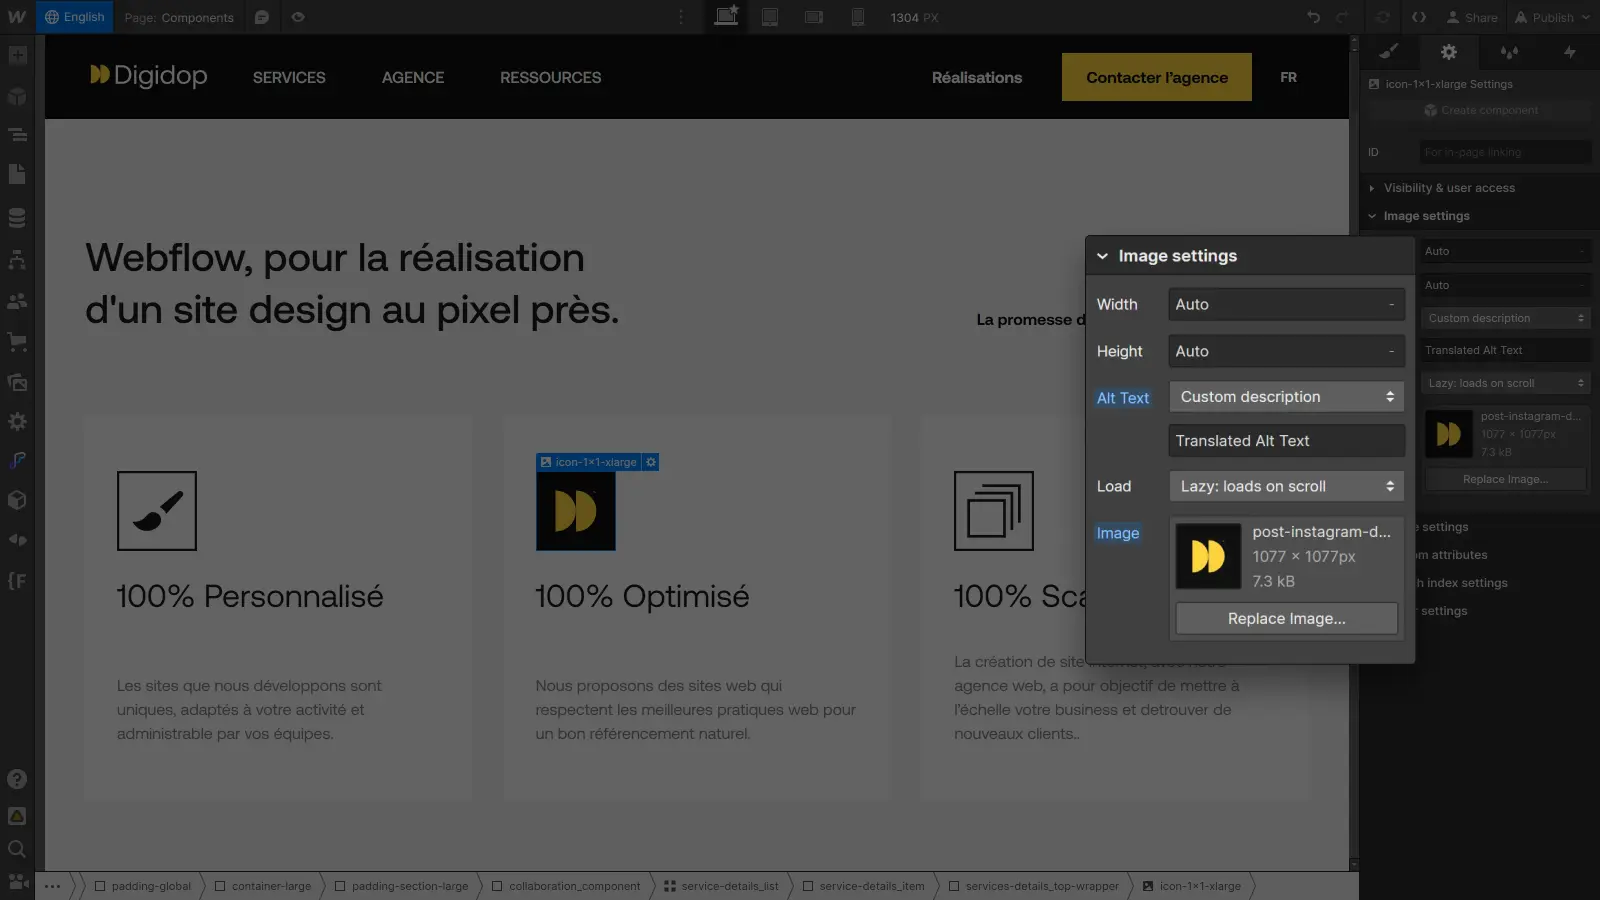
This way, when visitors use this language, they will get an appropriate description for the image, ensuring that each language version of your site has a relevant description for the images, thereby enhancing user experience and SEO.
By translating these key elements, you ensure that your site is not only accessible to a global audience but also ranks well in search results for each language. This contributes to attracting more qualified visitors and enhancing your site's visibility on the web.
Conclusion
So there you have it, you now know how to make your multilingual site visible on search engines in all languages. Webflow Localization opens new opportunities to create multilingual sites efficiently and simply: ensuring visibility for all is a crucial step in localizing your website.
To further enhance the management of your multilingual site with Webflow Localization, check out our ultimate guide on the subject:


